The easiest way to experience the approach of any holiday is to make the manufacture of home decor to the celebration. This time I decided to figure out how to make flowers from corrugated paper - realistic and stylized. Let's deal with together how to make flowers from corrugated paper and what is needed for this.
There are plenty of needlework technicians in the world that allow you to make beautiful flowers with your own hands - today the flowers are made of beads and fabrics, ordinary paper (quilling, origami, applique, and so on), they knit and lay them, but still one of the most popular ways of manufacture remains Assembling colors from corrugations. What are the good flowers:
- they can be both photorealistic and fantasy;
- they are easy to do in a few minutes (in contrast to felting or beading);
- easily utilize (relevant for those who want to decorate the colors of the big hall for the holiday);
- very affordable materials - corrugated paper is worth a penny, especially if you buy rolls, and not sheets;
- no special preparation is required;
- no need to use some kind of complex tool;
- it is easy to get an acceptable result without experience (for example, from paper flowers can be done with sweets - even small bouquets look very presentable);
- products are bright and expressive (which is very important for children).
Getting ready for work
What will be needed to make flowers from corrugated paper with your own hands:
- several paper rolls (it is better to choose the combined colors and green for leaves and stems);
- wire, floristic sleeve or any other fixtures for stems;
- cardboard for blanks;
- glue;
- sharp scissors;
- macate knife;
- threads and fishing line.
Work is more convenient at the table with good lighting. If you plan to make large flowers (more than 15 centimeters in diameter), then you can stay on the floor (of course, pre-sending children, husbands, cats and a favorite dog).
Making flowers
The easiest option:
So, the manufacture of colors from corrugated paper more complex options almost always passes through the same scenario. I will describe it, so as not to rewrite one one by one:
- first you need to make a petal pattern;
- call 15-20 petals for each flower (if you want to make a realistic flower, then make petals of different sizes - for example, five small, five medium, five large);
- cut petals (with Study Follow the direction of corrugations);
- collect the central part of the bud (with each other, 5-7 petals twist, binding at the bottom and gluing);
- further the petals need to stretch slightly and bending, so that they take the most natural shape for the plant;
- prepared petals to glue the bud;
- fix the floral head on the prepared stem.
How to make stem:
- we take a piece of wire, a floral sleeve, a conventional branch - at its discretion, measure the desired length;
- cut off;
- decorating green corrugation, or cloth, or paper;
- imine the leaves, processes and spikes;
- cut from two sides again.
Making realistic roses
After we have made a blank, you need to stretch the petals - it will give the right volume and we can imitate natural bending of rose petal:
We start assembling. We will need wire and thread. First, bend the wire as shown in the photo and wind our blank around the wire, forming a bud:
Outdoor petals need not only to stretch, but also slightly smooth the corrugation - it will give the effect of the wavy edge, and the flower will look lush.
From the paper of the green color, make a photo-instruction seashelter:
Build several leaves for the stem and lock them.
Spray the finished flower with a varnish hair - so you will give him a bit of shine.
And this is the easiest way to create roses:
Similar version of twisting flower roses, but already with explanations from the author:
Realistic peonies
Peony is a big flower in itself, so it is better not to try to make small flowers, but to collect some really big and beautiful pionists. To make a big flower from corrugation, you will need about twenty minutes.
By the way, if you want to achieve a more natural color, you can take white paper, and tinkering it with food dye - tender pink and orange flowers will look really like real.

You need to cut paper on rectangles, each rectangle round.
- Peony - the flower is rather disheveled, so the petals can be cut into someone and even tear away.
- Petals will need a lot - more than 25.
- For a cup of cup, use green paper, you need to cut 8-10 green leaves from it.
- So that there are bulk flowers, you can put candy to the center or form a foil ball.
- Cut randomly several petals - the smaller it will be accuracy, the more natural there will be your flowers.
Or option more complicated:
Decorative and Stylized Flowers
And how to make simple flowers from corrugated paper? Step-by-step instructions for the manufacture of different colors and different ways.
Realistic lilies. Photo of creating steps:
We make large flowers from corrugated paper - roses.

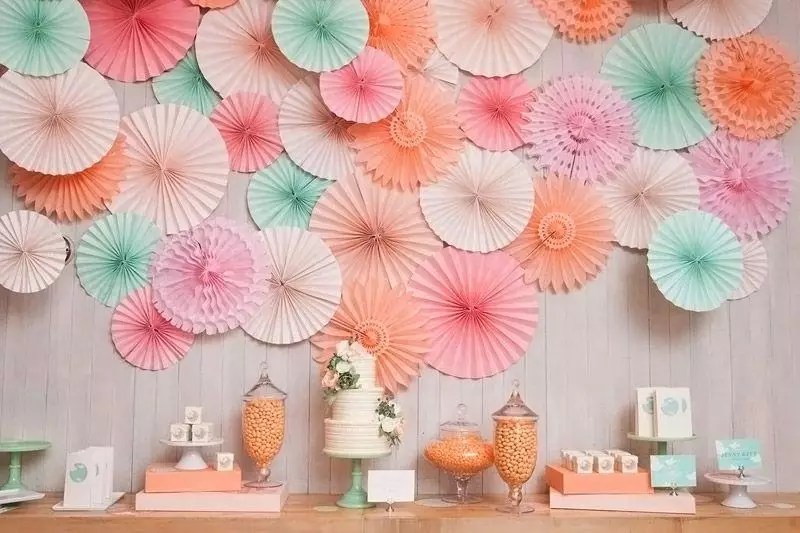
Such elegant and simple colors from corrugated paper can be useful for photo shoots or interior decorations, and they can also be used to create various decorative compositions on the street (only need to be borne in mind that the flowers are pretty light and can be carried away by the wind). In general, growth flowers are often used for the decor, but to produce them on the same principle as minor flowers, not too much time consuming.
Huge poppies:
Photo by steps: Stylized poppies, but already in miniature.
In order to make lush artificial poppies, paper will need three colors (black, red, green), wire, thread, glue or stapler, and of course scissors.
- From the roll of black paper, you need to cut off a cylinder about ten centimeters.
- Tightly link to thread and cut into a fringe one by one edge - it will be a middle of our flower.
- You can also make a box in the middle - for this you need to take trimming, and wrap them into black paper, so that the ball turned out. The ball is fixed with a thread or a bracket of a stapler, and attached to the center of the fringe.
- Red paper roll must be deployed and cutting into six parts, each part of folding the harmonica.
- To put all the accordions one to another and well fasten them with a thread.
- Corners of the harmonicus need to round up with scissors.
- All petals need to be well deployed (each harmonica with straighten, and the petal is obtained).
- As a stem, use dense wire or wooden specks - they need to be wrapped with green corrugations, cut large leaves and attach to stems.
- Poppy heads fix on stems and straighten the petals.
Or a little different option how to make a poppy flower step by step from and to:
Now you know how to make more colors from corrugated paper. If you want to make giant flowers, then for beginners it will not be very difficult, however, it is worth considering some points:
- use high-quality paper - Of course, even from the cast paper, the Master will be able to do something beautiful, but beginners it is better to rely on good materials;
- huge flowers should have weights, otherwise they will simply fall (or fix them with a fishing line on the wall);
- do not smooth the petals completely, leave a slight corrugation;
- better a lot of petals than little (large roses of four petals look very sorry);
- for a field composition, use a few shades of green paper - then ordinary herbs and plants will look natural;
- if a child is engaged with the manufacture of volumetric colors, take care of the fact that it does not cut down with paper, scissors, fishing lines or threads;
- for registration, use the two-three colors made by the flowers - more colors may look awkward.
More ideas and inspiration
Already wanted to make beautiful flowers from corrugated paper with their own hands? Excellent, it means you have to taste our ideas and MK. I will tell you some more about what you can create with your hands from corrugated paper.
Cute daisies:
See how crafts from corrugated paper are made - gorgeous roses that look better than living!
And on this master class you can learn to do sweet Flowers Corrugated Paper do it yourself. And so, flowers from corrugated paper with candy decorated in the form of a heart:
By the way, sweet bouquets with colors from corrugated paper are a beautiful find for any holiday. Such bouquets usually attract more attention than the traditional basket with flowers, and are remembered for a long time.
And so you can make a Christmas flower - poinsettia from corrugated paper:
Make paper flowers with your hands from corrugated colored paper, or make a bouquet of flowers to design a holiday, and maybe you want to make floral garlands from paper decoration? There is nothing easier - learn how to make roses from corrugated paper step by step, and you can give the master class in any kind of colors.
Try to make corrugated flowers at least once, and then for you it will not be possible to make a new product - see different graded video and make gorgeous bouquets with your own hands!
A bright beautiful bouquet will become an excellent gift. With the help of flower arrangements, festive tables decorate. They are used in the design of various events. Such products can be made with your own hands. They are not covered with time, long will delight their impeccable views of others.
To create an interesting composition, consider photos of colors from corrugated paper. Experienced masters offer different manufacturers and layouts of plant elements.

The structure of corrugated paper allows you to create volumetric compositions. The material is well held and suitable for design bouquets. To create your unique flower you will need quite a bit time.

Materials and tools
To proceed with the creative process, acquire corrugated paper. It is inexpensive, it is easy to purchase it in the store. The corrugation material is released in a wide range of colors.


You can buy monophonic options or rolls with a soft transition of shades. They open up almost unlimited opportunities for incarnation in the reality of interesting ideas.

For the manufacture of colors, such materials are needed:
- corrugated paper;
- cardboard;
- wire;
- glue;
- wool;
- clips;
- threads.

If you plan to make bouquets with sweets, then they acquire in advance sweets that will become an important component of the product.

The following tools will be needed for work:
- scissors;
- simple pencil;
- pliers;
- silicone pistol.

To make beautiful flowers, carefully watch for alive plants. Each has its own characteristics of the structure, which is taken into account in the manufacture. To get large drawers from corrugated paper, the standard pattern to increase to the desired size.

Technology performing work is no different from the usual procedure for making colors. But for a bouquet of large plants will need more materials. They will become an excellent interior decoration at the celebration.

Corrugated paper rose
The queen of flowers always looks great in a single instance and in bouquets. This gentle flower Easy to do yourself.

Step-by-step instruction:
- On the cardboard paint petals, leaves. To do this, you can take advantage of the finished patterns or remove them from the real rose.
- In the blanks of petals make small recesses to your fingers to give the necessary shape items.
- The length of the leg is selected at the request of the craftsman, for this pliers gently cut off the wire.
- Through small pieces of wire smaller diameter, on which green leaves will be attached.
- The end of the wire is flex with pliers to form a bud. To do this, the wool is used, or the middle of the flower is simply turning to the paper.
- Alternately begin to glue the petals to the core, starting with the smallest detail. To securely secure the elements, a durable thread is used.
- Flower ready. Now you need to take a small strip of corrugated paper. It wounds around the stem, on which the prepared sheets are fixed. This is the final assembly stage.
- Petals and leaves neatly straighten.


If you make several colors, they are collected in a bouquet. There is a simpler way to manufacture roses. For one flower you will need only 15 minutes.

A strip of 10 cm wide is cut out of a long-length paper. The edge of the workpiece is made uneven, covered with your fingers along the entire length. After this operation, the band is folded into the bud, it is attached to the wire thread. You can create an amazing composition in just 1 hour.

Beginner craftsmen worries the question of how to make flowers from corrugation. To do this, you need to prepare materials and tools, stock patience and proceed to work. If you precisely follow the instructions, you can get an excellent result.

Corrugated paper peony
For a luxurious peony, paper is required for different shades. From each roll is cut off the band. The size of the element depends on its remoteness from the core. Dark color is located closer to the center, after the transition to brighter shades. The resulting elements are folded by the harmonica, they must all have the same width.


The edge of each component is attached to the shape of the petal. The average units of the prepared billets are connected and laid in size. All components are rewinding the thread, a flower is formed.

Corrugated paper tulips
Take a template and cut the petals. Each of them twisted the tip, give the base form of a cup. Then begin to form a bud, the adhesive is used when performing this operation.


To the core alternately typing elements. After this operation, the strip paper of the green color is wrapped the stem. Carved sheets are attached to the stalk.

Corrugated paper flowers with candy
A rectangle is cut out of the paper, fold in half, on one side of the edge cut off with scissors. Candy is placed in such a workpiece. Material in the center is a little stretched with hands. On the one hand, the edge is fixed with a rubber band. A wire is used as a stem, it is fixed to the base of the flower. To do this, you can use the silicone pistol.


Cut petals. They need to give a form, stretching the middle and taking the edge of the workpiece. For lush flower Cut more petals. They are attached to the bud threads and glue. Such fixation ensures a reliable connection of all components. You can also use elastic bands.

From green paper, leaves cut out and fasten at the base. Stem is wrapped with green paper. A bouquet of flowers will be a magnificent gift for the holiday. Small bows will give the composition of the festive appearance, they are fixed with sparecrows. Such a surprise will define.


Finding ready-made stencils is easy, you can make them yourself. Do not worry if items are different. In nature there are no two absolutely identical leaves. To speed up the cutting process, fold the paper several times.

It is possible to achieve natural coloring the petal, if you apply a darker paint on the base with a tassel. The use of a variety of shades in one flower will give it a natural look.

Patterns are sorted and folded into separate envelopes that sign. When a certain element is needed, you will not need to start the process from the development of a template.

Conclusion
Amazing compositions for the holiday, unusual gifts make corrugated paper. Simple flowers will help to decorate the table, add the interior.

An unusual option will be able to use various plants. Bright poppies, gentle cornflowers and daisies are connected to a field bouquet. Multicolored asters complement the greens to give the composition a finished view.


Corrugated paper and candy bouquets are particularly popular. They will like sweet tooths. You can collect any flower. It is only important to choose the right form, sizes and number of petals.

To create colors, you do not need to visit expensive courses, buying tool sets. Making technology is simple and understandable even for beginner masters. Working with such material will enjoy adults and children.

Stock Foto Colors from corrugated paper


Decor of the house - the work is constant and not stopped. The process is mastered by new techniques and types of work. In this article we will talk about how to make flowers from corrugated paper. This paper can be found in flower stores. But in a larger assortment it is in specialized establishments that sell everything for needlework. A wire or thin sticks will be needed for work (bamboo ships are suitable), glue and scissors.
General principles and rules
Despite the fact that the colors from corrugated paper make different, the principles of work are the same. Here is brief general rulesSuppose to make paper flowers with your own hands, very similar to real.
Here, in fact, all the rules. And also: the first stem is preparing. For it, a wire or chopsticks of different thicknesses are used, which turns around with a long thin strip of corrugated paper of green. Ribbon can be labeled with glue, and then wind on the base. You can spin dry, and the edge fasten the liner's drop. Another point: if you are going to collect the composition, the bottom 1/3 of the stem is left without finishing - it will be easier to make a bouquet.
Macs
Macs from corrugated paper do very simple. It is important to find the desired shade of scarlet. It also takes a small piece of black - for the core. But, if it is not, you can use any dark, painting it later into black.
Mac corrugated paper do this:
- From paper napkins of any color we put a small square. It is wrapped with black corrugated paper. If there is no black - you take any dark, then paint.

- Cut from scarlet paper for two or three petals of different sizes: small, medium and large.
- Collect the petals all together (do not fold into a neat stack) and ferment into the ball.
- Disassemble the ball on the petals.

- We take the core, turn around the first small petal around it from left to right.
- The second small petal partially overlaps the first, behind it is also overlapping, there is a medium.

- The second middle and two large petals form the second row. They are located so that their central part overlaps the place of the compound of the previous row.

- Having collected everything together, insert the wire into the base, wind the base of the thread, we speak. Wrapping green paper.

Mac is one of the most simple colors for self-making from corrugated paper. It looks, at the same time, very good. You can use them in campaigns with other colors, or make a bouquet of makov only.
Even such a simple flower can be done in different ways. First of all, you can change the middle. In the above-described master class, the core of the flower is very simple. It can be done more like a natural one. According to the same technology, we make the middle, but of white paper. And from the black (you can paint) cut the band with a width of about 1 cm and a length of 4-5 cm. On the one hand, we cut it into thin strips (a pair of millimeters width). The resulting "noodles" twist, getting thin stamens. The stamens turn around the core, and then act on the same algorithm.
How to make crocuses from paper and candy
An unusual gift can be done using candy as a core of colors. It turns out the original sweet gift. Such core can be made in colors with large hollows inside a bud - tulip or crocus, for example. Moreover, crocuses from corrugated paper do very simple. Everything will take 5-10 minutes. Not more.

Bouquet of corrugated paper with candy - a good surprise
- From the paper, cut the square with a side of 15 cm.
- We divide it into three parts, making a cut on a depth of 7.5 cm. Three petals are obtained.

- Each petal, measuring 5 cm from the top, scroll around its axis and top Crawling down.
- Fingers give them a concave form.

- We take the generated petals, turn around the stem so that each petal occupies its place - approximately 1/3 of the total diameter. For this, the lower edge will have to be good.

- Green paper make leaves. Cut the rectangle with the sides of 5 * 8 cm.
- We divide it into three parts, making cuts to a depth of 8 cm.
- Having retreated from the edge of 3 cm, tighten the paper strip around its axis, the upper part be fed down, we will spread and attach a rounded shape.

- Leafs turn around the bud. They must have to the butt butt.

- We take a narrow strip of green paper, spinning it around the wire, decorated the stem.
That's all, crocus from corrugated paper and candies are ready. Having made 7-9 pieces of such colors, you can put them in the basket. For a larger diversity you can make any small colors.
Chrysanthemum
According to the technology described above, you can make chrysanthemums. The difference is that the petals will be much and they will be narrow. And the principle is the same: tighten the top of the petal, lower down. Only in the case of chrysanthemums it is necessary to give the whole petal to be curved shape.

Candies are also used for these paper chrysanthemums. These colors from corrugated paper are better to do from not too bright material. Tone more tender, soft. For foliage also chosen muffled greens. For greater truth, take the paper of two close shades and make the petals of two shades.
So, do it yourself with crocheted paper chrysanthrom:

This version of chrysanthemum looks good. But for greater truthfulness, it is possible to make petals of different sizes. Need at least three gradations: small, medium and large. They will differ more in length than in width. Look such a flower will be more magnificent, in the bouquet look richer. Try.
Astra - simple and original
If you need to do simple, but spectacular flowers from corrugated paper, try to make asters. They are made from corrugations of bright and pastel shades. Best of all, they look in the bouquet, and the colors can be different.

Asters of corrugated paper can also be made of petals of different sizes - shorter closer to the center of the flower (there must be less), and longer on the periphery (more). You can bend them in one direction, and you can - in the opposite. As you like more.
Corrugated paper roses: step-by-step manufacturer algorithm (2 methods)
Flowers from corrugated paper themes and are good that they can be done in different ways. The material is very plastic, easily changes the form because there are several ways. Someone wants to achieve greater "naturalness", and someone is important.
1 method (natural view)
For roses from corrugation, it is better to choose a paper of two or three very close shades. So the type of flower will be more natural. For example, for a flower in the photo used white and strong paper. The number of petals of different shades arbitrary, as well as their placement in the bud.

The procedure for manufacturing is:

As a result, we will get a beautiful rose from corrugated paper. In this version, it looks like a real flower. There is a simpler and fast way (in the photo below).
2 way (simple and fast)
Cut the paper strip of a paper width of 7-8 cm. You can make it uneven - on the one hand, on the other - wider. We fold it from the narrow edge of the "harmonica". The width of the "accordion" - 3.5 -4.5 cm. From the resulting stack on 2/3 height, we cut the petals.
On the wire (you can not wrap green ribbon) by screwing the petals starting from the narrow edge. As you screw down, you give the shape to them - we stretch on the one hand, approach the stem. By setting all the petals, fix them with a thread (simply wound some amounts of turns). Soring the petals by forming a bud.

From green paper, folding it with harmonica, cut out long and narrow petals. Note that their ends should be twisted, so that they should be not so narrow (noticeably 1 cm). Carved petals turn on the bottom, under the petals, twist the fingers of the leaves, after which we design the stem.
Corrugated paper peonies (with patterns)
For peonies, you need yellow corrugation - for core, green - for foliage, pink, cream, raspberry - for the flower itself. Wire or thin wand is suitable for the stem. Still need PVA glue.

PION Corrugated paper is quite complicated for the manufacture of flower. It has a lot of different shapes of petals. Without pattern, it's not enough. But there are many peony varieties, so there are several patterns. We give two options. The first can be printed, cut and use as a template - it is given in a full-time image. The second option can be drawn with your own hands on the cells.
Step-by-step manufacturing process with photo:
- From yellow paper, cut out a strip of 4-5 cm wide and 10-12 cm long. Fold several times, cut the thin "noodle", leaving about 1 cm of the undeserted edge.
- The resulting tape is rolling into a dense roller using a whole edge for this. It is lubricated with glue, and twist. It turns out a shaggy yellow hearter, around which the petals will be mounted. This middle is fixed on a wand / wire, which will be stem.

- From paper cut out petals. The minimum number is 20 pieces (all kinds), but the more, the more fluffy the flower works. On the second pattern, the number of petals is indicated on each, an explanation is needed on the first. There are also numbers. This is the required number of petals.
- Each petal stretch in the middle, not the touch edge, giving them a convex form. Do not strive to make them the same. It is not required. In the process, you can still stretch or click.
- Folding petals start from the smallest. They are placed around the already available sequence. The first small petals are placed only a little overlapping their edges. The base is labeled glue.

- Next take medium petals. They are placed with a small approach of one to another.
- Then stack big and the latter - very large leaves. Each layer we rinse with a small amount of glue at the base.
- Leaves will also need. Cut them from green paper. On the one hand, they compress them, forming the petiole, with the other we are straightened in the middle, giving a curved shape (like a boat).

- Listers are fastened under a bud, flexing them down.
- You can make leaves like a peony, but for this you will need a thin wire and several carved curly leafs. Residents on corrugated paper do not do, but they can be labeled.

- Each leaf is glued to the wire, wind the sticker with a thin strip, then fastened to the stalk.

The assembly process is a creative occupation
- We take a long narrow band of green corrugated paper (about 1 cm wide, length - cm 20-30 - depends on the length of the stem). Watch the base of the flower, then smoothly go to the stem. At the end, fasten the edge of the glue paper.
PION Corrugated paper is ready. Usually they make a bouquet. When you do the following, do not strive to make them exactly the same. All flowers are unique in nature. Your too should be different.

You can play with the dimensions and number of petals, mixing the petals of different shades, close in color. You can try paint to make darker petals at the base. In general, mass options.
Corrugated paper flowers: photo ideas, patterns
Using the methods described above, you can make any flower. The main snag is in the form, quantity and size of petals. The most important thing is the form. It is characteristic of each petal. The size is arbitrary. Not only in nature flowers are of different sizes, in lately It was fashionable to decorate the interior with gigantic growth. Original decoration, but specific. It is necessary to increase the basic patterns many times, it is difficult to work with a large scale. It is better for a start to practice in the colors of normal sizes, and then begin to large.

A little about patterns. They can not only find them. If it happens in the summer, take the desired flower, disassemble it on the petals. From the whole heap, select the most characteristic, attach to the sheet of paper, circle. Then the form must be corrected, taking into account the fact that it is still paper flowers. Finally, the pattern will take out the outlines after multiple samples and errors. Several paintings and master classes in the photo will post in this section.
Vasilki
The easier the flower, the more ways to do it. Corrugated paper can be done in different techniques. Examples - in the photo.


If you want to make it very similar to this (and - pattern for the blooming flower, b - for bud)
Iris
The manufacture of iris from paper requires some fantasy. Very non-standard flower. The photo presents several techniques that allow you to achieve different effects. Some flowers simply resemble the original, some very much like it.


Any-different


Lilies ... beautiful, but several techniques apply


Pansies - Pattern for making from corrugated


For "advanced". Very handsome Flower
Products that will be described in this article have unique characteristics. Their excellent appearance will be useful for memorable gifts ,. Beautiful flowers from corrugated paper with their own hands is not difficult to create without errors after learning the instructions below.
In the petals of tulips experienced masters hide tasty candy
Creativity helps to reveal their own talents and at the same time - create products with really exclusive characteristics. But some techniques are distinguished by excessiveness, excessive duration technological processes. Sometimes scares the high cost of component parts.
These and other drawbacks will be excluded if used corrugated paper:
- Its cost is not great. Therefore, you can work without significant restrictions on large-scale projects. Multiple experiments and samples will not be accompanied by high costs.
- Such materials are offered by many trading enterprises. They are purchased in classic stores, or on specialized sites, with convenient delivery at the desired address. In the relevant catalogs, a wide range of colors and textures is maintained.
- For proper reproduction of technology, inexpensive adhesive compositions and simple tools will be needed.
- When making errors, it is not necessary to create products again. In most algorithms, it is planned to attach individual parts, so the problem is eliminated quickly, without loss of time.

How to make flowers from corrugated paper with their own hands
In addition to basic materials, in certain variants of colors, the following products must be prepared:
- Durable and elastic wire of the desired length. It creates a power frame of stems, so it must correspond to the alleged loads.
- For the separation of wire on certain segments and flexions, it will be needed nippers and passage.
- Acute scissors (large and manicure) will be useful for cutting out large and small billets.
- Middle density create templates.
- Simple pencil note contours of design elements.
- To fasten them (type PVA). It should be verified by experimentally that it does not change the color when frozen.

Roses do it yourself from corrugated paper: step-by-step instructions
This table discusses a more complex method. It will take all the components above.
| Photo | Sequencing |
 | On the cardboard drawn petals in the form of "hearts". Severally change the magnitude to get 4-5 different templates. |
 | For neat cutting blanks, scissors are used. |
 | To simplify the subsequent assembly of the petals fold one on the other, taking into account the order of consolidation on the stem. |
 | Create an optimal form. For this, a little pulls on the side of the area with roundings and make an in-depth middle part. |
 | Next you need to prepare stem and leaves. They can be formed by pre-like petals, or during attachment with reference elements of the structure. |
 | To obtain tender stiffness, two wires are combined with green ribbon. A small upper portion (1-2 cm long) bend. For this procedure will be needed by Pasteati. |
 | Start the formation from attaching the smallest petal. |
 | Next, the larger elements are fixed. Instead of a ribbon, you can use a fishing of suitable color. |
 | The bottom of the bud attach minor leaves. |
 | Large leaves are glued to the stalk. |
 | After completing the assembly of the entire product, petals and leaves give the final form. Rose is then installed in a vase vertically. |
Important! This technology of connecting leaves and petals is used for the manufacture of different flowers from corrugated paper. It is complemented by special techniques for creating stamens and other elements of plants.
The next way is faster. In it, the bud form from one billet. Initially, cut off the ribbon of the required length (50-60 cm) and height (4-5 cm). One edge wrapped inside. Next, this is more dense than the rest of the paper, part bend in the form of a flattened spiral. The corrugated material is fixed in the desired position without glue and other devices. The billet is formed as a bud. The bottom is attached to the stalk. Downstairs attach leaves.

Features of creating tulips and other colors
For manufacture, you need to prepare similar components, tools and materials. It will take paper of different colors corresponding to appearance Tulip petals. It is necessary to purchase a wire of three types (with different diameters). It is used to create frame elements with different stiffness and thickness.
The sequence of actions is given in Table:
| Photo | Description of technology |
 | Petals can be cut down the billets, as in the manufacture of roses. But to simplify the process use such a workpiece. It is created from a strip of 5-6 cm high. After folding, a square is 4-5 cm wide. |
 | All petals (8-10 pieces) are cut out at the same time. The bottom of the workpiece is made elongated. |
 | It is rolled in the form of a cord. The petal itself is stretched over the edges and form in the center of the depression, as in the first method of making roses. |
 | Created petals are set aside and start the manufacture of stamens. They are created from the wire of small diameter. Top parts - from corrugated paper. |
 | Separate elements are attached to the stroke ribbon, or thread. |
 | Leaves cut by pattern. These parts will turn out long, so you will need to strengthen the medium in the thickness of the wire. |

From corrugated paper with their own hands complement the pearl beads, fabrics and other decorative products for creating beautiful compositions. AT following examples The features of the processes of manufacturing other artificial plants are noted. In Lilios, stamens differ in large sizes. They are created from thick wire wrapped with white paper. To imitate pollen, the upper curved parts are labeled with adhesive solution. Next - dip in the gun. To dry out, such blanks are inserted vertically into a piece of plasticine.


Sunflower leaves and petals are cut, form and attached using the methods considered.

In the chamomile, there will also have to pay sufficient attention core:
| Photo | Actions |
 | It will take thick yarn. |
 | It creates such a nodule from it and fasten it with a thin yellow thread. |
 | Cutting from above, get the necessary workpiece. |
 | It is planted on a wire. |
 | For durable compounds are used green tape. |
Production of colors from corrugated paper with candy
Delicious treats inside buds - a pleasant addition to the wonderful appearance of products. This technique can be explored on the example of making making:
| Photo | Description of action |
 | Petals cut out of blanks with or without it. |
 | In Macs - a lot of stamens. Therefore, it is useful to prepare such a product from corrugated paper. |
 | Candy wrapped in it. |
 | The finished block is installed on thick wire and fix with a solid green thread. |
 | Candy can be hidden in partially blurred buds. |

What can be made from corrugated paper yet?
Forms form. Such elements are used to create paintings and original designer compositions. Below are features of corrugated paper with your own hands:
| Photo | Description of action |
 | For a large product, there will be enough consumables. Roses buds create in the desired amount of one of the above technologies. |
 | The ball base is created from the crumpled paper, which is fastened in the desired form using the thick durable thread. You can purchase a ready-made ball of polyfoam. |
 | In Kashpo, a cube of foam with a rod is installed. It is wrapped with a ribbon of corrugated paper, which is attached with adhesive composition in several places. |
 | On a bowl fix roses (PVA glue). It is advisable to pre-create a hole in it for subsequent mounting on the rod. |

Corrugated paper - lightweight and well-retaining material. These properties are used to implement different creative plans.

If necessary, the fantastic background with the necessary parameters will be created quickly and without extra cost. The only significant limitation is suitable weather conditions. With strong wind, during the rain, the openwork compositions will not stand destructive external influences. For this reason, they are more often used in closed rooms.

Bright unusual corrugated paper products like babies. They joyfully perceive the amazing transformation of the surrounding space.

To find out how to make flowers from corrugated paper, you can use other instructions. We offer advice from experienced masters, studying current market proposals in relevant product groups. But in any case, the following facts and recommendations must be taken into account:
- The cost of the standard roll of paper - from 60 to 120 rubles. From it you can make several bouquets of colors. In order to save more, find direct suppliers.
- The first experiments are performed on relatively simple designs. Select products with large components, the manufacture of which does not require special accuracy. As the skills acquired, they go to complex compositions.
- This hobby is suitable not only for adults. The creation of functional and beautiful items are used for the harmonious development of children. With it, the fine motility of fingers is improved, a good taste is formed, a careful attitude towards things is brought up.
Corrugated paper products are unique. They will be applied to solve various household and commercial tasks with minimal spending time, financial resources and labor resources. Video Master class of colors from corrugated paper is presented below.
Hello everyone! On the blog "School" next master class! Today we will do big bags of paper, well, the most that use as a festive design at different parties.
Let's with us! Join our creative brethren! Yes, and make pompons from the corrugation with their own hands is not difficult and very interesting. For your convenience - step-by-step photos.
Application from corrugated paper - Dubrovskaya Natalia Vadimovna | Buy a book with delivery | My-shop.ru.
So, see what we did.
It all starts with the preparation.

For the manufacture of Pompon, we need:
- roll of corrugated paper, it is also called crepe;
- scissors;
- pencil;
- line.
Paper standard size. Its width is 50 cm, and the length is 2.5 meters.

We take a roll and with the help of Lineshek, we determine where he has a middle. Blacks in this place a pencil line.

Without unwinding the roll, cut it with scissors into two equal parts. There was one long roll, and now it turned out two short.

Then rolls are still needed to deploy and cut them on the same rectangles. You can make rectangles in size 25cm x 50cm, then 5 rectangles will be released from each roller. We made 25 x 40, and we had 6 stuff.
The more rectangles there will be, the volume will turn out to be a pompon.
Then the rectangles need to be folded with a neat stacker, each other.

Since our paper, all-time sought to twist back into the tubes, we pressed it with scissors on one side and a ruler on the other to take a picture. And if you noticed, the photo of threads appeared in the photo! It was necessary to say about him at the very beginning, on the preparation process. But we remembered that it is only needed now and immediately declare about it. Instead of threads, you can take a beautiful ribbon. But we did not have it and we cost threads.

Then turn the stack of sheets of one of the short sides to yourself and begin to fold the sheets into the harmonica.

There should be something like this.

Using the ruler, we determine where our corrugated high-end harmonica and make a pencil mark.

We take a thread and tighten our harmonic tightly in the middle. One end at the thread should remain long.

Now proceed to the design of the tips of our pompon. We will cut them a bit, round, so that the pompon looks like a flower. The photo shows how we cut the trajectory.

First cut one corner.

Then another. Well, with one tip sorted out. Similarly, we do with another.


To begin with, we turn one side in the form of a fan.

Very neat, not to break, capture the first layer of paper and lift it.

Then the second.

Well, then the third, fourth, fifth and sixth, too. Already beautiful!

I turn over our "fan" to the other side and flowing the remaining six layers of paper. Just at the same time we try not to remember those that have already issued.

It turns out like this. Very similar to the bridal bouquet. If you make half a pompon of white paper, and the handle is made green, it will be one in one. But now we have another task, we do not be a white bouquet, but pink pompon. Therefore, by the same principle, the other end of our accordion is fluffy.
Corrugated paper flowers - Sherstyuk Julia Valerievna | Buy a book with delivery | My-shop.ru.

And we get this beauty! We corrected him a little, so that Pompon acquired the shape of the ball. Then they decided to experiment and make another pompon smaller from the remains of yellow corrugated paper, which the topic found in the closet with all sorts of creative things. We call it so - a creative locker. We have paints there are plasticine, glue and colored paper too. In principle, it turned out.

And now we know that you can make a small pomponchik, but it is much more complicated than big. And in this yellow little ball, we did not have 12 layers of paper, as in large, but only 8, on this paper ended.

These two pumps we hung on a chandelier in the children's room. And immediately somehow more fun there! Well, soon we have holidays in the family. First, I have a birthday, then our beloved grandmother. And we now know exactly how we can decorate the premises to be elegantly and beautiful.
But if we had a lot of such paper, we would try to make the same beautiful flower as the video below. Very beautiful! And the principle of manufacture is similar to pumps.
Friends, your opinions about our master class can be left in the comments. And we will be very grateful to you if you share a reference to an article on social networks.
Thank you for your attention!
Pleasant creativity!
Always yours, Alexander, Artem and Evgenia Klimkovich.


