The screed is an intermediate layer between the sexual base and the finish flooring. It is designed to align the draft floor. Without pouring this layer, overhaul in a private house or apartment will be poor quality. If you need to know how the floor screed is done, the technology will be presented below.
The laying of the presented layer should be made only after you decide with its type. You can classify the screed:
By method of production:
- Wet. For its manufacture required cement mortar With the addition of sand. You can cook it yourself or buy ready mix. At the same time, the layer must additionally strengthen the reinforcing grid. The optimal screed thickness is about 10 cm;
- Dry. It can be done using special large-format sheets, 1.5-3 cm thick.
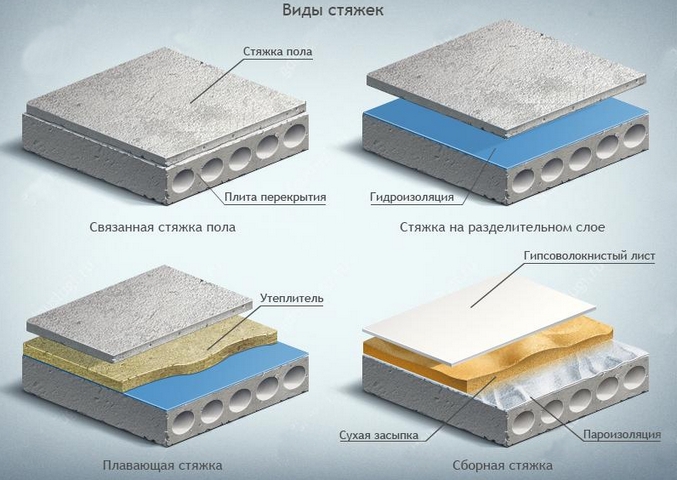
By type of connection:
- Floating. It usually stacked in the event that a waterproofing film is used during repairs. This screed is a thickness of about 3.5 cm and more;
- Solid. It is firmly fixed on the ground.
Based on materials:
- Cement layer. It can be used in the apartment and in a private house. The most optimal ratio of mixing cement and sand is 1: 3;
- Sandob concrete screed. The laying is performed using a ready-made mixture that can be purchased in a construction store. The biggest disadvantage of this method of alignment of the floor is considered a quick shrinkage of the material. While working with the mixture, you need to monitor the thickness of the screed, as well as the uniform distribution of the solution. To preserve the integrity of the layer, it is necessary to strengthen it with reinforcement or fibrovolok. To achieve maximum quality, the fill must be sprayed with water over 2 weeks. For complete drying, the layer will take at least 20 days;
- Hypan screed floor in the apartment. In the installation, it is very simple, does not allow shrinkage, it has good plasticity. Located a layer of a small thickness. At the same time dries gypsum very quickly. The only disadvantage of this material is the impossibility of installing it in those rooms where high humidity is observed;
- Screed using concrete mix. It stacked the same as cement. But a cellular concrete solution is added to the finished mixture;
- . Since making a screed of this type is easy, it is becoming increasingly popular, especially in a private house. This layer is a thick of 0.5 to 3 cm. But if the root differences are very large, then to use the mixture, it is necessary to additionally make a rough screed (a concrete solution can be used);
- Plasterboard. In this case, rectangular sheets are used, which are stacked with a small adhesive. Note that such a screed does not require a long time to dry, and simply is quite simple.
What do you need to work?
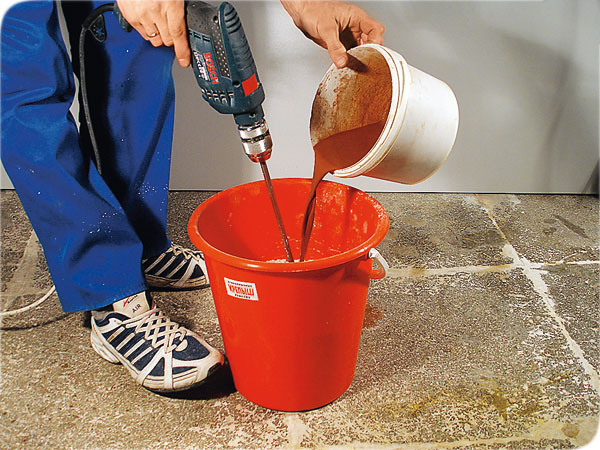
The most common and frequently used material for the fill is concrete solution. Before making a tight floor, you need to collect all the necessary devices and materials. You will need:
- Capacity for kneading concrete mixture.
- Drill with a special nozzle or building mixer.
- HydroWore.
- Rule.
- Master OK.
- Roulette and marker for placing markup.
 Some tools needed for filling floor screed
 Features of the preparation of the foundation
Floor screed device is not a very difficult process with which you can cope with yourself. However, preparing the foundation is required. First disassembled old flooring. If the draft floor has already been filled with cement or concrete tie, then it should be carefully examined. If there is no significant damage, then you can apply for the fill.
Small flaws are eliminated cement or concrete mixture. The bulbs are better to sile with a grinder or perforator. Further, the base should be cleaned of garbage, the remnants of the adhesive of the concrete mix.
 Priming allows you to improve the adhesion between the tie and the floor surface. It is carried out in two layers of primer for highly absorbing surfaces.
 The thickness of the screed is important not only in the apartment, but also in a private house, especially if you decide to warm. This effectively can change depending on the selected materials and room parameters. However, it is also necessary to take into account that the screed with an incorrectly chosen thickness can be poor quality.
Montage of Mayakov

Before making a tie of the floor in a private house or apartment, you must definitely set lighthouses. They will help pour the solution as soon as possible. The installation provides for the implementation of such actions:
- Definition of Samoa high Point Paul with a hydraulic level. Note that a small drop on the horizontal can be "defeated" without additional layer fill concrete solution. If it is too big and exceeds 8 cm, the additional screed will only enhance the load on the overlap.
- . Most often, for this purpose, in a private house or apartment applies metallic profileAlthough there is another option - Oak Reiki;
- Installing elements. The distance between them depends on the width of the rules that you will ravize the solution. Leveling lighthouses need to be constantly monitored by level. Next, the elements are fixed using a small amount of solution;
Please note that even with the need of an additional substrate under profile, wooden bars cannot be used, as they are able to change the form under the influence of moisture. In more detail and clearly about this stage you will tell you the following video:
Features of making a solution
If you apply, the mixture is prepared very simple. Connect 1 part of the cement M400 grade and above with 3-sided parts. You can also add a clamzite that will allow you to achieve additional insulation. Further, all the ingredients are well mixed with a construction mixer. Water is added gradually. At the same time, the mixture must be continued to stir so that no lumps remains. The liquid is added as needed, that is, the solution should not be quickly spread or being very thick.

If you choose a dry mixture to work in a private house, it is prepared in accordance with the description made by the manufacturer. However, the standard preparation procedure provides for such actions:
- In the larger tank, pour water at the rate of 1 liter by 5 kg of the mixture.
- Pull the acquired material in the bucket and thoroughly mix. If you pour liquid into the mixture, it is unlikely to achieve high quality solution.
- Leave the resulting substance for several minutes to insist, and then mix thoroughly again.
Foundation technology
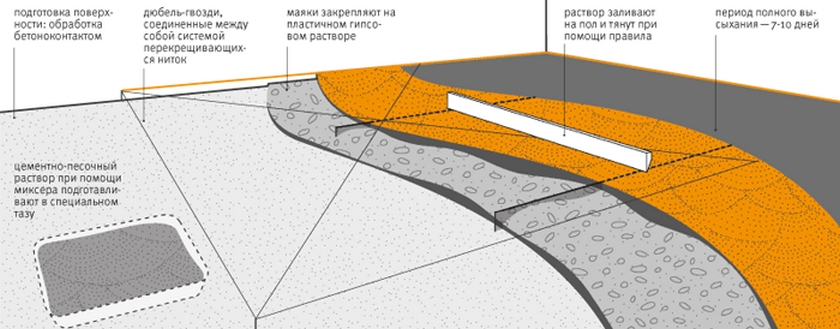 The main stages of the arrangement of one-layer cement-sand tie By Mayakom
 After all preparatory work You can proceed to the most important thing - fill. How to make a screed for steps:
- Starting work follows from a long corner, gradually moving towards the door to the door.
- The mixture you just need to pour into that area, which is concluded between two lighthouses. At the same time, constantly try to control the level of the layer. At this stage, the rule applies.
- After processing the rule, the surface is trimmed with cells. Note that the movements should be light, circular.
Note! Pull the screed should be so that the work is carried out in 1 day.
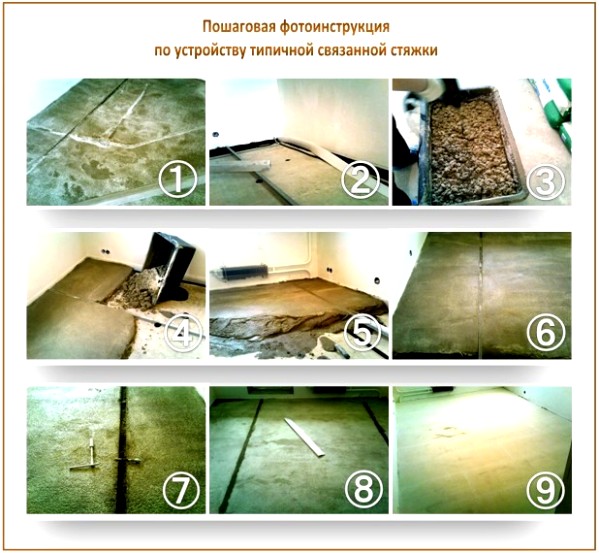 1 - Preparation of the foundation; 2 - installation of beacons and damping tape; 3 - preparation of the solution; 4, 5, 6 - fill and the distribution of the mixture; 7 - removal of beacons from a layer of screed; 8 - filling with emptiness with mortar; 9 - finished floor screed
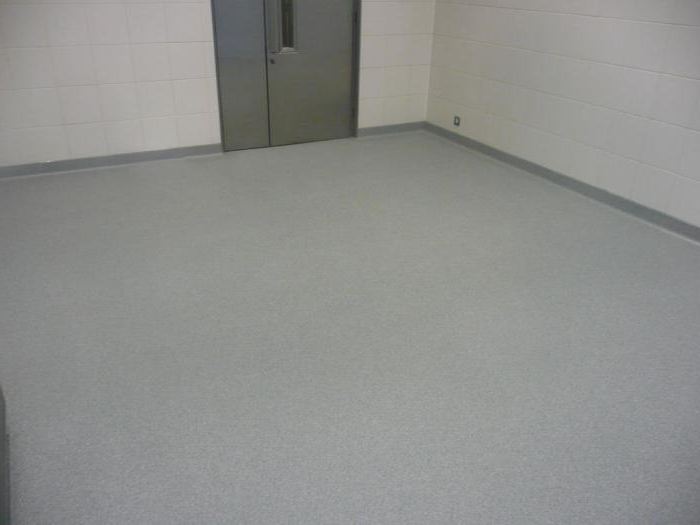
 Naturally, after the end of the fill of the solution, he needs to give time to dry. At a temperature of + 20 ° C, the mixture will be solid after 24 hours. However, this does not mean that it is ready for operation. In the first few days of drying, concrete must be periodically wateted with water so that its surface does not crack. Lighthouses can be removed on the third day. In this case, the formed pit is poured with a solution prepared in advance.
Now the impose on the resulting base cellophan, pour sand on it, and water it periodically for 14 days. Then the film is removed, and the base is again wetted by liquid. After that, the surface must dry completely. That is, it will be ready for the load after a week.
Now you know how to make a light screed. This process requires special attention and patience. It is necessary to take into account many factors, especially the layer thickness. Leave an opinion on the article in the comments or share your experience of the device screed in your home. And finally, a couple of very useful video materials.
If you decide that in your house there will be a warm-alone system that you plan to lay a modern finish coating, it is really reliable to be the basis of its laying can be carried out on any, even uneven base, and you will get to make the desired slope. However, it is important to properly prepare the mixture, and after - to apply it according to technology. Alignment and drying are no less important stages if you want to get a strong safe coating.
Preparation of rough surface
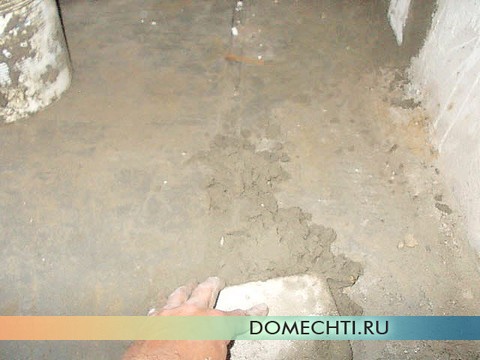
Filling the floor screed is carried out on a pre-prepared surface. If the house is an old wooden floor, naked soil or concrete plateYou should approach each case individually. In the presence of large cracks on the draft surface and the depressions should be cleaned and smeared with cement mortar. For the grinding of concrete floor, you can use a grinding machine or milling equipment on concrete. From the resulting dust you can get rid of
![]()
Lighthouse installation: reviews
Filling the floor screed, according to the masters, can be carried out directly to the ground. For this, the soil is compacted and complemented by a sandy pillow. It is important for the presence of a waterproofing layer so that the moisture from the concrete does not succeed down. Only after it is possible to start the exhibition of beacons, which guides protrude. You can make them from girlfriend, using long rails, brick battle, pipes and cement mixture. Homemade masters do not advise to use wood, as the material will choose moisture from the screed, subsequently, the shrinkage will occur unevenly.
First, we should prepare slides from the cement mortar to which it will be convenient to establish a profile. Its location is checked using a construction level. Lighthouses should be located strictly parallel to each other, while the most extreme should be removed from the walls by 20 cm. The distance between the beacons should be less than the rule of 40 cm. As the specialists emphasize, the skills will be durable, the beacons made from metal pipes, the fastening of which is made on a dense solution of plaster.
Laying waterproofing and reinforcement
You can independently have a filling of the floor. Cement screed for this is preparing for a certain proportion. The ratio of materials will be mentioned below, and at this stage it is necessary to put waterproofing. To do this, you can use runneroid and other similar materials that are combined with a screed. It is important to remember that the solution should be well clutching with the base, most often universal primer is used to increase adhesion characteristics. Sew the surface after applying primer is needed about 4 hours. If the floor absorbs moisture well, then it should be projected twice, otherwise it will not be possible to achieve a positive result.
When arranging the system of "floating" the floor is better to use a polyethylene film. Filling the floor tie concrete must be accompanied by preliminary installation of the reinforcement frame. To do this, it is best to prepare a mesh with square cells with a side of 100 or 150 mm. The diameter of the rods must be 5 mm.

If the future floor is subject to intensive loads, for example, trucks will ride on it, then instead of the mesh should be laid armature carcass. To do this, be robbed by rods, the diameter of which can vary from 8 to 16 mm. The reinforcement is associated with a manually or a special pistol. For the device of a concrete floor, a high dynamic load will be provided to the surface, the solution is used, which is added to the components of which it is added replaces the reinforcement and is triggered.
Pouring solution
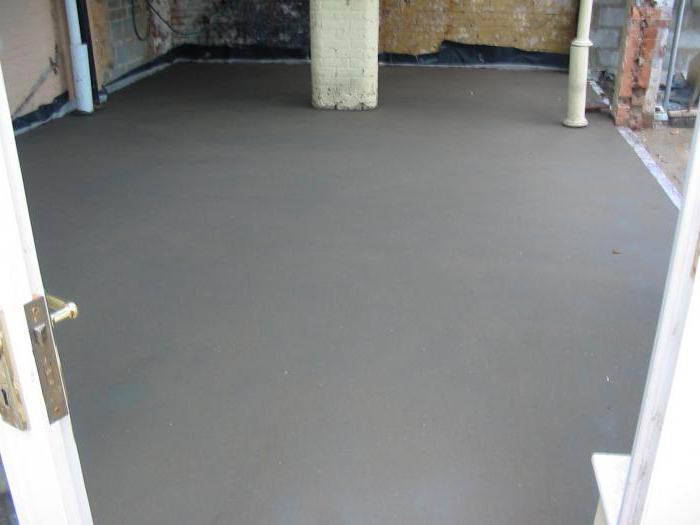
Filling of floor screed must be accompanied by alignment. The tracks between the rails should be filling out by moving to the doorway. To equalize the solution you need to use a rule or half-sash. If it is necessary to arrange a multi-level screed, a plywood formwork is additionally installed, due to which the solution will not flow into the neighboring area. At the highest location, the screed layer must have a thickness of 2 cm, otherwise the surface is covered with cracks, but this parameter should not be made more than 8 cm, since the load on the foundation will be unjustified. As the most suitable option, 5 cm performs, for the arrangement of such a gender, concrete brand "M300" or higher should be prepared.
Ground floor arrangement under cement screed
Such a system is usually mounted by the old base, on top of which heat insulation is covered, which can perform foil or foam. The presence of this layer must, otherwise, heat will go down. The next step will be the laying of water pipelines, heating mats or cable. About the high strength of such a design speech does not go. Therefore, on each square meter of thermal insulation, it is necessary to do the holes.
Around the perimeter of the site where it is produced to leave 15 cm of free space. This will allow the upper screed to rely on the bottom layer, which is especially relevant for small rooms. The fill of the heap screed is carried out taking into account the formation of a concrete layer in 5 cm. It will provide a quick heating after the system is turned on. If there are circumstances forcing less than 3 cm to make a screed, then a universal plasticizer should be added to the solution. For 100 kg of dry mixture, 1 liter of additives will be needed. Alternatively can be used to fill the floor which has higher elasticity. 
Warm floor laying technology under the screed
Filling the floor tie (the price of work will be mentioned below) quite often produced by domestic masters, as these works are not distinguished by complexity. It should be placed on a black screed, thermal insulation, which is strengthened with glue or scotch. Following a metal grid, which is useful for marking, and for laying the pipeline. The grid should also be fixed to the base. The perimeter of the site is pulled out which will be further installed on the installation of heating floor elements around the perimeter of the site, they should be connected to the coolant supply system.
If you learned the cost of fillings of the floor screed, the price did not suit you, then work should be done on your own. Moreover, the technology is pretty simple. So, in the next step, you can make the final tie of the floor, after which the masters are dried to laying the finishing coating.
If the fill of the floor screed will be made by you yourself, then first you need to familiarize yourself with the ratio of materials. Optimal and proven years proportion is the use of part of cement and three sand parts. At the same time, two parts of the water will need for this ratio. You can use other options in which part of the cement is added part of the sand, you can use a 1: 2 ratio. However, in this case, you even improve the strength of the floor, but lose as. The solution after laying will grab quickly, and it will be solved quite problematic. If you increase the volume of sand or water, then it will cause a reduction in strength and quality.
Cost of work
Filling the floor screed, the price of which is 400 rubles. per square meter can be made by specialists. Installation of bulk floors costs cheaper - for the square meter will have to pay 300 rubles. You pay the highest price for the device of the Dry screed team - 450 rubles. per square meter.
Today, the screed is universal and one of the most commonly used floors of the floor alignment and the elimination of its defects. Its key advantage can be considered the fact that the fill of the floor screed can be carried out in almost any premises, regardless of the scope of their use, and it is enough to see a special training video to perform work. This method of alignment of the floor can be used almost for any reason, and if necessary, you can install the "warm floor" system.
Even if you do not know the answer to the question how to pour the screed to the floor, just numerous instructions, one of which is presented in our article. As practice shows, despite the fact that the process of alignment of the floor using a screed is quite laborious to cope with it, even a novice builder.
Features of mounting screed
Before you begin the device, you must carefully read the answer to the question of how to fill the floor screed and the peculiarities of the implementation of this type of work. In essence, the screed can be used in almost any rooms, experts recommend extremely caustically align with its help on balconies and loggias. This is due to the fact that the considerable weight of the screed may cause serious harm to the carrying overlap of these structures. The use of a screed indoor with high humidity is obligatory that it is necessary to consider in advance all those who started repairs in the bathroom.
It is also necessary to keep in mind that the screed is a "raw" method of alignment of the floor, and therefore, if you do not take the corresponding measures in advance, the leaks towards neighbors are not excluded. In order to avoid such extremely unpleasant situations, it is necessary to eliminate any defects of floor plates and slots in the joints between the floor and the walls in advance of cement mortar. In the case, if there are doubts about the fact that this will be enough before the fill of the screed can be equipped with floorproofing.
Ideally, the thickness of the screed should be at least 50 mm, which ensure its strength and reliability. To increase the bearing capacity, the surface of the screed can be reinforced using a special metal grid for these purposes. It is necessary to place this necessary in the middle of the screed, but as close as possible to its surface, to reduce the flexural voltage.
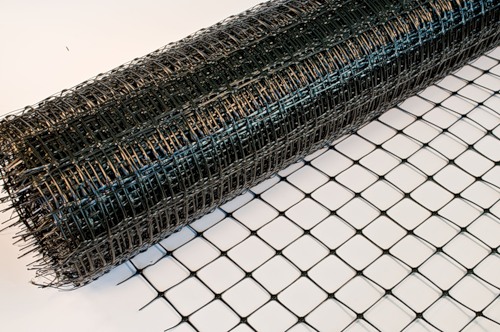 Reinforcing grid.
 To reduce the number of necessary elements for the screed solution, you can add various additives and fillers, most often for these purposes use clay. It is added to the solution used for the so-called underlying screed layer, on which the main layer of the solution is then placed without clay.
Like any building process, the fill of the screed requires careful preparation, all work is carried out using special equipment that will not only facilitate the workflow, but will significantly save its execution time.
The main tools that will be needed for floor alignment are:
- Hacksaw, drill, screws;
- Screwdriver, level, roulette.
Work on the arrangement of the screed can be divided into three main stages - preparation of the flooring of the floor, the installation of beacons and directly filling the screed.
Preparatory work
Absolutely any technology has its own nuances and features whose ignoring leads to extremely unpleasant consequences, many of which are fatal and are not subject to correction. Filling the tie of the floor in this regard is little distinguished on a general background, with its arrangement, much will depend on how competently and correctly prepared the basis for it.
 Heat insulation by foam.
 The first to what, it is necessary to pay attention to the preparation of the foundation is thermal insulation. Its task is to maintain thermal energy indoors and reduce its losses to a minimum. Polyfoam is used as a universal thermal insulation material, which does not allow the cold concrete slab slabs to cool the screed and the finish flooring.
Over the waterproofing, the waterproofing film is most often stacked, which is attached to the material using painting tape.
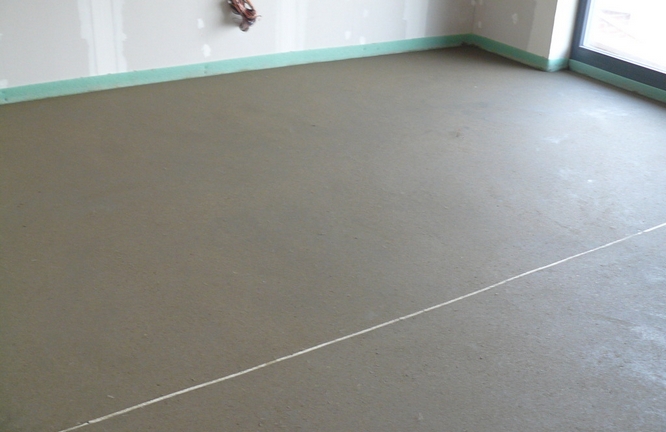
IN lately In the process of preparing the basis, experienced specialists use damper tape, which includes the defense of the screed from temperature deformations. Today there is no such material that would not expand under the influence of temperature. This statement to fully relate to the screed. Expanding, it rests on the wall and gradually begins to bent, as a result of which cracks appear on it.
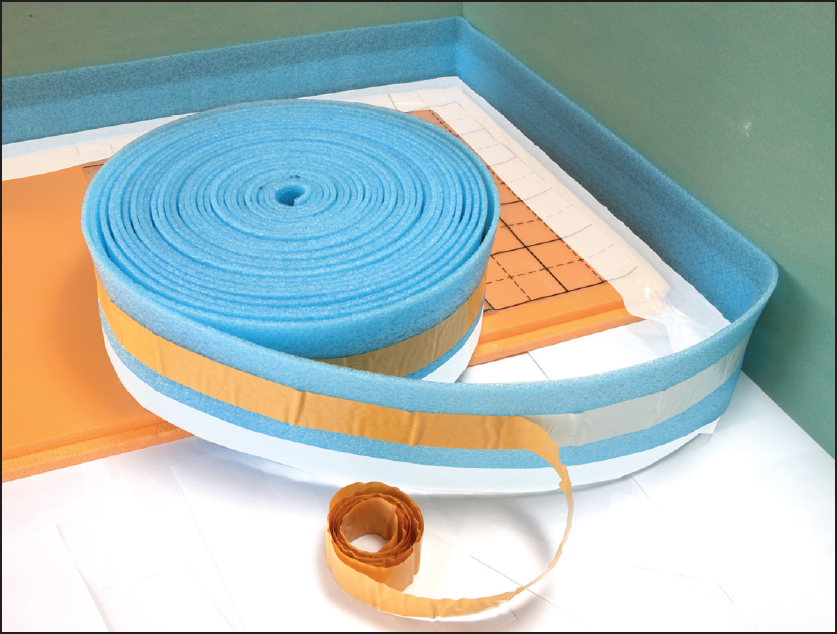 For sealing the junction between the wall and the floor.
 As practice shows, the crashing screed is not able to withstand serious loads, which in turn affects the deterioration of the operational properties of the finishing flooring. The damper tape is very effectively coping with the elimination of such drawbacks, which significantly improves the quality of the screed. The process of mounting the ribbon is illustrated in the photo. By the way, in the role of a damper, a low density foam can be used, which as well as the tape is placed along the perimeter of walls indoors.
Installation of Mayakov
Answering the question of how to fill the floor screed, it is necessary to consider a particularly carefully to consider the process, which is described in our learning video.
Lighthouses allow you to more evenly distribute the solution on the floor surface, as practice shows, without them, it is almost impossible to get the necessary result. In essence, lighthouses are special guides for which the level of fill the future screed is exhibited. It is possible to establish them an arbitrary way, it is necessary to keep in mind that the distance between them should not exceed 20-30 centimeters.
 Mortar lighthouses.
 Today, two options for installing beacons are metallic and dissolved. And if the acquisition of metal beacons need to take care in advance, but mortar lights are made from the same solution that will be used for a screed.
Use mortar lights is much easier and cheaper than their metal counterparts. Make them as follows. In places selected for the placement of beacons, the solution is pounced, then the height is adjusted using the rule, which must match the level of the future floor. Excess solutions are simply removed.
 Metal lighthouses.
 In turn, metal lighthouses are more technologically, they are several species, the difference between which only in thickness is 6 mm and 10 mm. For the device, the tie for the floor is used with ten-minute beacons, they are installed with one of two ways.
As well as in the case of mortar beacons to the floor, where the guides will be installed, the solution is thrown. Then the lighthouse is pressed into the solution until the stop is pressed, after which the excess mixture is removed. The main disadvantage of this method is the fact that at the time of indulgence of the metal lighthouse it can be significantly known, which subsequently the most negative way will affect the final result.
 Pins Lighthouse for self-leveling screed.
 You can cope with this problem using the second method. It suggests, using a special fastener with a metal lighthouse. The level of lighthouse in terms of level is carried out with the help of this fastener, after which, to increase rigidity and zoning the screed under its base, a solution can be applied again.
The fill process
How to fill the floor screed? It is very difficult to overestimate the role of a properly prepared solution for the floor screed.
Each experienced master, perfectly understands that the key to successfully carried out on installing the floor becomes a properly prepared solution, in which all the necessary components are mixed in the desired mixed.
When compliance with technology, the screed is obtained not only durable - it easily copes with any loads and has the necessary thermal conductivity indicators.
For the preparation of a screed, it is recommended to use the grade cement not lower than M400, the sand fraction is 0.9 mm and water, in a 1: 3 ratio. If necessary, the solution is allowed to add special modifiers, fillers and plasticizers, which make the mixture more plastic and give it additional characteristics.
 To improve the quality of the screed into the solution, it is recommended to add a plasticizer.
 You can prepare a solution either by the traditional manual way, or facilitating your life to use for these purposes special, builders mixer. For kneading, almost any large container will suit, as a mixer, you can use a perforator or drill equipped with special nozzles. Such nozzle is attached to the tool using a special adapter with a cartridge. Also for the preparation of the solution is perfect for a concrete mixer, acquire it specifically for the preparation of a floor screed in the house, somewhat loud and not economically.
 Ready dry mixes for screed are easy to use and give an excellent result.
 The thing is that in such mixtures, various additives have already been added most often, which are most positively affected by not only the fill speed, but also at the time of hardening and the strength characteristics of the finished surface.
It is impossible to intimidate with proportions if it is possible to simply mix a certain amount of water and a bag of finished dry mixture, in the future you can avoid such unpleasant phenomena as shrinkage or cracking. But in the case of the use of a self-made solution to face such problems, every second novice builder risks. What is important, the price of homemade and finished solutions is almost the same.
After the mixture is ready, you can proceed directly to laying a screed. The essence of the fill operation is reduced to the uniform distribution of the solution on the surface of the draft floor and the subsequent alignment of it using the rule on the level exposed on the lighthouses. In the process of conducting work, it is necessary to constantly monitor the plane using the level, in those places where the differences are formed, it is necessary to add a solution and thoroughly spark it.
The mixture should evenly fill the space, without any air pockets and other defects. The key indicator that the work was carried out qualitatively is the appearance on the surface of the "cement milk", which indicates that the solution is tightly, and the screed will be durable.
After solidification of the solution - after 2-3 hours, the lighthouses can be removed, and the holes remaining after them eliminate with the help of freshly prepared solution. To obtain a more even and smooth surface, it can be additionally styled with a polyurethane grater, which will also eliminate small defects.
The evaporation of moisture and the set of maximum strength of the screed will be required at least 25 days. During the first week, it is recommended to avoid the appearance of drafts indoors. Without any concerns, you can walk on the screed a few days after it laying.
As can be seen from everything that described above, even a novice builder, who has a minimum of knowledge and skills in this area, obtained from a special training video will be able to align the floor with a screed.
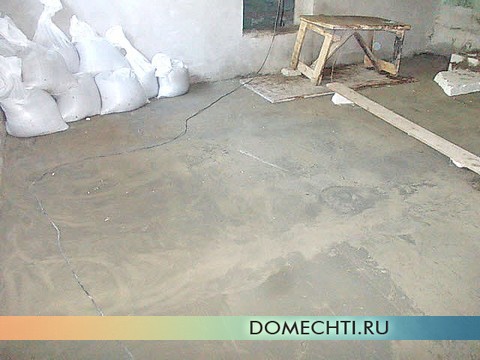
Filling a screed is one of the most important stages of creating full-fledged floors of residential space. Much depends on it, including how much time for you will be a decorative flooring device. Will the screed of exactly, with the level observing, withsting a clear plane - no further preparatory stages, for example, for, you can not perform. Why, if the flooded bands of the floor completely satisfies all the requirements of almost any floor coverings?
Want to know how perfect floor screed with your own hands? Want to learn to pour it yourself? Well, then forward!
The first stage of the fill of the balls of the floor with their own hands - installation of lighthouses
The first and perhaps the most important step on this path is to install lighters - it is from the correctness of their installation and the final result depends. An ideal tool for installing beacons is a level or a laser plane builder, but at home on small areas you can do and an ordinary rated level. With it, the first lighthouse is installed. By the way, UD profiles are remarkably suitable as lighthouses for designs from. There are, of course, the factory lighthouses made specifically for the screed, but they are harvested and for their installation have to use more support points.
Well, we will make them install. We mix the cement mortar and spread it in a slide into one line along one of the walls, at a distance of about 200-300 mm from it. We take the lighthouse and press it into the scattered slides of the solution so that as a result, our profile is located in a clear level and at an altitude of no more than 50mm, but not less than 30mm from the existing floor.
A second lighthouse may be more difficult for you, it must be installed so that it is in the same level with the first. It is necessary to install it at a distance of a little less than the length of the rules that you will pull the screed. If you have acquired a rule with a length of 2m, then the step between the beacons should be no more than 1.8m. At such a distance, we scatter the second row of the cement slides, we put the following profile on them and with the help of a long rack level set by one end to the first lighthouse, and the other on the second, we achieve the location of the second lighthouse clearly at the same level with the first.
In exactly the same way, all subsequent lighthouses are put.
What you need to reinforce the floor screed
At the next stage, the tie of the floor should be reinforced - a special metal mesh with a cell 100 × 100mm and a wire thickness of at least 3mm is laid between the beacons.

What is it done for? Over time, from the impact on the screed of all sorts of aggressive factors (drawdown at home and the like), it can crack. If we are talking about a private house, then as a result, the moisture from the soil will penetrate into the room and slowly lead the decorative floor coverings. So in order for the screed of the floor made by your own hands, retained its integrity long yearsAnd I need a reinforcement.
Cooking a cement solution for a ball screed with your own hands
There is nothing complicated here, the main thing is to clearly observe the proportions of the mixture for the preparation of the floor screed.
As a rule, four parts of the sand to one piece of cement are ideal proportions for screed.
So you load, for example, four sand buckets and one cement bucket in a concrete mixer or great trough. Very thoroughly mix and you can start pulling the screed.
In manual mode, when the kneading solution is produced in the trough, sand cement must be mixed on dry, without water. Only having achieved a dry and homogeneous mixture of sand with cement, it can be added to it. The solution is needed rare - it must have a lot of water. A rare solution and pull lighter, and easier to align - it spreads independently and fills all the small emptiness.
How to pull a light tie - technology is simple
There is nothing to tell here in general - as they say, everything is simple to disgrace. We pour the mixed solution between the beacons, with the help of the shovel evenly distribute the mixture. In height, the distributed solution should be slightly higher than beacons. We take the rule, we rest in two lighthouse at the same time and fast forward moving movements left and right by pulling it on yourself. To fully pull the entire excess solution, you will need to make two or three passages in one place.

Stretched the first portion of the prepared solution? We prepare the following and pour it in the same way. You must have exactly such a cycle of work: I poured the screed - wept, flooded - they stretched again. And so until the entire floor is filled with a rigid tie.

Drying the screed of the floor in the house for quite a long time, but the next day it can be walking. It is, of course, it is not yet able to withstand, but already has enough hardness so that there are no traces and dents from shoes.
It is at this stage that the floor drying must be removed from the screed now unnecessary lighthouses and close the grooves remaining after them. It is done quite simple - a semi-dry solution (galtsovka) falls asleep in the grooves and rubs off with a wooden halfter. While the screed is fresh, garbage and all the floor are securely concluded with each other and form a single solid coating.
Also at this stage it will be useless to clean the screed. Surely after the fill of the screed, there were traces from the rule, small influx of the solution - they need to be considered, using the rule or ordinary silicate brick.
This is how the fill is perfect floor ties do it yourself. It is hard, troublesome, but as a result you get a perfectly smooth surface suitable for laying any flooring!


