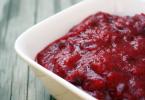
Making snow-white clay with their own hands.
If you have a creative idea using self-sustaining clay, I suggest you to study the recipe for the manufacture of this clay at home.
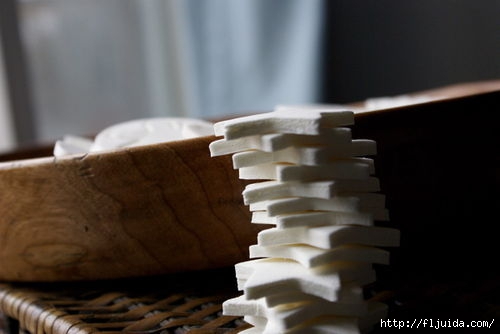
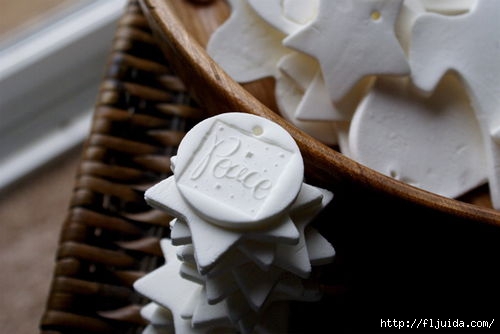
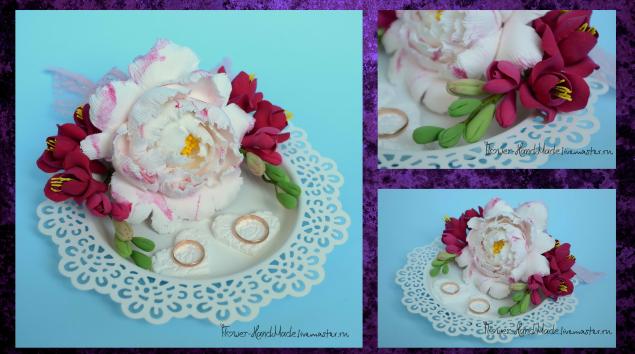
Thanks to this recipe you can create these New Year's decorations. 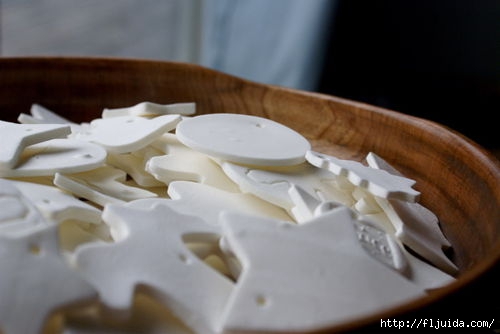
all sorts of suspension, use to create a core
 .
.
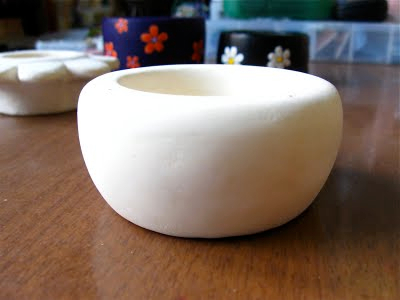
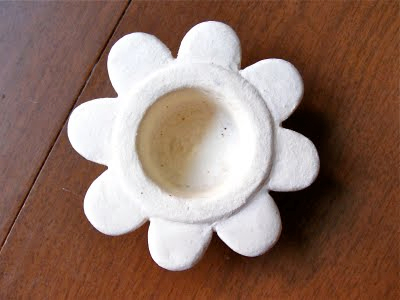
and even small decor items.
This recipe is good because after frozen the product, it can be perfectly grinding!
So, we study the recipe and look at the sequence of its execution:
Let us study the process of manufacturing this pliable mass itself, from which we can create original decor items. 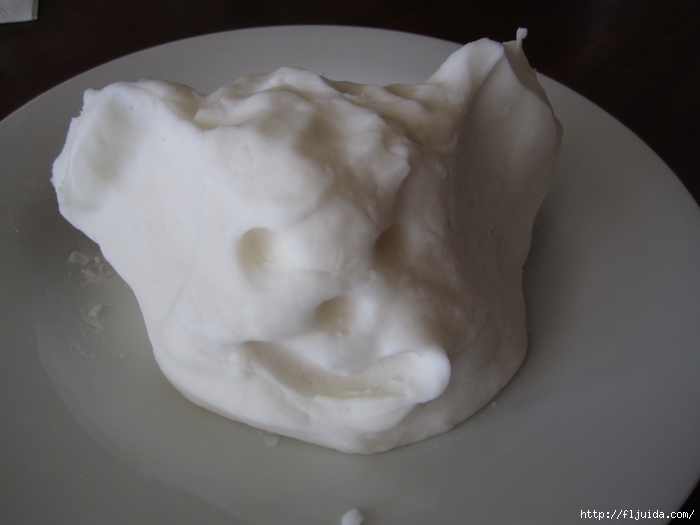
Recipe for selfless clay:
For the manufacture of this sample mass, we will need:
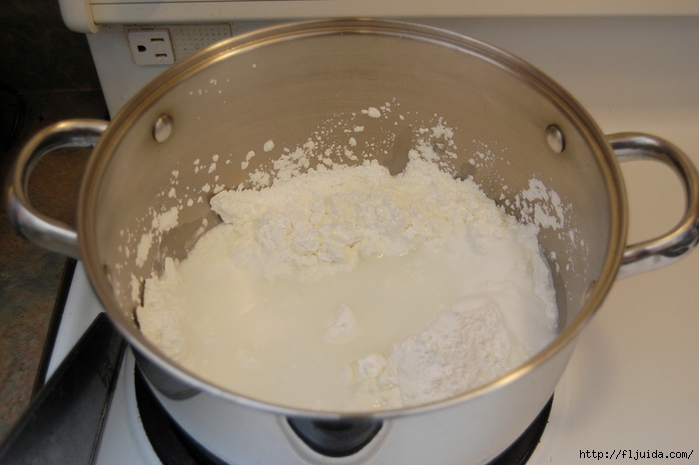
2 cups of food soda
1 cup of corn starch
1 1/4 Water Glasses
Preferably a non-stick saucepan, a shoulder blade for kneading the dough and a wet towel.
And now I will study the sequence of this kneading:
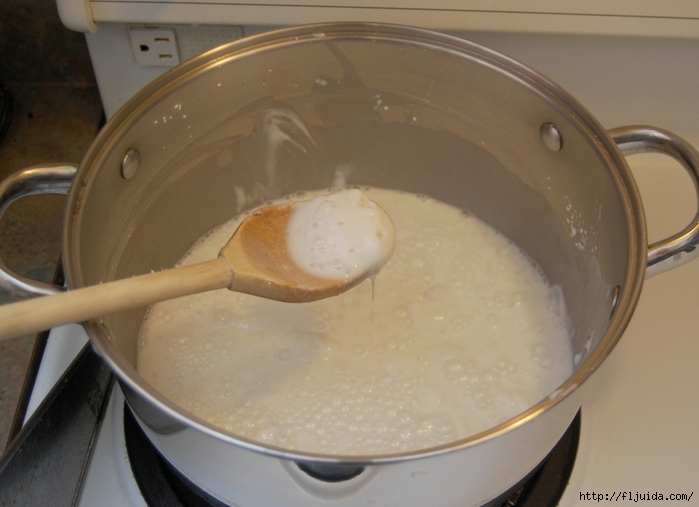
In the pan, we pour all the listed ingredients
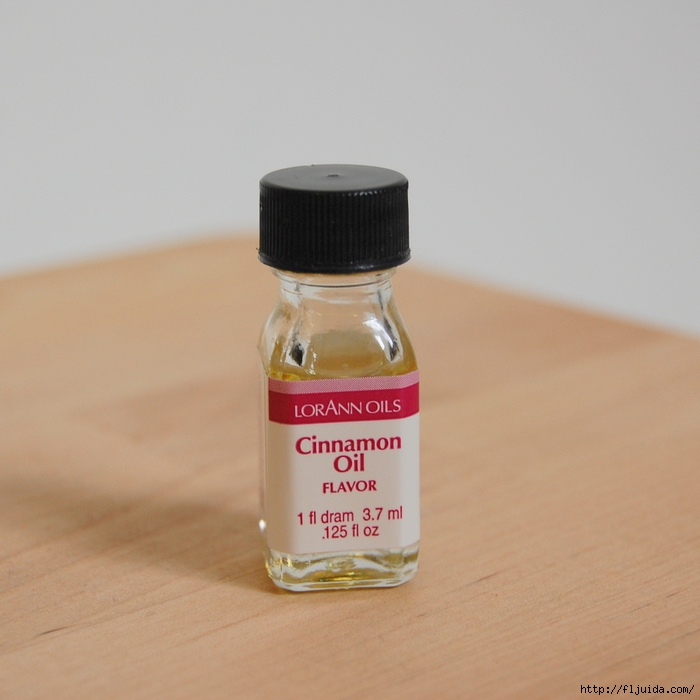
We put on fire and constantly stir. When the whole mass dispels, add cinnamon oil drops into it or other fragrant oil for a pleasant smell of the product. But you can not do this :)
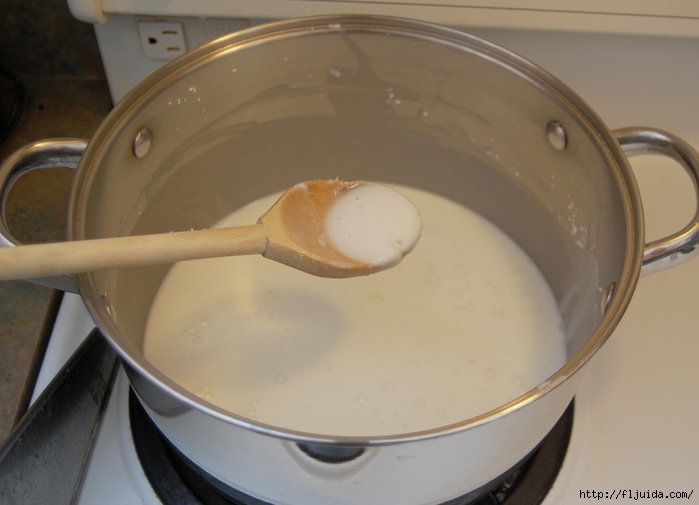
After a couple of minutes, the mass will start bubble :) We continue to stir.
And after 5 minutes, this mass will start glare at the bottom of the pan, gathering in com, so we stirred and scroll through the bottom of the bottom, collecting in com. 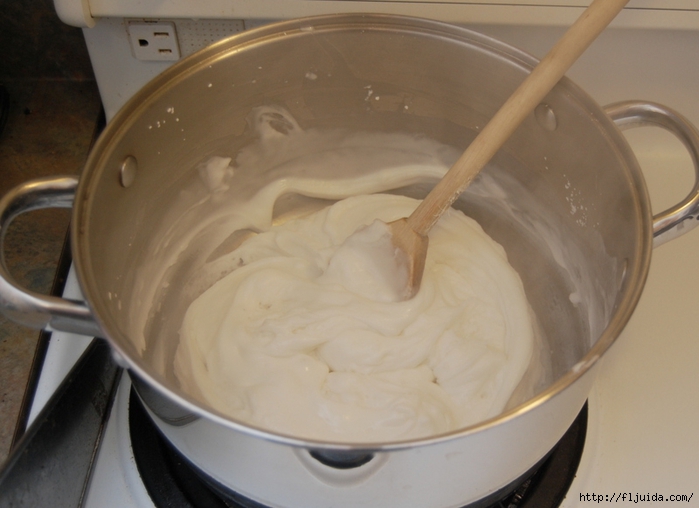
When the mass becomes like a "potato mashed potato" - remove the saucepan from the fire and fall out the contents in a bowl or on the wax paper for baking, cover the wet waffle towel above and we are waiting for a little so that the mass is cooled. And then we already knead the mass in the com, smearing the hands with a bold cream before that.
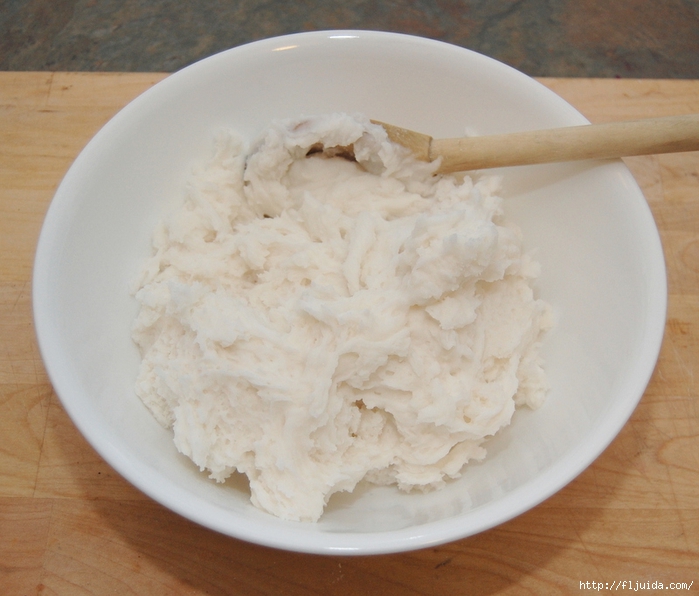
In order for the edges of this Coma to do not froze, hold the contents in a bowl with a hermetic lid or wrap in the food film.
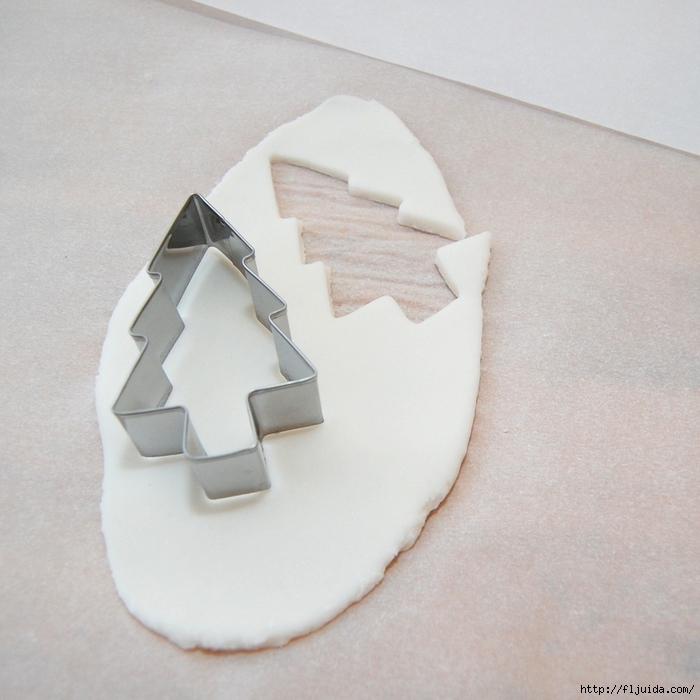
You can already create :) To do this, we roll out of this mass a rather thin layer (from half a centimeter and more) and squeeze out of it molds for baking the necessary forms ..
All these products can dry themselves on air or battery. To do this, place them on the wax paper. Or you can speed up the process and send to the heated oven to 150 F oven your products and leave them there with a lid a lid. The oven is already turned off.
12.
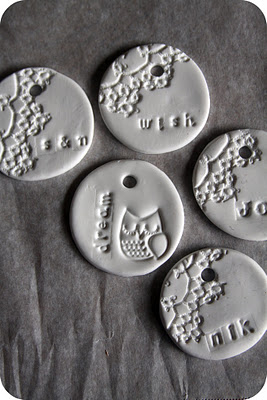
Let me remind you that after drying, the product can be grinding!
And then the product can be applied acrylic paints. Or to cover it first with varnish and after drying it is already possible to use other paints.
15.
And of course, do not forget about the possibility of creating various implications on this mass :)
Well, went to create? :)) After all, you probably have everything at hand :) 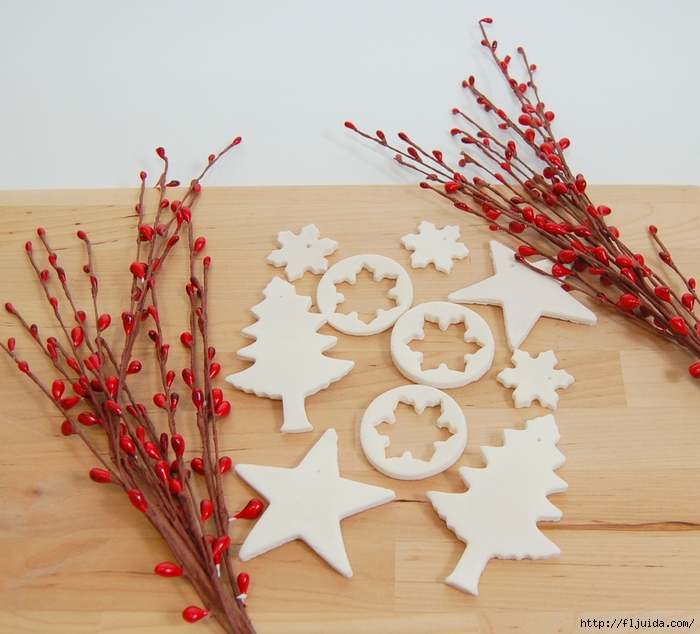
successful experiments and original ideas :))
Polymer clay for beginner craftsmen is an excellent material that is easy to use and has several advantages and various characteristics that we will talk about in this article.
Types of clay
Polymer clay, it is plastic, there are two species - self-sharpening and thermoplastic, which freezes at a certain temperature in the oven.
Self-sitting clay is good because it does not need to produce additional manipulations so that it hardened, it works in itself with long-term contact with air.
Store such clay is better in native packaging (it will be better if the package is tightly closed) or wrapped into the food film and several polyethylene packages.
Thermoglin is baked only in the oven or furnace at the temperature and time indicated on the package. In no case do not put clay in the microwave. The minus of products from such a clay is to some extent the loss of the original color, but the products are becoming much stronger than those dried by themselves. Crafts are placed on heat-resistant faience or ceramic dishes. If you burn, for example, the flowers and you are important not to remember the petals, put a bouton on a skewer and stick to the steady blank from the foil.
Products from both types of clay can be sick, painted and expose different types Processing, but it is worth avoiding contact with water, if only clay is not intended for this.
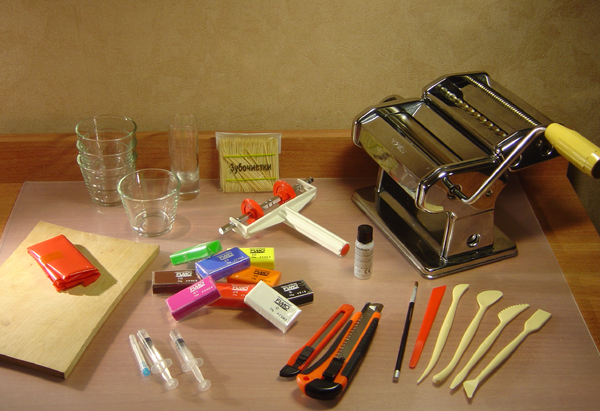
Tools for work
Working with a polymer clay, you will most likely come across the need to have the following tools with you:
- various knives that will be useful for cutting clay or cutting into small parts;
- the rolling pin or special layer is needed to roll the clay into a thin layer;
- gloves or rubber dimensions will help avoid prints when working with clay products;
- foil is needed if you work with clay for firing;
- various stacks of sticks and toothpicks are needed to create grooves, patterns, dents and other useful elements of the decor that cannot be made with fingers;
- acrylic paints and varnish will complete the appearance of the crafts, give them colors and protect them from possible damage.
For what is used
Polymer clay is a different destination. Marshmallinal clay is most suitable for creating flowers. Claycraft by Deco.. It has a very tender texture and from it you can create the finest petals. It is sold in several basic colors that can be easily mixed with each other to get the desired shade. This clay is very soft and does not stick to the hands.
During the modeling, cover the clay with a damp cloth, it will not give her to frozen.
If you are using dolls and sculptures, you will suit a special clay. Usually it has a body color. It is very convenient, as it does not need to be mixed with other flowers to achieve a natural skin shade. Products from this clay are distinguished by special strength and wear resistance. Clay is very easy to give a smooth surface without junctions and cracks.
There is clay ( Sculpey Eraser Clay.), which after firing becomes like rubber. For products from such clay, you can certainly not worry. Suitable for making any crafts.
Clay clay fits to create sculptures and modeling Darwi. It has good adhesion to any materials. When working with such clay, you need to make hands and clay itself with water.
Perhaps the most common clay is Fimo., thanks to its value and universal purpose. It is suitable for creating any crafts. At first it will seem to you that it is rather firm, but she quickly takes the warmth and becomes a piley.
There is also a liquid polymer clay, which will help soften the dry or quite solid clay.
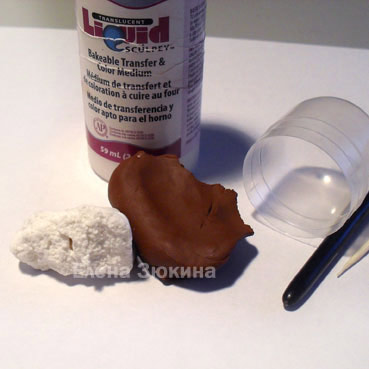
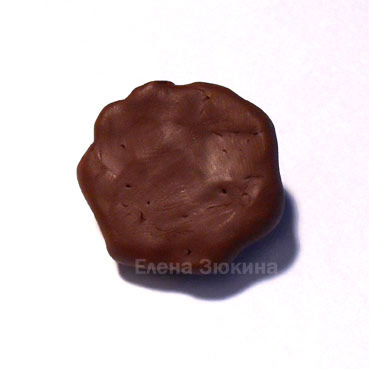
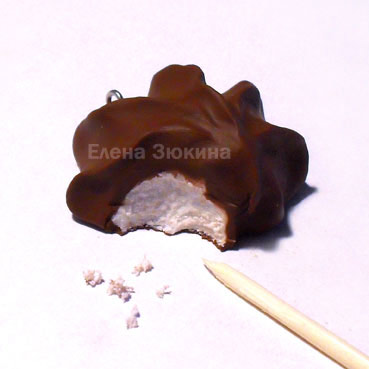
Marshmallow in chocolate
Try to close the zefir from clay, which can be used as a decoration of any gift or jewelry. This will help our master class.
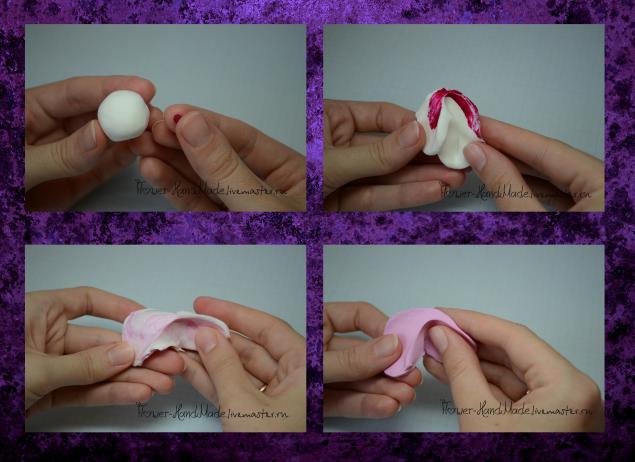
To make an appetizing moisture, you will need a white and brown clay, as well as various tools for making the effect of the "bought piece". White clay, choose a marshmallow type accordingly.
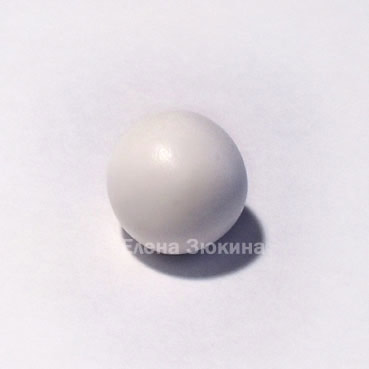
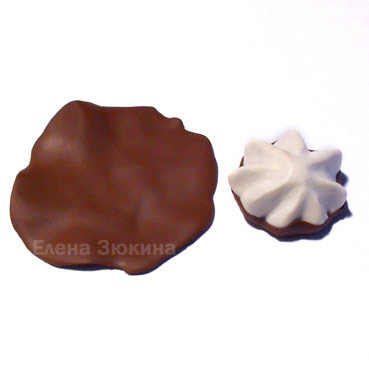
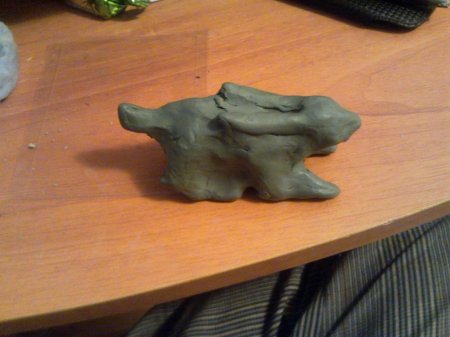
To begin with, we roll the ball from white clay.
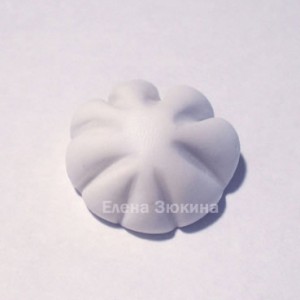
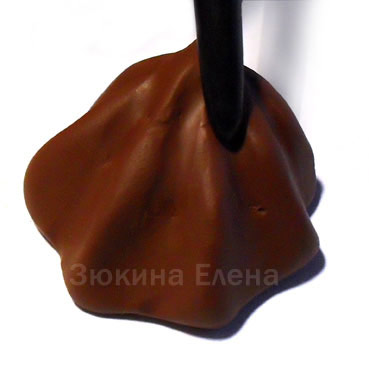
Find the ball, giving it a little cone-shaped shape, then the toothpicks, stack the mooring of the marshmallow, as shown in the photo.
Do not take a blank in your hand, let it lie on your work surface, as you can spoil the product shape.
Continue forming the shape of the marshmallow.
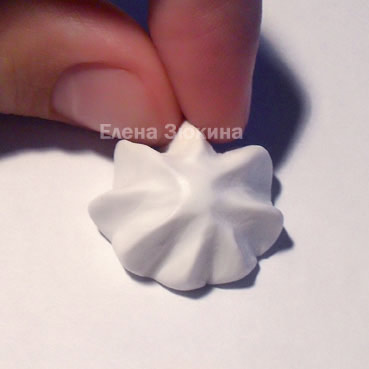
Sharpen the Ribs of the Marshmallow and put the blank in the refrigerator.
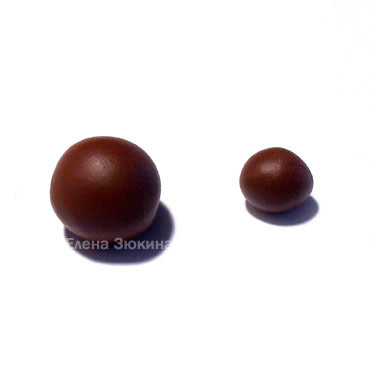
Take a brown clay, as close as possible to the color of the real chocolate, and roll a couple of balls - one bigger and other smaller.
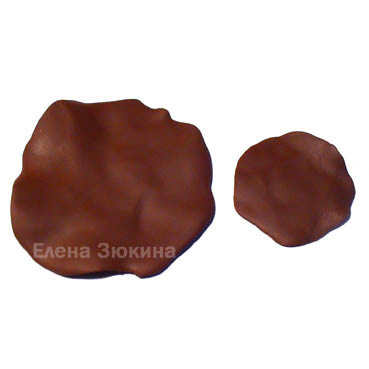
Further you need to flatten both balls in cakes, they must be warm to make it easy to cover the white core of the marshmallow. Get the marshmallow from the refrigerator and begin to cover it with "chocolate". Put the marshmallow on the little cake and seize the edges.
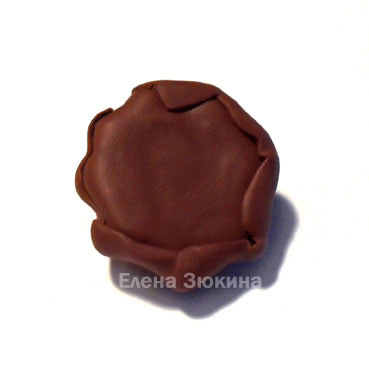
Large cake from above, we cover the marshmallow and smooth, repeating all the bends of the workpiece. Make sure that the brown clay is well heated.
![]()
Generate the edges of the top chocolate to the bottom. Schedule them in the event that air bubbles appear, pour them with toothpick.
Now you need to reveal the grooves on the marshmallow, use some smooth wand for this. Keep the image of the present marshmallow before your eyes and give dessert a natural look.
Again, press the ribs of the Marsfire.
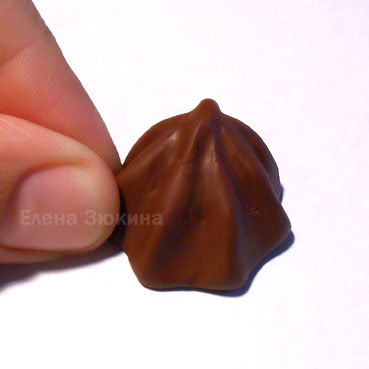
You can additionally explode the spill place to emphasize the zephic structure. Your marshmallow is ready. You can make several such products and decorate them a beautiful plate. The most important thing is not to succumb to temptation and do not try the marshmallow to the tooth.
Video on the topic
For greater clarity, you can watch video tutorials on creating different crafts from polymer clay.
Overview of Clay Craft by Deco Self-Fastened Polymer Clay
On the Internet, there are many scattered information about the properties of polymeric self-sharpening clays for modeling colors. In her search, I spent a lot of time, but something was missing. In the process of working with various clays, a desire arose to structure information for their own convenience. "Field notes" gradually resulted in a full-fledged review of materials, converted by their own experience, observations and experiments. So the idea of \u200b\u200ba cycle of articles telling about various self-hardening clays was born. Introducing your attention Clay DecoClay. This is the first clay with which I started familiarizing with the art of modeling colors, so I decided to start with it. All reviews are designed to help beginner masters. In the comments are welcomed by experienced masters.
Calculating Japanese Polymer Clay Craft by Deco.
Description
Clay Deco is positioned as accessible and easy to use for everyone who wants to join the art modeling colors. Since this Japanese clay is not toxic and safe, even children from 7-8 can be sculpted from it, however, under the supervision of adults, still ... these are children.
To many, this clay resembles an air marshmallow or a fresh pastile, because of what received the folk name "Marshmallow". And it looks like the truth. Polymer clay model DECO real pleasure. It has a pleasant aroma and a very tender texture, soft and enough elastic. She does not want to get out of her hands, and the modeling turns into a meditative occupation. Clay is produced in 7 colors. White clay is the main and manufactured in packs of larger volume:
- White clay: 137 gr., Putting size 20x11x2;
- Color clay (red, yellow, blue, green, brown, black): 55 gr., Putting size 17x9x1.5.
Structure
Cellulose, talc, water, natural fibers.
Storage
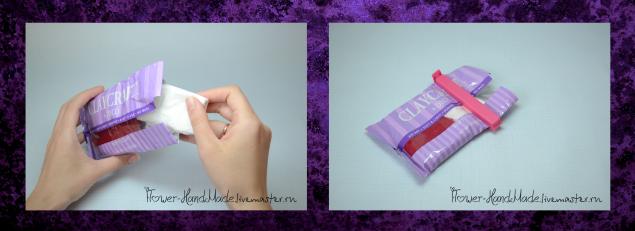
Store open packaging is recommended tightly closed, without air access. You can tightly clamp an open pack and take a tape or take advantage of a large plastic clamp. If the next time you plan to sculpt not soon, then it is better to put a wet napkin inside the pack.
Do not store clay and finished products under the right sunlight, as pigments over time have the fading property.
Do not store clay near the heating devices and in the cold.
Technique Lappa
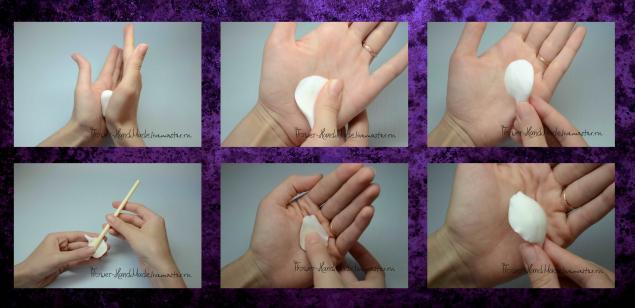
In order to understand how much clay is needed for each specific flower, imagine the size of the finished flower (or look at the original). Size Clay clay for modeling is almost equal to the size of the future flower.
In the cheese (not dried), the details are very well glued together. If the fingers are a little moistened with water, then the details can be glued to each other almost without seams. Slightly gliding on clay fingers, you will achieve smoothing irregularities and junctions.
If the details have already grabbed and dried a bit, then use PVA liner or latex glue to connect them to firmly.
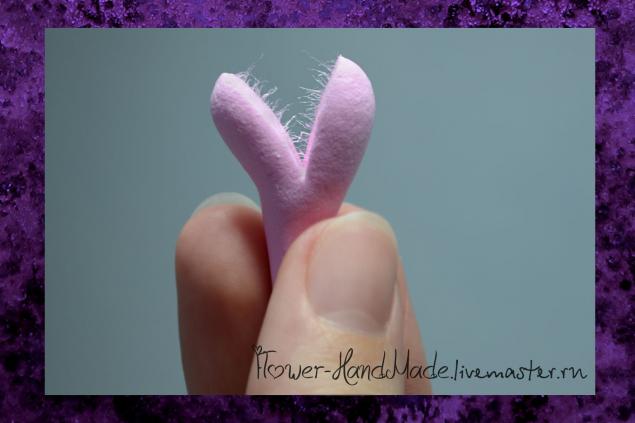
In the process of modeling, make the base of the petal or sheet quite thick, and the edges are thinner. Petals are easily formed on the palm by rolling the "drops" with your finger, thereby achieving the texture of each petal and the streaks are imprinted.
In this clay, basic stacks are used. And no catter (cutting) are not used. Scissors apply for the formation of small simple colors.
![]()
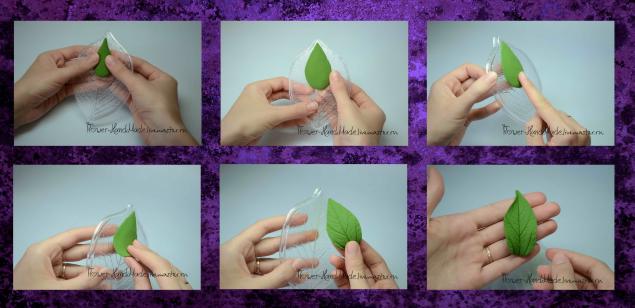
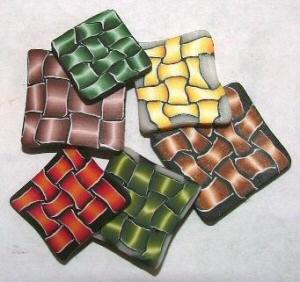
The leaves are formed on the mits. You can use plastic or silicone. Clay Craft by Deco clay gratefully adapts any texture. To give texture with decorative products, you can also use lace or tissue with a pronounced weave of the threads.
For modeling, take a piece of clay the necessary value. Small clay surplus and those pieces or ready-made items that you do not yet, stay under a wet cloth during modeling. Verified napkins that do not affect the composition of clay - Huggies Ultra Comfort. Either you can use a slightly wet unking fabric.
Restoration of clay properties when dried
If the Clay polymer clay can still dry out a bit, then it can be reanimated. Wrap the refrigerant piece of clay into a wet napkin or cloth, then tightly wrap the resulting intake of the food film and wait a few hours. After the time expires, expand clay and try it out well in your hands. Also in the raid piece you can intervene a little fresh white clay Deco and smash.
Clay properties during modeling
Clay Craft by Deco is very pleasant and easy to work, will not stick to the hands.

This self-hardening clay and it does not require any additional actions for its drying. Hardens in air within 24 hours. The base of the flower can stick several days depending on its thickness. In the process of drying, the Clay Deco gives a small shrinkage.
Large flowers (for example, Peony) during the drying can "lead" so that the petals dried in the right position, between them and the pieces of paper napkins can be carefully closed. And dry the finished flower is in suspended over the battery or dry the hairdryer. So the clay will quickly grab from above and the process of frosting will be reduced. Periodically, it will be necessary to ensure that the flower dries and, if necessary, correct the petals if they fall out or savage.
If sculpt from a little bit of fading clay and use not very sharp scissors, then when cutting "drops" can be visible micro "hairs" (fiber). However, this does not affect the properties of clay and the finished product. For the aesthetic, the "hairs" can be carefully pushed by stack.
Clay properties after drying (in finished product)
Since the Japanese clay decoclay poorly tolerates contact with water, it can be coated with acrylic varnish (matte or glossy) for artistic work to increase moisture resistance. If the finished product breaks into the water more than a day, it will very much.
After soaring the clay is very light, although the flowers and sculptural miniatures appear to look more difficult. In the finished product, the clay becomes velvety, matte and opaque. By appearance And sensations look like a papier-mache.
Clay Craft By Deco after drying loses its elasticity and becomes absolutely inflexible. With an inaccurate circulation or a strong drop, thin parts may be broken down, and the edges of the petals can turn and be covered with a fine grid of small cracks.
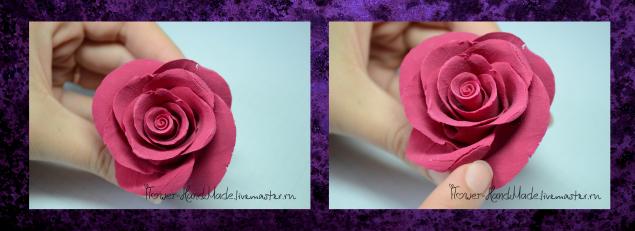
For a visual demonstration, we took a flower that is not a pity (this is the very first training rose, surviving moving and many years storage in the box in a box with materials for creativity, as well as the non-challenging exploitation by a small child and other curious).
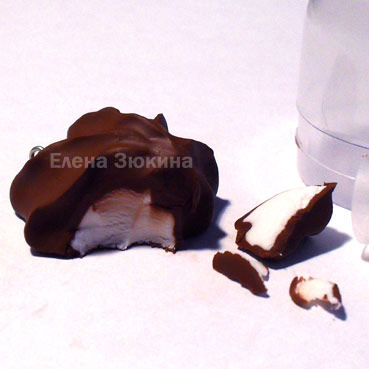
Contact with water (cruel experiment)
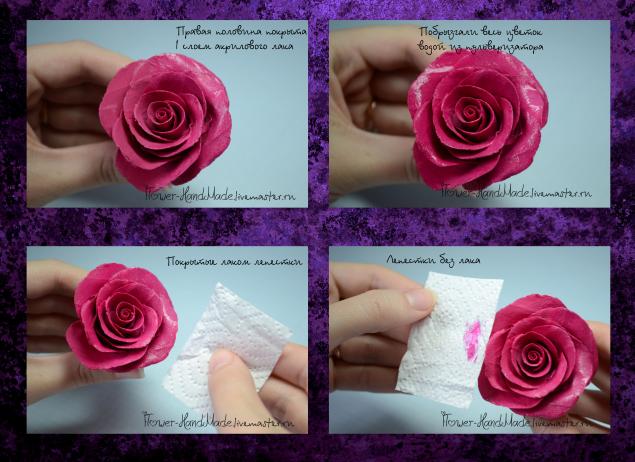
In experimental purposes, we covered half the flower with one layer of acrylic varnish for creativity, the other was left as it is. We specifically used glossy varnish so that in the photos it was noticeable. If you like a velvety surface, then you can cover the finished product with a matte varnish.
We understand that no one will soak broots and bouquets for half an hour in the water, but we were very interesting.
Evenly sprinkled with water from the pulverizer and alternately put a paper napkin to each half. As can be seen in the photographs below, after the coating varnish, the petals dry faster and do not paint.
Then we decided to check what would be with long-term contact with water. We put the flower into a glass with water and left it for 1 minute. Petals with varnish remained unchanged, clay and without a varnish coating broke a little, the edges became more rounded, and the texture of petals began to be lubricated. After a 30-minute stay in the water, the clay began to grow strongly, but the petals covered with acrylic varnish looked quite well. They just became a little softer, and they could be bent a little bit. After drying, these petals remained quite close to their original form.
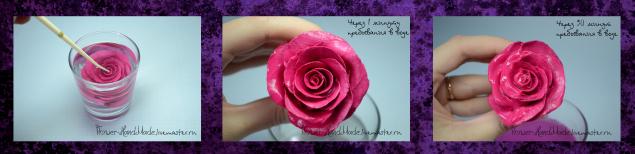
Outcome. Coating the petals acrylic varnish (even one thin layer) will allow you to keep your favorite decoration or a bouquet in good condition with an inadvertent contact with water.
Coloring
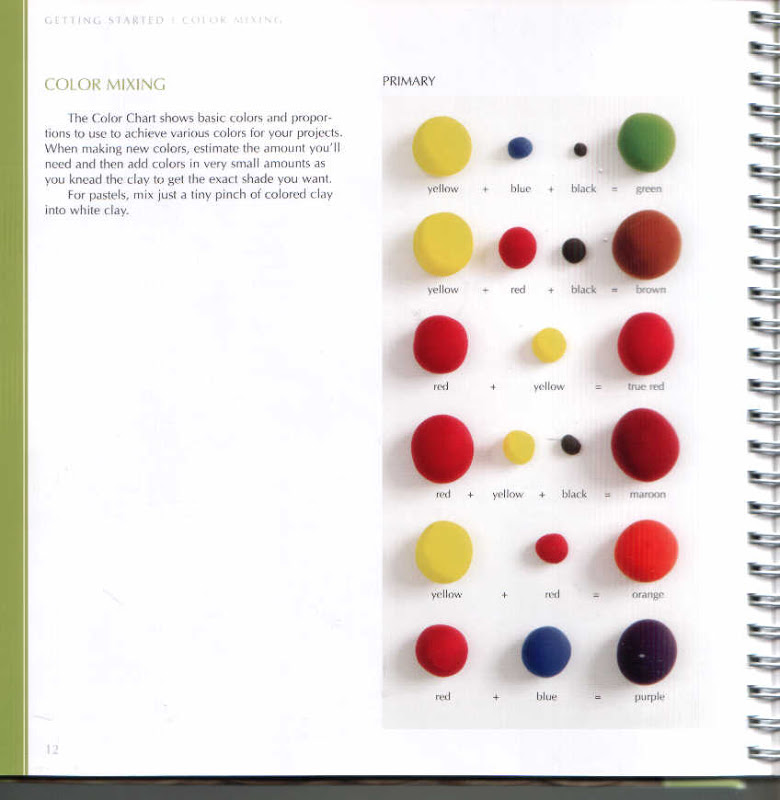
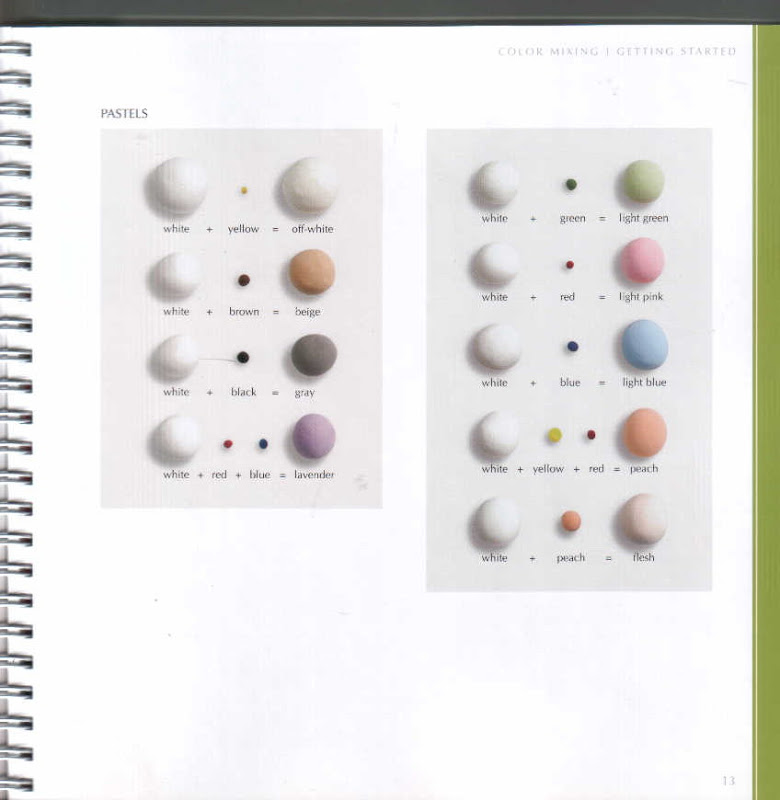
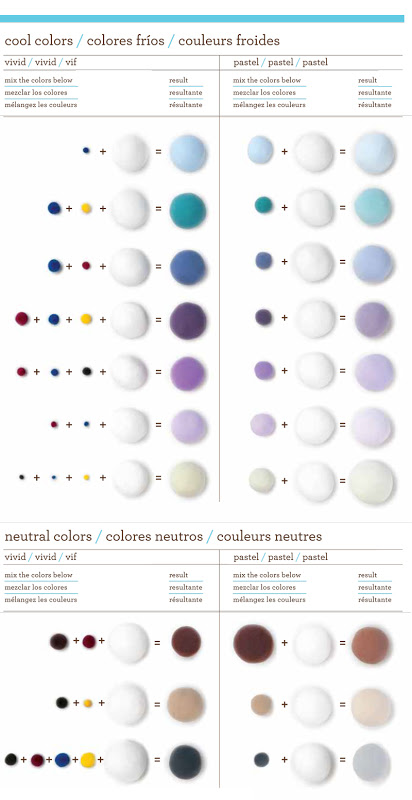
The Japanese Clay Deco is painted by mixing colored clay with white, in this way the brightness and variety of colors is achieved.
To obtain different colors when mixing clay clay Craft by Deco, you can focus on ready-made schemes, for example:
- Scheme from the book Yukiko Miyaki "Clay Art for All Seasons"
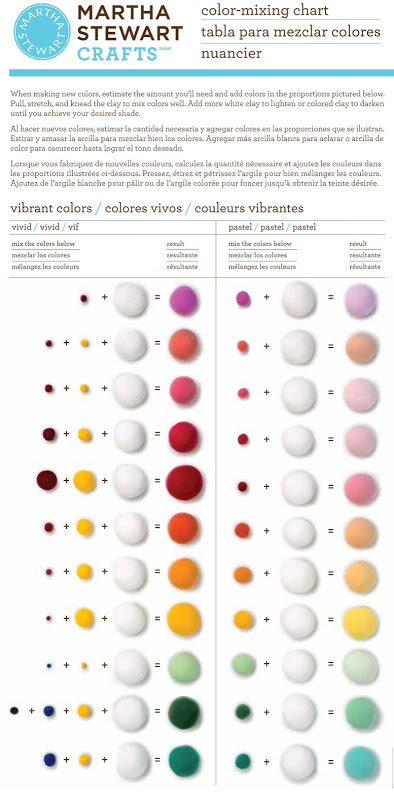
Scheme from the finished set for creativity Marta Stewart, which is designed together with the masters from Deco.
You can intervene B. white clay A bit acrylic paint. The amount of acrylic added to clay does not affect the intensity of the resulting color, it will still be pale. In addition, when adding a large number of acrylic, clay properties deteriorate. It becomes sticky and dries faster.
Intervention in clay decoclay of oil paints can lead to unpredictable color results. Colored oil pigments change their color not only during the kneading with clay, but also after drying it. Colors As a result of such staining, flat and unnatural are obtained.
The finished dried product from Deco from above can be toned with a dry brush with acrylic paint or pastel. Oil paint lies badly and dries very long.
Recommendations for the care of finished products
Ready products made of clay Craft Craft by Deco is not recommended to wet. If you still wooered them (for example, got with a bouquet or a hairpin under the rain or dipped into the water with a ring with a ring), then they will survive a short contact with water. Main, carefully remove and place the product for drying. Try not to touch the subtle details so that there is no deformation.
Light pollution from the product can be removed with a wet cloth, but it is impossible to rub much so that the texture does not disappear.
Clear the finished flower from severe dust pollution can be soft dry brush. With a light pressure, pass the brush on the petals and blow the remnants of the dust.
Areas of use
The Japanese Clay Craft by Deco clay is used for modeling colors, small figures and sculptural miniatures.
Ideal for decorative flower arrangements or jewelry that will not worry every day - for decorations in the hairstyle (rods, crests, hairpins), rings and seelings.
Also from this clay, delicious wedding accessories are obtained - bridal bouquet, decorations for hairstyles, boutonnieres, figures on a cake.
It can be widely used in scrapbooking: clay is well taken by the shape of silicone molds and because of its ease does not waste the product (for example, a postcard).
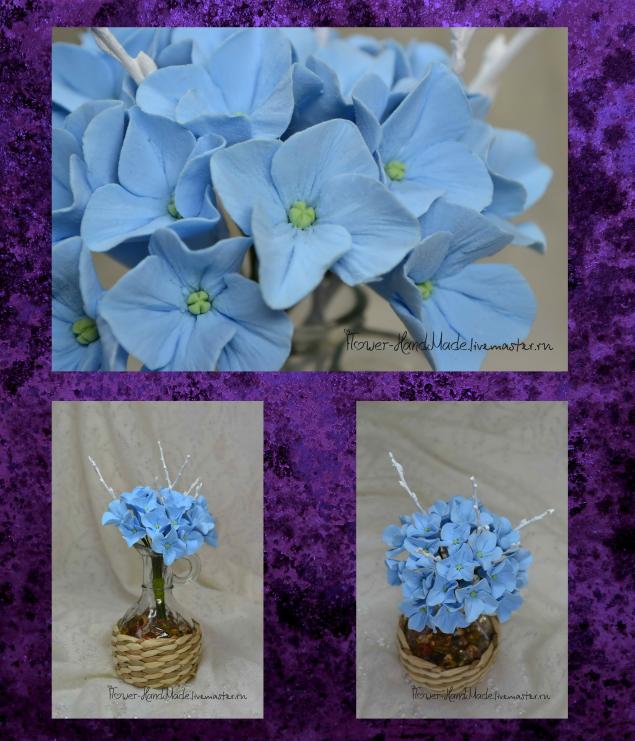
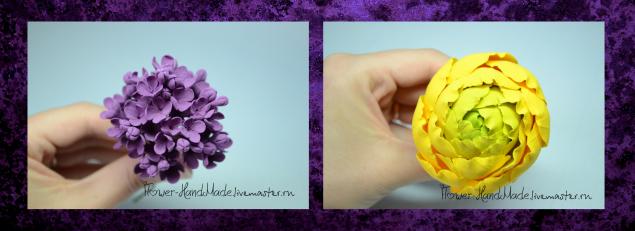
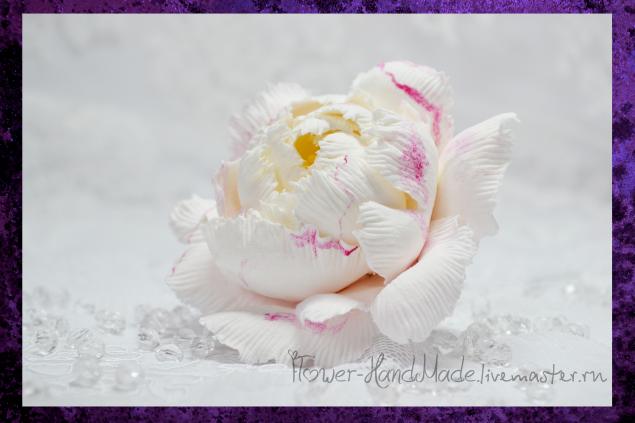
Below are the photos from Clay Craft by Deco.
Outlet of hydrangea
Lilac and Ranuncoule
Peony in wedding hairstyle
Wedding rings
Wedding Cake Figures

Fimo Air. - this is a separate clay series for creativity, since called self-hardening plastic.
Her difference from thermoplasty is that it does not require firing and dries in air. The FIMO Air Fimo AIR clay is 90% of the natural components, that is, is an environmentally friendly product.
Self-hardening clay:
· Cheaper
· Soft
· Easy
· dries in air in 24 hours.
· excellent material for children's creativity
Series Fimoair. Selected on the types:
light, Basic, Microwave, Natural.
By the name of the types of polymer clay it is not difficult to guess that
Fimoair Light - the easiest self-hardening plastic. Soft in work. Magnificent suitable for children's creativity.
Fimoair Basic - Self-hardening polymer clay. Natural composition and color.
Fimoir Microwave. - This type of clay can be baked in a microwave oven to accelerate the drying process - 10 minutes in the microwave and no need to wait 24 hours until complete drying.
Fimoair Natural - composition of cellulose. Strength. Similar to wood in appearance.
Keep self-hardening clay is necessary in tight-closed briquettes, and when working, try to close the packaging as quickly as possible.
Products made of self-hardening clay by about 8-10% give shrinkage, that is, dried up, because water evaporates from the plastic.
After drying, it is possible to process: grind, drill, paint and vapor.
Choose I. buy self-hardening polymer clay You can in our store. Call, our managers will advise you.
Today we will discuss this topic as miscelled of clay for beginners. Clay for modeling is a self-fascinating polymer clay. Refers to so-called cold plastics that do not require firing and any heat treatment.
Polymer clay properties for modeling
Dries in air at room temperature on average per day. Drying time depends on the layer thickness. Approximate drying speed 1 cm deep in 24 hours. This plastic can also be called a ceramic or ceramoglyinous mass.
The clay is soft, there is a lot of moisture in it. You can sculpt for a long time without using water. Working, you can put a mass for modeling in a plastic bag and, if necessary, pinch a piece.
Any clay plastic lipates a little to the hands. Hands should always be a rag or a cleansing napkin. Clay self-hardening plastics often give cracks when weighing or tubing.
The simplest thing you can make a polymer clay for the first time is a bracelet.
The probability of cracking increases on a thick layer - more than 0.5 cm. But they are not a problem, since they are well embarrassed by fresh casket (slip) from the same mass that rubs into cracks. If the crack is diverged after such a restoration, it must be expanded and put it over.
After that, it should be smoothed with your fingers or tools, give dry and sand. Cracks can appear on crafts from the mass that has long lying in the opened packaging.
Types of clay for modeling
Polymer clay can be divided into two main classes: reinforced and selfless. The first category is the most common. Its main disadvantage is the need to bake ready-made products in the oven for hardening the material. However, it is more compensated by the ability to unlimited the elements or details unlimited.
Selfless clay for modeling in this respect gives less space, and at first she is better not to use it.
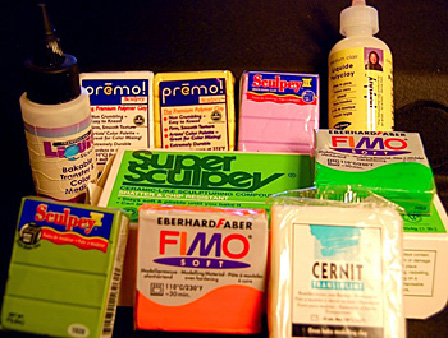
In addition to this classification, clay can be divided into manufacturers. The most popular types of clay in the world are produced under the FIMO brand:
- FIMO Classic - a rather solid variety of thermoplastic, is complex in work, but perseverance and work will allow you to create a rich range of combined patterns.
- FIMO SOFT - on the contrary, very soft Materialsuitable for creativity with children and for beginners.
Beads in a strip
To work, you will need clay for modeling multiple colors (four colors on stripes and black color as the basis).
Roll some amount of plastle with a rolling pin, fold the resulting plates and cut them in half. The resulting "turrets" again roll the rolling pin and cut into parts.
Next, it is necessary to add all parts by the column, making them in black. Gently surrendered only to the excess air and the edges are connected. Ready Hollows need to cut into thin plates. Each plate stretch along the drawing and twist a little.
The resulting petals need to wrap over the spiral of the black bead - the basis. Roll in hand. Toothpick make holes under the thread.
At first, in the manufacture of crafts using such a material, like a polymer clay, a photo of the finished product taken for the sample, keep yourself.
Video materials on the topic of the article
Beginners can try to make fleets from polymer clay:
What do needed tools for modeling:
How to make a cat:
Clay roses: