In this material, we consider the installation process of the perforated corner. In particular, we will deal with questions: how to fix the corner how to align it how to make an finishing finish. For maximum clarity, the article is complemented by the corresponding photographs and video.
First of all, a few words about what will be needed to perform work. So, in addition to the perforated corner, we will need the following materials and tools:
- spatula (50 mm);
- spatula (150 mm);
- nozzle mixer (for a drill);
- mcList (wide brush);
- building level;
- primer deep penetration;
- dry gypsum spacing ("Start").
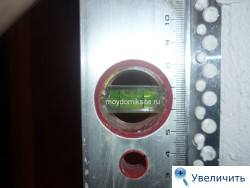
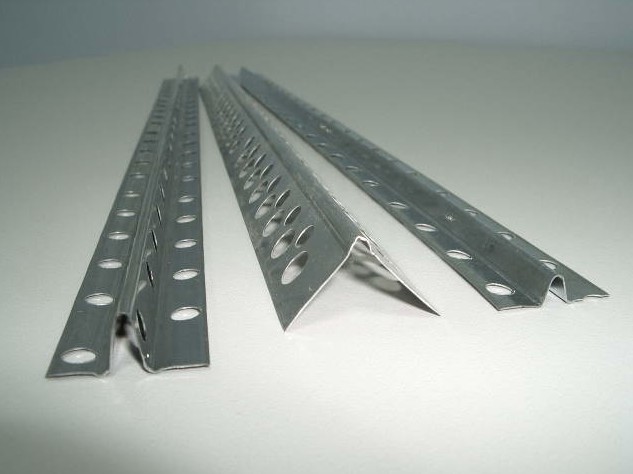
Regarding the perforated corner. In this case, it all depends on the corner, the finish of which you will do. If work is carried out on the repair of an external angle, indoors where the greatest probability of damage is present, it is more expedient to use plastic corner. Such a room, for example, is a corridor.
Of course, the use of a plastic corner is not a mandatory requirement, rather this is a recommendation. For decoration, both metal and plastic corners can be used equally. Simple, plastic, in comparison with metal, more profitable in terms of durability: they do not impetuous in case of rather strong blows.
Preparatory work
With the tool and the type of corners, it is understood, you can move to the preparatory process. It reduces to priming the repaired plane and preparation of a gypsum solution.
First of all, we prepare a solution from the starting gypsum spacure. By the way, not only the starting, but also the finishing putty can be applied to glue a paint corner. You can also use various cement adhesive compositions, such as laying glue ceramic tile.
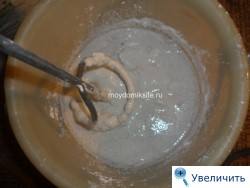
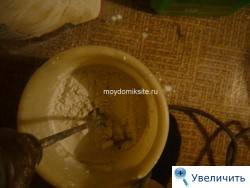
The solution is prepared as follows: In the pure container, we gain a certain amount of water, add a dry mixture into it and stir all the mixer. Important: The solution for installing a perforated corner should be rather thick - much thicker than, for example, for putting the walls or for the glue of the ceiling foam plate (ceiling pastile with tiles).
So, the mixture is ready, you can proceed to the primer. Here everything is simple and quickly: with the help of the McList, we apply a soil on the surface to be processed, evenly smearing it. Several times there is no particular sense - it is quite enough and one time.
Installation of perforated corner and alignment
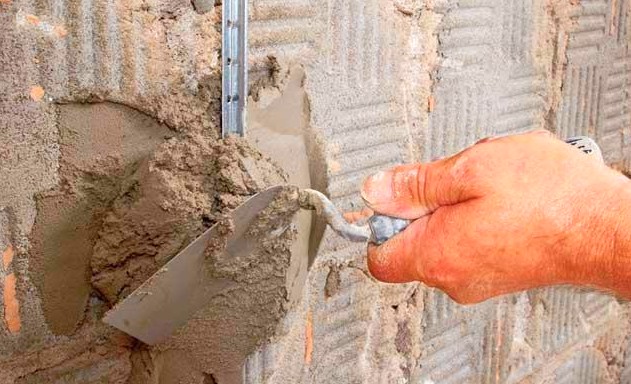
A small spatula is applied a small amount of spacing solution on a larger spatula and carry our glue directly to the repaired angle. This work is performed at the entire height of the angle.
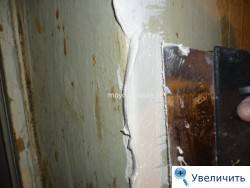

Now we lean the perforated corner and gently "indulge in" it. With pressing / pulling out of those or other sections of the angle "on the eye" align its verticality.
Next, take the construction level and with its help check the smooth installation of a painting corner. If necessary, carefully not to damage the corner, change its position. Thus, we achieve the production of perfectly level angle.
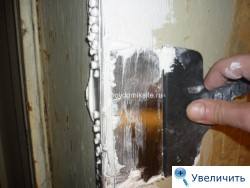
At the end, put the corner from one and the other. It is convenient to perform this work after the putty, by means of which the corner keeps, completely dried. You can do this and directly during the installation process, the main thing is to do everything as carefully in order not to disturb the correct vertical of the corner.
In order for the walls in the alignment of the walls of the walls, the wizard did not rarely use various plaster corners. Yes, at first glance, this item may seem completely simple to you - she is not so easy to use. If you decide to do this - you need to follow a number of rules.
It is about this that we will talk more in the framework of this material. Consider - how the corner is plastered, how to use it correctly.
Views of corners
It is not difficult to guess that the corner of the plaster today is represented by the diversity different species. Now more from Consider.
Metal models
When the finisher is taken for work, he needs to have the necessary number of corner overlays at hand. And if you consider that today in retail chains a range of such products is quite wide, the model is better to determine in advance - so that then there is no unpleasant surprises.
The pads for the shp can and plastering on the corners, depending on the material, is customary to be divided into plastic and metallic. Consider each of the groups of products, but for starters - we will deal with the most popular.
Metal corners under the stucco can be made of different metals:
- From galvanized steel - these products are distinguished by high strength, at the same time they weigh a lot (if compared with the analogues). Moreover, there is a chance that this corner will eventually rust with time - especially in those areas where the plastering layer is thinned. Metal there is subject to direct impact of moisture (from the atmosphere)
- From aluminum - such products are obtained very durable. They are practically not afraid of corrosion, are very easy. But there is one "but" - the mechanical parameters of this lining will be an order of magnitude worse than that alternative options. Just aluminum is a soft metal - and everyone knows about it.
In order to overcome the galvanized steel with time, there is no corrosion, during installation with the product it is necessary to contact very carefully. Try not to damage galvanized - when the corner is fastened on the wall. And the trimming is better to make scissors for metal (from the grinder it is better to refuse).
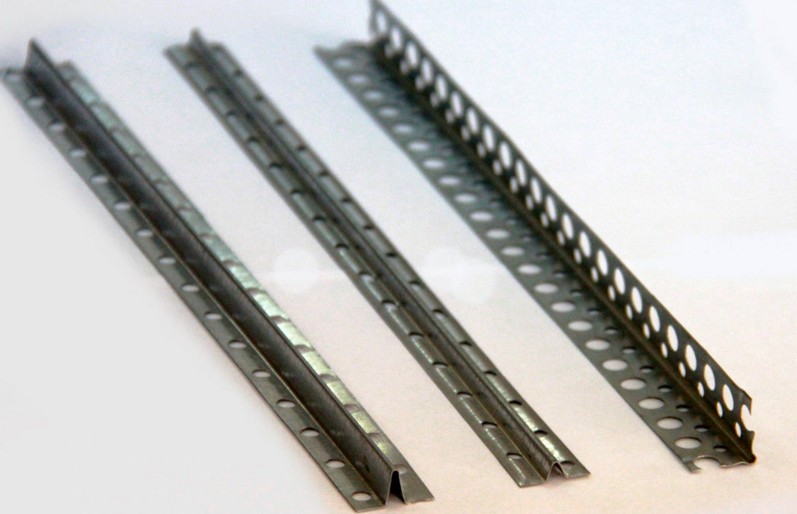
Metal corners may differ in their shape:
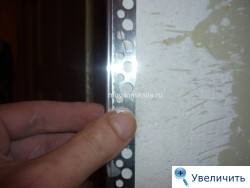
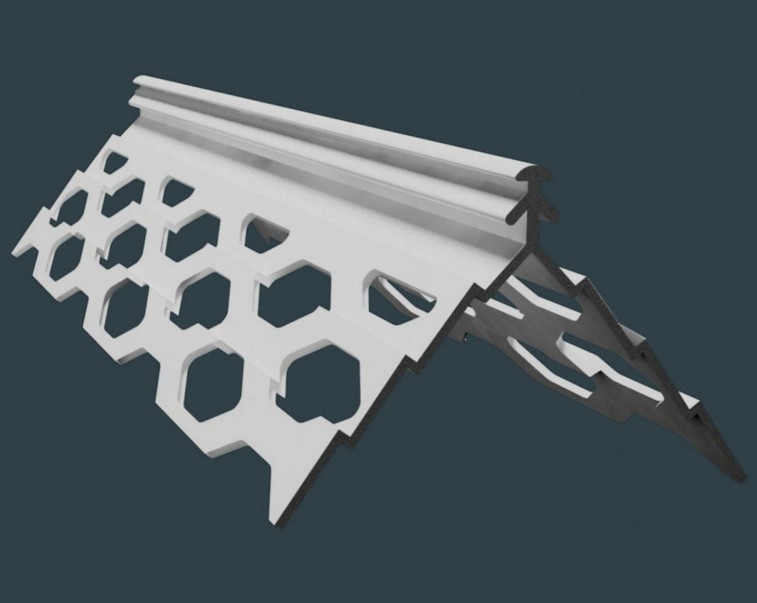
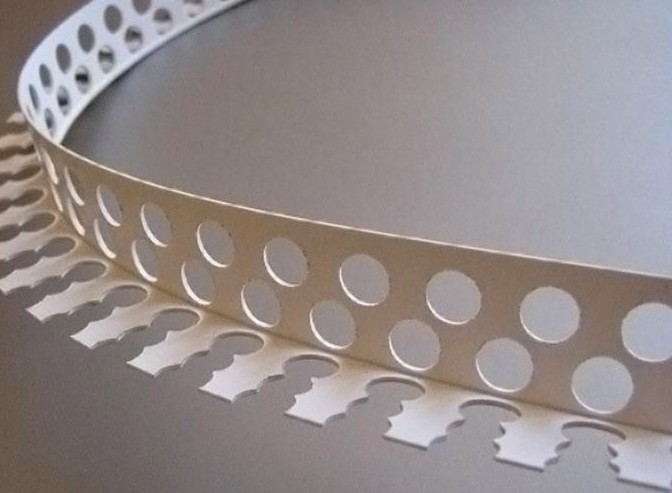
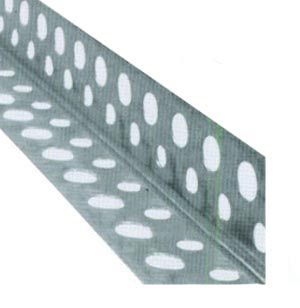
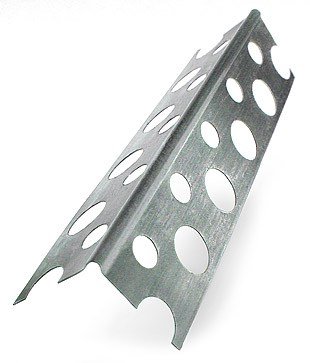
- Usually the most popular recognize simple corners - That is, a metal strip, curved under ninety degrees. The thickness of such a product is only 0.4 mm. Perforation is applied to sides of such a lining - this is done so that the mass of the product has become even less. And the clutch with a plaster solution thanks to such actions is significantly increasing;
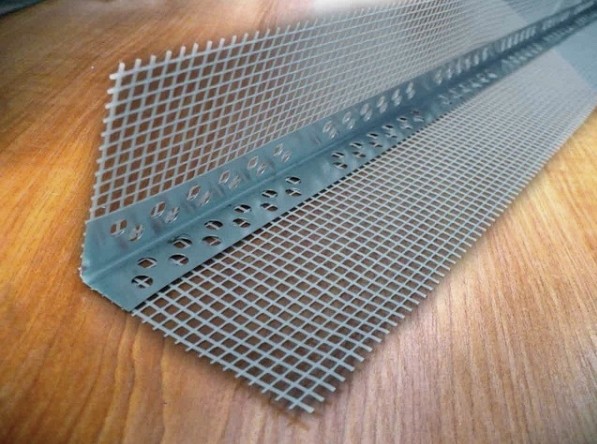
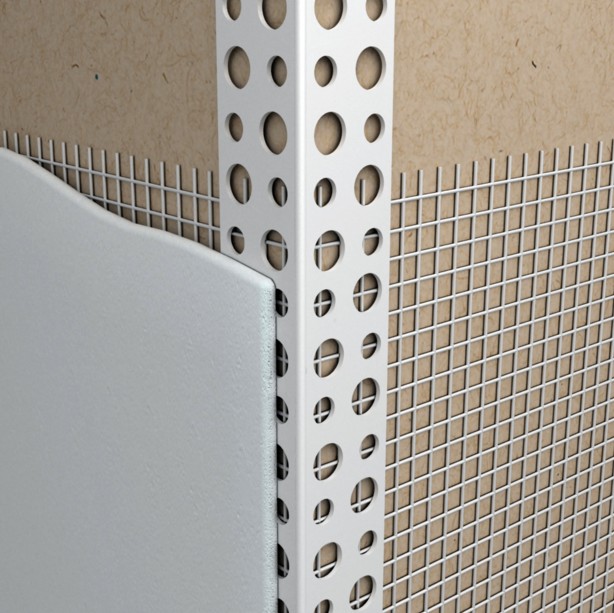
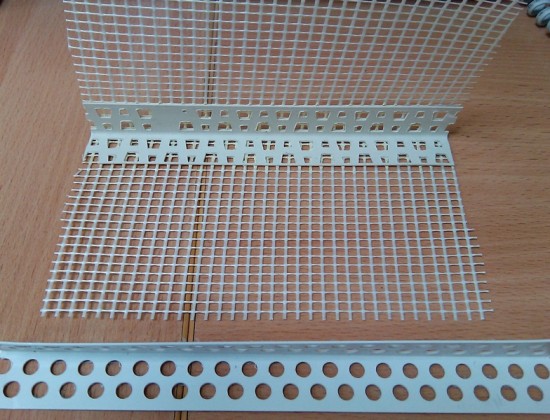
- The plastering corner with the grid looks a little different. Such models are chosen when wet shocking is made. The corner itself in this situation is equipped with a narrow lining - it is attached to its edges with a grid of steel, the width of which is a pair of cm.
The corner of the plaster perforated is ideal for fixing the plane. At the same time, your finish becomes more durable - this is a fact.
- Today in the market you can also choose for yourself the models of the corners that are combined. In this situation, the aluminum or steel corner is equipped with a special polymer grid (fiberglass uses extremely popular). Such products have all the advantages of both plastic and metal models of plastering corners;
- It is also nice that the cost of combined plaster linings is slightly higher - but also to serve you will be longer than;
- The main difficulty in working with metal overlays is that such material is subject to corrosion - especially due to the effects of alkalis and acids. That is why many masters advise them to establish them only if the finish is produced by latex, acrylic or gypsum.
Models from plastic
Consider the options which today are the most used:
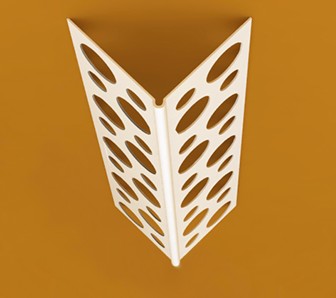
- Standard lining - By design, this element is an identical metal corner. But instead of steel or aluminum, plastic is chosen for production - high enough quality. Such corrosion linings are not afraid, so if the plaster is carried out, where the level of humidity is high - it is necessary to use them;
- The main disadvantage of a standard corner of plastic - the thickness of the material is quite large. At the same time, the plaster is not applied usually with a thick layer, it rarely happens that the layer is more than 3 mm. And this is quite enough to produce a disguise of a plastic product;
- Arched corners for plaster are used in those situations when it is necessary to arrange the joints of the planes on the surfaces that are curvilinear. One side of this corner is not solid - it is segmented. Due to this product, it is always possible to bend, while the bending radius will be arbitrary;
- In addition, you will easily find mesh corners for plastic plaster. The grid in this case is an overhead element. These corners are used to close them in a thick stucco layer. The reliability of fixation increases repeatedly, because the corner will be held not only on the basis, but also due to the high adhesion of the mesh part and the solution;
- It should be noted the model, which uses not so often. We are talking about a universal mesh corner for plaster. It is a thin strip of plastic (or even a tape) - quite a solid grid. It can be flexing as an angle. Use these overlays to make indirect angles - that is, those that are less or more than ninety degrees.
Frequently, this model is used when finished the inner joint of the walls is performed. If it were not for such an element, it would have had to do the work at all without a lining - which is not recommended.
The main advantage of plastic plaster corners - they are inert in a chemical plan. Often such products are laid directly in (which, moreover, has an alkaline reaction). And in general, corrosion polymers are not scary - largely it makes it very popular (even if we take into account low strength, compared with metal products).
How to use angular linings - we understand
Now let's talk about how to properly apply plastering corners (lining). However, about everything in order.
Cooking the finish angle
In order for a plastering corner of metal or plastic on a hundred percent one hundred percent with the performance of its function (protected the joints of the planes from possible damage) - it is necessary to install it correctly.
In fact, such a task is not particularly difficult. But at certain points you need to pay attention:
- First of all, a capital wall must be under the angular lining. To do this, you need to check the quality of the surface - if necessary, all discharged elements are removed;
- Then, all walls are ground and diverse - including the angle. First remove dust, then the primer is applied. This must be done in any situation - so that the plaster layer has good adhesion regarding the foundation;
- In the case when the wall joint has severe damage before installing a plastering corner, alignment is carried out - a plaster solution will help. Of course, the time of work will increase due to this approach, and the finish will be carried out longer - but it is better to "lose" in this way a couple of days than to get a plane at an angle;
- Next, plaster beams are exhibited on the plane. It is necessary to navigate directly on them when aligning steel or aluminum corners.
Only when all work aimed at the preparation is made, you can start the installation of a plastering overlay.
Krepim corner
![]()
It is impossible to say that the corner on the wall is established somehow difficult. Consider quite a simple instruction:
- Small slides of the solution are superimposed on the surface. 300 mm - just as the magnitude of the optimal step;
- The lining is cut into size - the knife will help you (if you work with plastic models). If the metal is made of metal (aluminum or steel) - use metal scissors. From the application of the disk saw, it is better to refrain - the processes of corrosion are then necessarily activated where there was heating;
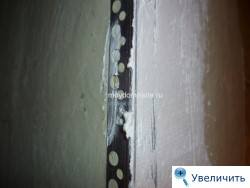
- The corner is installed on the wall, it is pressed into the solution so that plaster penetrated into perforation. If there are mesh lining on the edges - they are in the leveling layer it is necessary to immerse so deeply as it is possible;
- With the help of the level and the rule, monitor the correctness of the installation of the lining. If there is a need - the position of the part is adjusted by smooth presses.
Consider - if you laid an insufficient solution, the lining will have to remove and add an alignment mixture. Corner, in any case, you need to put it with lighthouses at one level. One plaster "output" is not necessary.
If the layer of finishing is thin - corner can be mounted on mechanical fasteners.
But, while:
- The lining is installed at an angle, make alignment on the plane and vertical;
- For fasteners, the holes are drilled;
- In the obtained holes, you need to score a liner from plastic - they are fixed by locking stainless screws;
- If your wall material allows, it is necessary to use not anchors, but a self-tapping screw made from a stainless steel;
- Keep in mind: It is not worth using standardized mounts here, since in case of their oxidation, rusty traces may appear - or on your plaster, or even on that finish that will be applied on top of the plastering layer.
Stood the junction of the planes and alignment
As soon as the solution to which the corner pad was installed, hardens - can be taken for shuttering.
Everything is done here so:
- As part of the first stage, the wall is equalized - at the same time, it does not reach the corner somewhere at 400 mm;
- Then the solution is not so far from the installed corner - and through the rule it is loaded: so all excess will be removed;
- The above operations are repeated, but this time is not a rule, but a wide spatula or sixrock;
- The connecting planes are aligned - the master should do so that during this work plastic or metal is not found;
- To make an internal angle, you can apply a special spatula. Its blade has a special form - so both surfaces can be removed very qualitatively: the correct recess will be formed between them.
Watch the video on how the plastering corners are made. Surely, this lesson will help you to get together with thoughts before work and understand - how and what should be done here.
Now we need to wait, when the plaster is dry - the outer layer must be subjected to polymerization. And then take a grout.
Everything looks like so:
- The angle will first rub on on the one hand, then - on the other;
- The wizard when moving the grater should ensure that it does not remove the material from the edge - after all, the occurrence of chips does not exclude in this situation. You do not need to be allowed;
- Curvas with a sponge produced grout of the inner corner. If there are no putty in the plans, the plaster can be corrected by ordinary sandpaper.
RESULTS
Using today corner linings for plaster walls significantly facilitates the work of those owners who want to carry out repairs in an apartment or at home on their own - without the involvement of professional brigades.
Yes, if you have little experience (or it is missing at all) - it is not so easy to make an angle, so it is not necessary to neglect with different auxiliary fixtures. Act - and everything will definitely work out, the experience will come with time and everything will get perfectly - right from the first time!
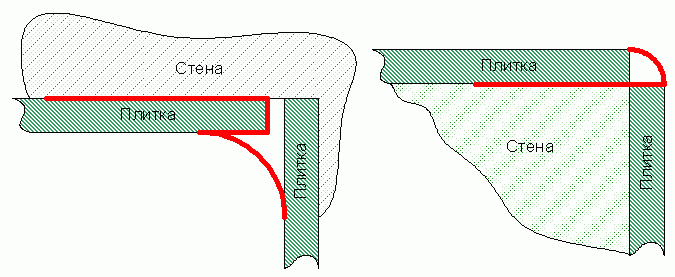
If you do not live in a round tower without windows and doors, then in your accommodation, there are necessaries corners - internal and external. And during the repair, you have to decide how to separate them so that they come perfectly evenly and protected from mechanical impacts.
If the mix between the walls and the ceiling or the floor is easy to hide the plinth / eaves, then the putty of the inner angles between the walls and the outer, formed by window and door slopes, niches and protrusions, should be performed qualitatively. To simplify this task, special perforated corners are used, about the purpose and types of which you will learn from this article.
Perforated corners are often called paint or plaster, as they are used during putty / plaster to strengthen the corners before.
They serve two goals:
- Reinforce the angles, especially external, give them additional strength and resistance to damage. It is no secret that the protruding angles more often than flat surfaces are subjected to chips, scratches and other mechanical effects, for example, with a row through the doorway of large-sized furniture.
- Allow you to easily and quickly make a junction of perpendicular surfaces, make it smooth and clear. This in turn facilitates the subsequent finish: glue the wallpaper or tile in even, not "dwelled" angles is easier, the result is better.
What are there corners?
Materials for manufacture
First of all, these products are characterized by the type of raw materials from which are made.
The main types are three:
- From galvanized steel. Durable, reliable corrosive resistant due to zinc coating from all sides.
However, during long-term operation, in a humid environment, there may be caused by the appearance of rusty spots.
- Aluminum. Light, durable, are not subject to corrosion. But not resistant to the close proximity with copper and some other substances.
- PVC (from polyvinyl chloride). The price of these products is the lowest, and their advantages are not less than that of metal corners.
First of all, it is absolute inertia to the effects of moisture and aggressive chemicals - plastic corners are not corrosion, do not rot, do not deform.
For reference. Every year, PVC products are becoming increasingly popular. On sale there are different modifications of plastic perforated corners, including combined with ribbon-sickle and with an adhesive composition that facilitates the installation.
Configuration
The link of the two surfaces does not always have a straight line. In the manufacture of the arches (see), curvilinear multi-level ceilings made of drywall and other structures, it can take very intricate forms. Such angles are simply impossible to protect with the products shown above.
For them produce special arched corners. Most often, the raw material for their manufacture is plastic polyvinyl chloride. The arched corner under the putty differs from the direct fact that one of its sides is cut by the "petals", allowing it to be flexing in any direction with any radius of rounding.
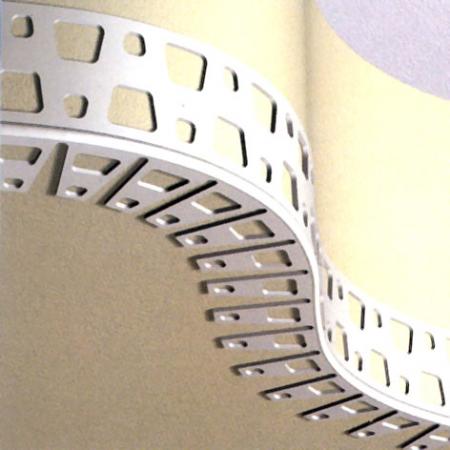
The curvilinear corners are much more complicated to give a clear form when finishing, especially if you do not have a certain skill in putty and plaster. Arched corners allow you to do this without any problems.
How to mount perforated corners
We will describe in detail how to finish the corners with the help of the described products.
Take one of the most difficult options when you need to "remove" the joints of the window or with the walls, when the workers did not comply with the observance of the level.
Note. When finishing the corners formed by sheets of drywall, such problems usually do not occur: their surface is smooth and smooth, and the sheets themselves are usually attached to the frame-derived burr. In such cases, it is reasonable to use PVC corners with adhesive inner surface.
So, the putty of the angles of walls and slopes begins with the installation of the corners, which is conducted in such a sequence:
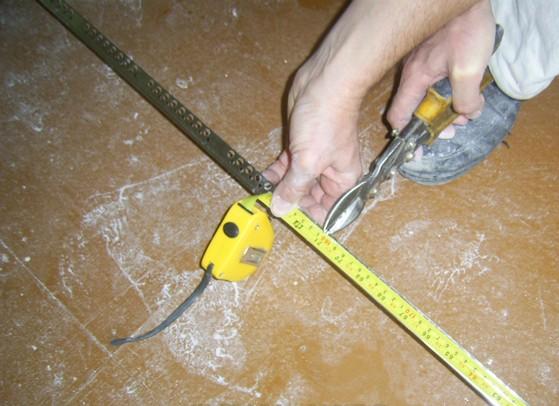
- Measure the length of each joint and cut the corners in size. Plastic cut in conventional scissors or painting knife, metal - metal scissors;
- So that the thickening is not formed due to the allen corners, their outer side is cut at an angle of 45 degrees;
- Then the construction level is applied to each side of the slope to determine the degree of its evenness and the "rationalness" in one direction or the other. On the wall you can make a mark to know where to apply more putty, where - less;
- Prepare the required amount of solution and apply it to slightly on both sides, but not a solid layer, but at intervals, focusing on the labels made earlier;
- Attach the corner to the slope over the spacing slaps and slightly press it into it so that the small part is squeezed through the holes;
- Removing the solution squeezed with a spatula, with the help of the level, check the vertical or horizontality of the position of the corner. Get his right position, pressing the stronger where it is required;
- Next, the instruction requires wait for a while that the putty is grabbed and fixed the corner. After that, you can put an angle, filling with a solution of empty places and leveling the adjacent surfaces.
Council. If the corners and walls are almost smooth, you can immediately use the finish putty. If they require serious correction, start better with the starting, and the finishly applied to the second layer.
As in the case of a straight plane, the perfect smoothness of the angle is achieved by grinding (see). In the process of grinding itself, the corner itself is preferably smoothed a little, rounded - it will facilitate the subsequent finish and make it more resistant to mechanical damage.
Conclusion
Professional finishes easily cope with the task of aligning the corners and without any additional devices. But they often use perforated corners precisely for the purpose of giving the protruding joints of greater strength. How they do it, you can see in the video in this article. And try to repeat during repair. It's not hard.
The only lack of internal and outer corners - they are designed to be installed in places where the transition angle from one plane to another is close to 90 o for internal corners and close to 270 O for external corners. This means that in places door openings With steep slopes (with an angle of less than 255 o), it is not always possible to put the outer corners and then you have to customize the joints of the plinths in other ways, and this is not so simple, and the overall design of the plinths is broken. Well, B. panel houses In the angular apartments, where there is another plane between the two outer walls, formed by concrete the joint and the angles of the transition from one wall to this plane and from the plane to another wall about 135 oh, put the inner corners will not work at all. True, such angles after repair of the apartment are usually forced to bedside tables or something else, but nevertheless. If you have an indirectal form with multiple transitions with angles different from 80-100 and 260-280 o, then use internal and outer corners for docking plinths does not make sense. Well, in all other cases, you can easily and quickly put the plinth with corners, having the following
Tools
1a. Perforator (panel, monolithic, stone houses).
1b. Perforator or drill with battle (brick, block houses).
1C. Drill with drills of various diameters (samanny, wooden houses, any other houses with walls (partitions) with covered panels, plasterboard, chipboard, OSB, plywood, etc.)
2. Screwdriver (drill with a nozzle), screwdriver.
3. Hoven for metal.
4. Construction corner, roulette.
5. Pencil, marker.
6. Knife.
7. Large grinding skin.
8. Vacuum cleaner (if flooring - carpet)
Note: The knife and grinding skin are not required, but desirable to treat splitting cuts.
Technology performance:
1. Determination of the number of plinth, corners and fasteners.
It would seem that everything is simple here, the perimeter of the room must be divided into the length of one plinth, that's the number of plinths, but there are several nuances:
- I often come the electrician for self-draws and on the question: "How much do you need?" It is responsible for: "I need 4 self-press, but! If I take 4, then I will not be enough one or a rubbing or a ruin, and if I take 5, then one will remain extra." With plinths, as well as with any other construction and finishing materials The same story.
- Some rooms, such as 3.5x3.5 or 5.5x5.5 m, very bad fit into the modular plinth dimensions. Standard plinth length - 2.5 m. This means that there will be 1 or 2 pieces of plinths on the wall. If the joints do in place, it will not be beautiful if the junctions do in the middle, then there will be a lot of waste plinths. If a furniture wall or a bed (sofa) is pressed against the wall after repair, then you can not pay attention to this, and if the plinths are open, then everything depends on your aesthetic requirements.
- In order to accurately determine the number of plinths, you need to draw the plan of the room, to determine the areas where whole plinths will be made, or the maximum long (for example, in the room 3.5x3.5m with the joints of the plinths in the middle), count how much m / n is missing for the remaining Plots and divide this value by 2.5, add 1 spare plinth.
The number of external and internal corners is determined by the number of internal and outer corners in the room, as a rule, is an even number, so the corners are sold by pairs. When the plinth is bought on a non-standard (indirectant) room, to the entire apartment or house, the number of angles (internal or outer) can be odd, nothing can be done, you have to buy one more.
The number of butt linings is determined according to the drawing, the number of side plugs depends on the number of door openings or niches indoors. The side plugs are set near the platbands or in the corners, where at various reasons of the plinth are not joined - for example, along the half of the wall stands close to the wardrobe wall.
Determine the number of mounts, too, it would seem just. The plinths are usually attached to the walls every 45-55 cm, but this rule works for smooth walls and smooth floors, and in 80% of cases, new plinths are attached to the old curves of the walls and they are adjacent to the same old and crooked floor, a little frozen fresh outdoor Coating from carpet, linoleum or laminate. And in such cases, the number of fasteners is determined at the place, in addition, most modern plinths with accessories are attached not to the wall, but to latches, but the latches are attached to the wall. Sometimes it happens very disappointing half a day to joy to all neighbors to hammer the reinforced concrete walls to fasten snagular latches, on which the plinths hold no more than a few hours. The worst of the latch holds the plinth, if the floor covering from the laminate is laminated on the uneven floor, in this case, putting the plinth on the latch is absolutely meaningless. Here only drill the plinth through what will inevitably lead to a deterioration external viewWhatever plugs for screws screws were used (exception - wooden laminated plinth), or put plastic plinth With a removable middle part.
2a. Alignment of walls.
This item is especially important when performing cosmetic repairs in brick and block houses. As a rule, in such houses, old plinths are removed along with the plaster or on the contrary, old plaster interferes normally put new plinths. Alleged the wall follows the wallpaper stickers, but there are all sorts of cases. If the wall before installing the plinths does not align at least partially, then the new plinths will look even worse than the old one. How can I lift the walls .
2b. Drilling holes under dowel.
In reinforced concrete walls, when drilling holes, fittings sometimes come across, and in brick Walls - Empties between bricks. In such cases, you need to drill new holes at 5-10 cm from the unsuccessful. If the floor coating of the carpet, then it is necessary to use the vacuum cleaner.
In samanny I. wooden Walls, as well as in the walls (partitions), decorated with panels, sheet materials of wood origin or plasterboard for metallic or wooden frameThe holes can not be drilled at all, but immediately fasten fastenings or plinths.
3. Slicing of plinths.
The use of internal and outer corners allows you to cut the plinth of the required length with a sufficient great error - up to 2-3 mm. It can be done almost on the knee, but of course it is better to use an old stool, a chair or table. Most often for cutting plinths, it is used for the metal, but if there is a professional stub, then of course it is better to use it. I do not mention a variety of cutting machines due to the low probability of their presence in a regular apartment.
The design of fittings for plinths is such that the place of cut slicer or the factory slice of the plinth will be hidden in the fitness. Usually, the plinths come into accessories by 4-6 mm.
When docking the plinths in the inner corners, the plinth is cut into the width of the wall minus the width of the corner (two widths of the corner, if the length of the wall is less than or equal to the length of the plinth, usually 1.5-2.5 cm depending on the type of plinth, and minus 1-2 mm for compensation for measurement error . If the walls are very uneven, then it is not recommended to cut the walls to exactly sizes, it is better to first leave the stock of 1-2 cm, which may be necessary to envelope uneven walls. To accurately determine the inner corner width, you need to tightly wear a corner on the plinth and tape measure measure the distance from The upper face of the corner to the open slice of the plinth.
When docking the plinths on the outer corners, the plinth is cut into the width of the wall minus 1-2 mm to compensate for the measurement error. If the walls are very uneven, then immediately cut the plinth on the exact size is not recommended, it is better to first leave the stock of 1-2 cm, which may be required to go on uneven walls.
4. Installation of plinths.
1. Typically, the installation of the plinth starts with one of the inner corners. The angle is the inner corner. In panel, brick and block houses of straight corners at the junction of the walls there is no low quality Plastering and finishing works. If the angle is greater than 95 o, then the upper facet of an inner corner, forming a straight angle, is desirable to cut off with a knife or handle the grinding skin so that the corner is tightly adjacent to both walls. How it will look, you can see.
2. The plinth is inserted into the corner and applied to the wall. If the wall is smooth and the plinth is completely adjacent to it, then the attachments can be attached every 45-55 cm.
- If the plinth will be put on the latch, the holes for the first and the last fastening are drilled at 5-10 cm from the edge of the plinth, the latches are attached to the walls and the first plinth is snapped onto the walls.
- If the plinth is fastened through through holes, then the holes in the plinth and the wall are drilled at the same time, and in other types of plinths, the holes in the plinth are first drilled, then the markers are transferred to the wall through these holes, or immediately through the plinth holes in the wall and Plinth is attached to the wall.
If the wall is uneven, then the holes are drilled in places where the plinth is moving away from the wall most, but at the same time no less than after 45-55 cm. Sometimes, if the wall is very uneven, it is necessary to drill another 1-2 mounting holes.
If the length of the wall between 2 inner corners less than 2.5 m, i.e. Installing a whole plinth will not work, and the walls are curves, then the plinth is cut off with a margin of 1-2 cm, on the ends of the plinth, the inner corners are dressed and an attempt is made to put the plinth in place so that it is adjacent to the wall. If the walls are plated by wallpaper, then it is necessary to do it very carefully, so as not to damage the wallpaper. If the plinth with dressed corners on one side fully adjoins the wall, and on the other hand, on the last 45-55 cm, it does not reach the wall 2 cm, then theoretically enough to trim the plinth is 4-5 mm and it will fall into place, but it is only In case the angle between the walls is close to 90 o. E If the angle is stupid, and it is usually stupid, then, depending on the stupidity of the angle, add more 1-2 mm. All this, of course, can be decomposed on trigonometric functions, but in this case the heater is not worth it. On a slightly subsided or underlying plinth, you will most quickly select the desired plinth size to the curves of the walls than when using geometric knowledge.
3. After the first plinth is fixed, the rest are joined to it.
If the above text did not greatly clarify the situation, you can watch the video showing the mounting of the plinth with the cable channel:
- Mounting or latches near the outer corners you need to put as close as possible to the outer corners, but here usually it all depends on the quality of the wall and closer 4-6 cm if the wall is concrete brick or samanny, put the fastening will not work. Therefore, for greater reliability, the outer corners are preferably planted on "liquid nails".
- A short piece of plinth in the slopes of doorways is placed together with the main piece of plinth.
- To smooth walls, wooden laminated plinths can be not screwed, but to glue with "liquid nails".
- Previously, to circumvent pipes of heating, carpenters often arranged the design of 5 pieces of wooden plinth, and on top it was all embarrassed cement mortar. Now such a decision is not rational. In addition, these are additional costs of 2 internal and 2 external corners, make such a pairing sufficiently durable hard - plastic nails do not beat. Yes, and a place is taken, which is always so lacking. It is better to put the plinth on the wall, if necessary, cutting part, if the heating (or what other) pipe is tightly adjacent to the wall, and the junction of the pipe and outdoor coating Close up in other ways, it will look like this:
Facing a cafeter is not by the use of one ceramics. The finished type and operational reliability depend on other materials. Corners for tiles (they are also called the layout for the tile) - one of them. They mask the shortcomings, decorate the corners and protect the tile from chips, fungus and mold.
Today it is often refused to use layouts under the tile in favor of a more decorative method - the alarm of the angles under 45 degrees. The monolithic laying is appropriate when using expensive ceramics, a corner for a tile in this case may not look very presentable. Nevertheless, the layouts for the tile are still leading. Moreover, in some cases, without them, it is not necessary, for example, when cladding steps (anti-slip profile) or apron. On hazardous outer corners in the bathroom, where you can easily slip, it is better to install a plastic corner than leaving a sharp corner of the fed tile.
Corners for tiles are all sorts of shades and various forms. When lining may need an outdoor profile for tiles, internal and for stairs. Consider each option in detail.
Fast navigation on the article
Outdoor corners
The most popular type. Used when cladding external corners. On sale, mainly there are dimensions 7, 9, 11 mm (with a length of 2.5 m). One side is a groove for a tile, the other serves as a decoration and protection of plates from shocks and chips. The hidden part is perforated for better clutch layouts under the tile and ceramics. Produce decorative elements of:
- plastic;
- aluminum;
- brass and other materials;
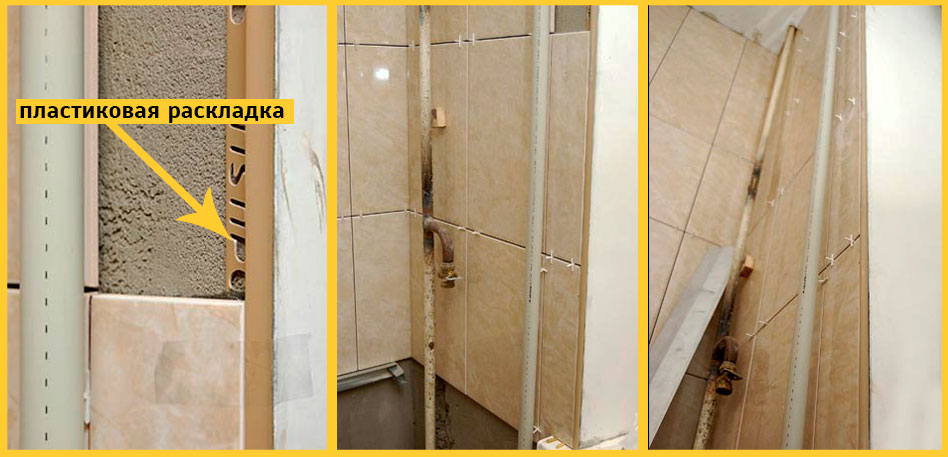
Installation of corners
The profiles for the tile are mounted when it is already ready by one of the two walls that form an outer angle. Sometimes trimes (layouts for tile) leave at the end of work. This happens in case of unforeseen circumstances: problems with the delivery arose, marriage was caught, etc. However, such a situation requires high qualifications and more serious calculations from the tile. The slightest inaccuracy can lead to convert or humility with flaws.
Getting Started by the next wall, with the back side, the grooves for tile layout are already ready. The product must correspond to the size of the tile. In the corner of a smaller format, the tile will not fit, and the larger in the size of trim will force the use of more glue and will hang out.
If the tile does not climb into the corner, keep the reverse side (3-5 cm from the edge).
To start laying the next wall, and the tile corner did not slip, it is attached to the tape or tile glue apply. The perforated side should adjust the cafél in parallel to give perpendicular ceramics to lie tightly and smoothly. The joints necessarily fill in glue - empties deprive the design of the functional point. Without hung eyes, it is better to spend time to extrude an excess mixture than to come with hollowness.
The video shows the installation of layouts on the example of a complex place - slopes with a double outer angle:
http://www.youtube.com/watch?v\u003db-9jpxpx2ks
Conditioning corners
If the ceiling is suspended and falls on the tile, cut the layouts under the tile, do not leave yourself or other the need to continue to study under cutting.
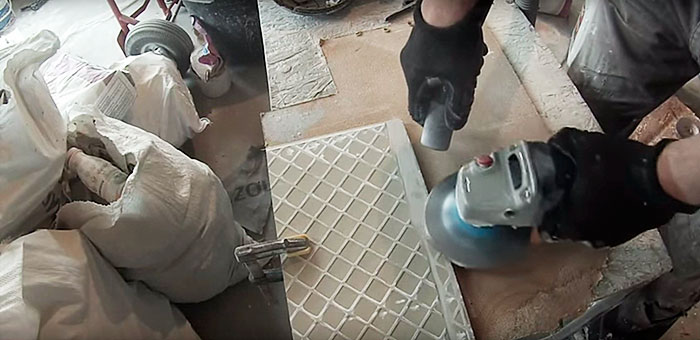
A separate conversation deserves installation of trimes in the field of door and window openings (or in similar situations). To position the elements perpendicularly, you need to trim their edges at an angle of 45 degrees. Do it very carefully, otherwise there will be slots or profiles for the tile and do not lie at all without bends or burrows.
Remove the layout for the metal tile for metal or a grinder. Better firstSince the method involves the use of Stusl. And without this tool, it is very difficult to achieve the necessary angles. In any case, the exact trimming is impossible without practicing, and this is not such a slight thing, as it seems at first glance. Sometimes geometry assumes a trim combination, for example, at one point, horizontal corners for tiles and vertical are joined. It is necessary to possess skill to virtuosively juggling compliance with the requirements for facing and installing profiles.
Repair of corners
It happens, layout under the tile stopped like, and maybe the profile for ceramic tiles was damaged. In such cases, you need a repair, but how to extract trim, and even more so, install a new one? The case is a vigorous, but feasible:
- gently, so as not to damage the tile, cut the old outer corner for the tile;
- prepare a new one;
- cut the back of the trim;
- if necessary, align the place under the profile, not the touch of space under the tile;
- with liquid nails or silicone, glue the layout;
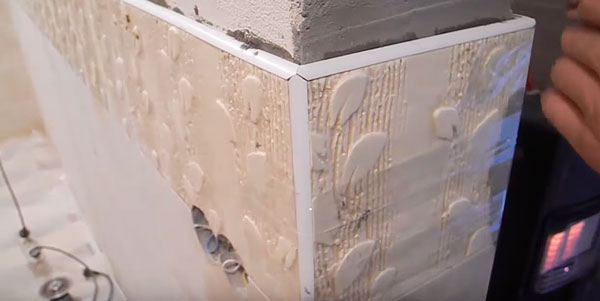
Interior corners
Unlike external, these are not very common. To make outdoor angles, you need to cut a tile or decorate profiles. Internal not necessarily, because without them the interior does not suffer. Yet a certain percentage of people is experiencing sympathy to them, so consider them. 
Represent a slightly more complex design consisting of:
- groove;
- perforated rib;
- facial concave part;
As in the previous case, mount the layout under the tile, licking one of the walls. In fact, it's easier to trim the back and stick the corners to silicone. This facilitates the installation process:
- glue easier;
- work can be done at the end of the cladding;
Using both types of corners, before grouting seams you need to clean the joints between profiles and tiles from glue. If the profile is plastic, keep care, so as not to scratch it or cut the layer.
Options for registration of inner corners:
Corners for steps
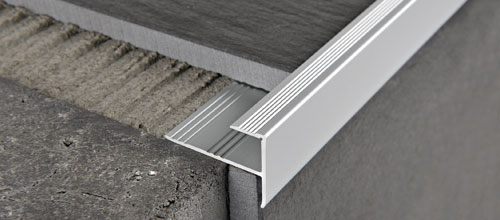
The use of profiles on the stairs is the dispute room. The question concerns the aesthetics and durability of the facing. The layouts on the steps are two types:
- ordinary - similar walls;
- overhead;
The first does not bear greater functionality, serve decorative purposes. However, their use undermines the monolithic design, the risers are at a half-bentimetting distance from covering plates. On the one hand, layouts for the tile provide a certain protection of the joints, but on the other, as a result, lead to a decrease in the life of the stairs. They admit the possibility of accumulating water, which due to temperature fluctuations gradually destroys the integrity of the steps.
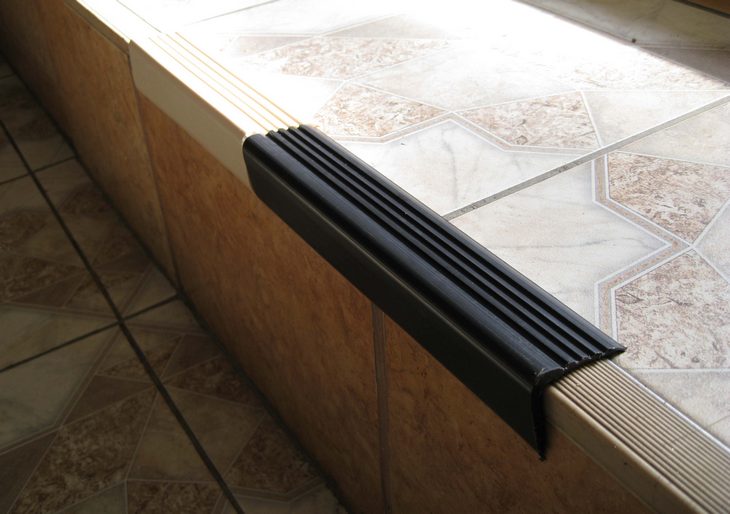
Patch profiles provide sliding resistance and, unlike simple, often necessary. It is important to understand the nuance of operation: the water accumulating near the corners, negatively affects the facing. To avoid this, it is not recommended to mount a continuous web. Do between the layouts for the tile drainage gaps, and the staircase will last much longer.
When installing on the steps we are talking about metal materials, no plastic.
Other corners
Profiles are required with the device of iron and at the joints of heterogeneous materials. Variations There are many, as a rule, they are mounted mechanically - with fasteners. Installation is associated with the edges of the tile, so observe caution to do without a tile chip.
Sometimes layouts for the tile when the device is low winding steps. For such cases, there are corners with a smooth working part and the comb backward side, which allows you to smoothly curb profile. It is important not to disturb the border of the "painless" bending.
We looked at the options for corners for tile. Despite their collective farm, it is still not necessary to abandon them in traumatic places and inexpensive repairs.
Comments Powered by Hypercomments


