Repair is a necessary lesson for everyone who dreams of achieving comfort and comfort in their own business. Usually, problems with the selection of the desired design, style and materials do not occur. However, it is very often so that the repair seems to be completed, but still the feeling remains that something is missing.
To give a complete view of the room, hide the gaps between the wall and the ceiling and hide the wires, you can use ceiling plinth. It is represented by various forms and material. It is very convenient to use an option from PVC for this. You can also pay attention to the hallt. It is most often installed as a mount for plastic panels.
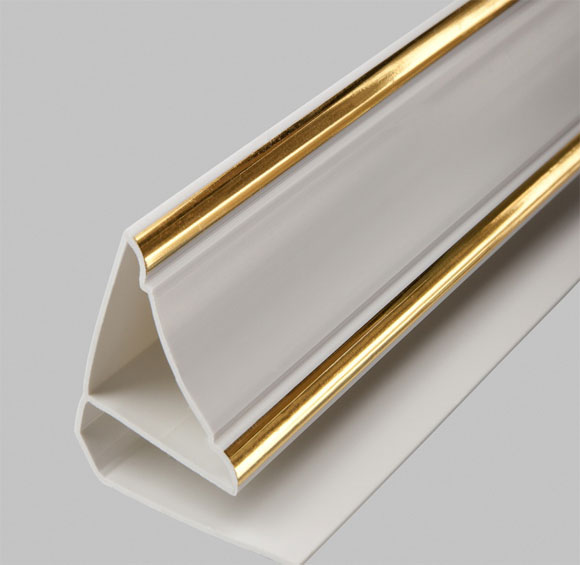
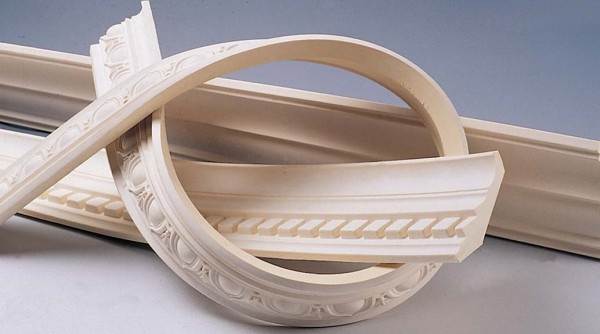
PVC design is used as a decorative element. It is produced in various colors, with drawings, it is possible to imitate under the stone, wood. I am glad and low the price of the element, simplicity of installation work. Even newcomer will cope with its installation, so there is no need to pay professionals. All this makes the PVC ceiling baguette favorite among other baguettes.
Main advantages and disadvantages
Important!Plastic ceiling design is a plinth of polyvinyl chloride, which is used to hide the junctions between the ceiling and the wall and used to secure wall panels or ceiling analogs. PVC, like any other material, has its own positive and negative sides, what should be remembered.
The pluses of PVC include the following:
- Resistance to sunshine. Panels do not burn out, even being on direct sunlight during a long time.
- Fire safety. As a result, the element can also be used in the kitchen, without surviving for its safety.
- It is possible to use in wet rooms, since the plinth is not subject to wetting, rotting and decomposition, almost eternal.
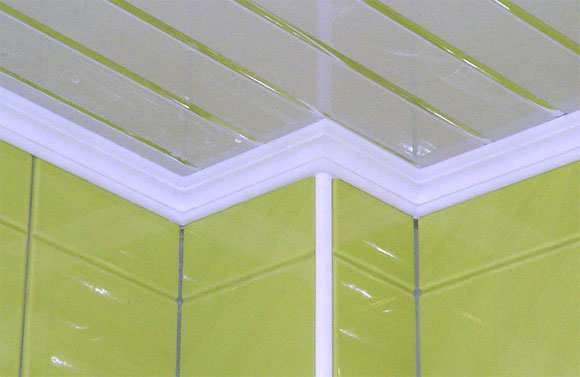
- The ability to apply in the bathroom and bathroom.
- It allows you to hide wiring and pipes.
- It does not collect dirt, fat and soot on the surface, easily clean and cleaned, which allows you to use it in the kitchen. For cleaning, in no case apply abrasive means.
- The element is easy to choose in color and drawing to almost any room.
- Easy in installation, as the baguette has additional elements for docking strips and protect external and internal angles;
- With PVC plinth, it is possible to mount not only PVC panels, but also wall MDF panels and wooden rails, if you pick them in size.
- Environmentally friendly material. It will guarantee the safety of use.
- Low price baguette. For many, this dignity becomes basic, as it helps not save on its own interior.
Minuses PVC plinth is also available. Among them are the following:
- It has a small width, so he will not hide wide clearances.
- High-quality installation is possible only on smooth surfaces. Plinth will emphasize all the flaws of wall mounting and ceiling.
- It is impossible to mount near hot pipes, water heaters and other heating devices, since PVC plinth can be melted.
- Installing in the unheated room and outdoors is also not recommended.
- It's hard to hide for plastic PVC Profile fastening elements of wall panels, so installing the latter in a number of panel is difficult.
- Design can not be repainted. If necessary, it will have to be changed.
If you use the connecting plinth, problems with the difficulties of hiding fixing elements can be avoided. You can also easily get rid of a number of other flaws, achieving comfort of use.
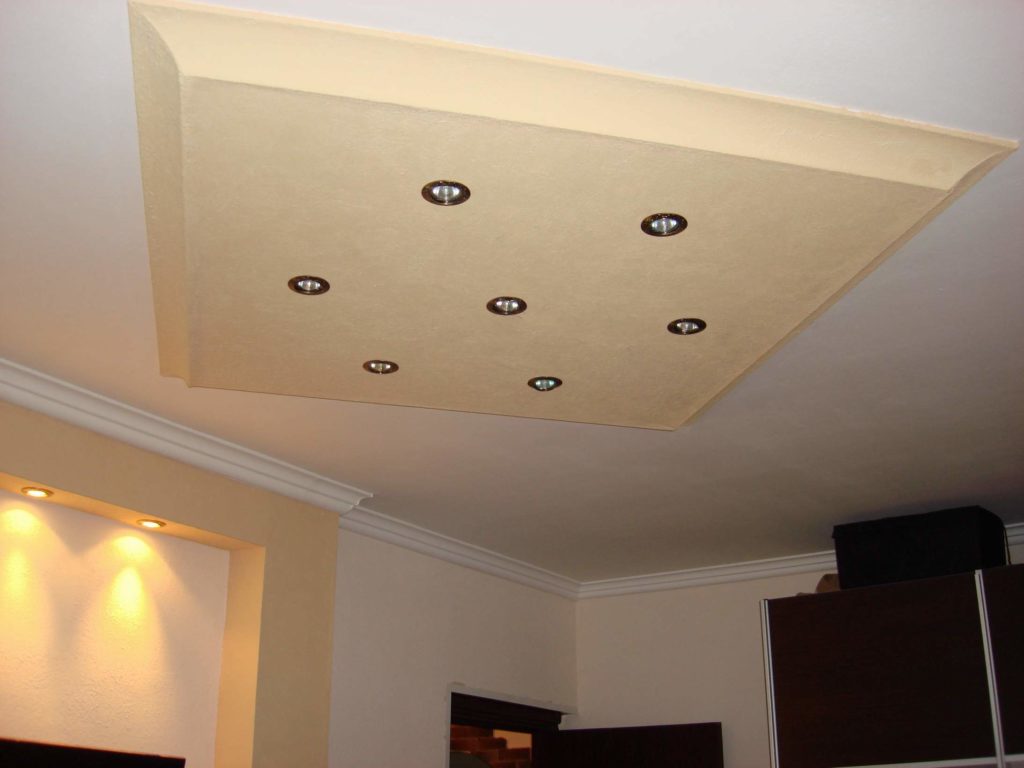
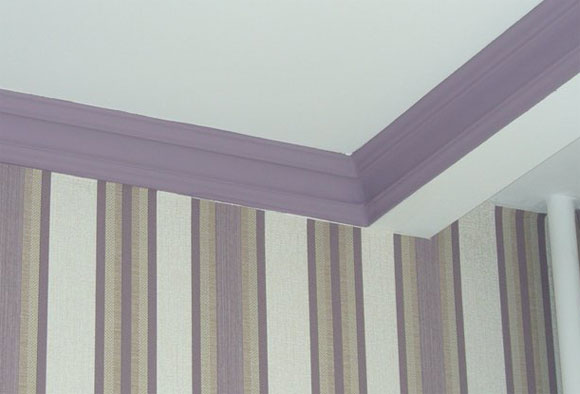
The best place To install a plastic plinth, there will be a bathroom, a bathroom, an entrance hall or kitchen. In these rooms, it is simply indispensable. For large rooms the best option There will be a ceiling foam baguette. This is explained by it more presentable by its appearance, as well as the correspondence to almost any interior design.
At the very beginning of work, you need to calculate the required number of profiles or cartoons in pieces. To do this, measure the room around the perimeter, taking into account all the angles, niches and protrusions. The resulting result is divided by the length of the plinth. Standard plinth always goes three-meter length. You need to buy for one profile more, to the stock, then not to look for a similar option as needed. To additionally calculate and buy the necessary components.
If the walls are placed in plastic panels, the plinth is attached to the wall under the ceiling. Or on the ceiling, if the panels are mounted on the ceiling. The plinth must be installed simultaneously with the installation of ceiling or wall panels. It is possible to mount it on a metal profile or a wooden bar. With curved walls for simplifying and accelerating the installation, a perforated metal P is a shaped element - suspension. With it, you can create a smooth surface, deploying in the desired direction. These elements and for walls are used, and for ceilings. PVC Plintus is fastened to the frame of metal or wood, or with the help of a construction stapler and brackets, which is more convenient and faster. The gaps formed between the wall and the baguette can be smeared with a suitable sealant.
The ceiling plinths additionally go to the design of angles from the right and left plugs, connectors and external and internal corners. These details are needed to connect profiles among themselves, masking uneven edges. With their help, it is possible to achieve greater decorativeness of the plinth, hide all the joints. They are made of a more dense texture material than the panel, which makes it possible to protect the block angles from damage to them. Plugs and corners with silicone, liquid nails or colorless glue so that they do not break off when hitting.
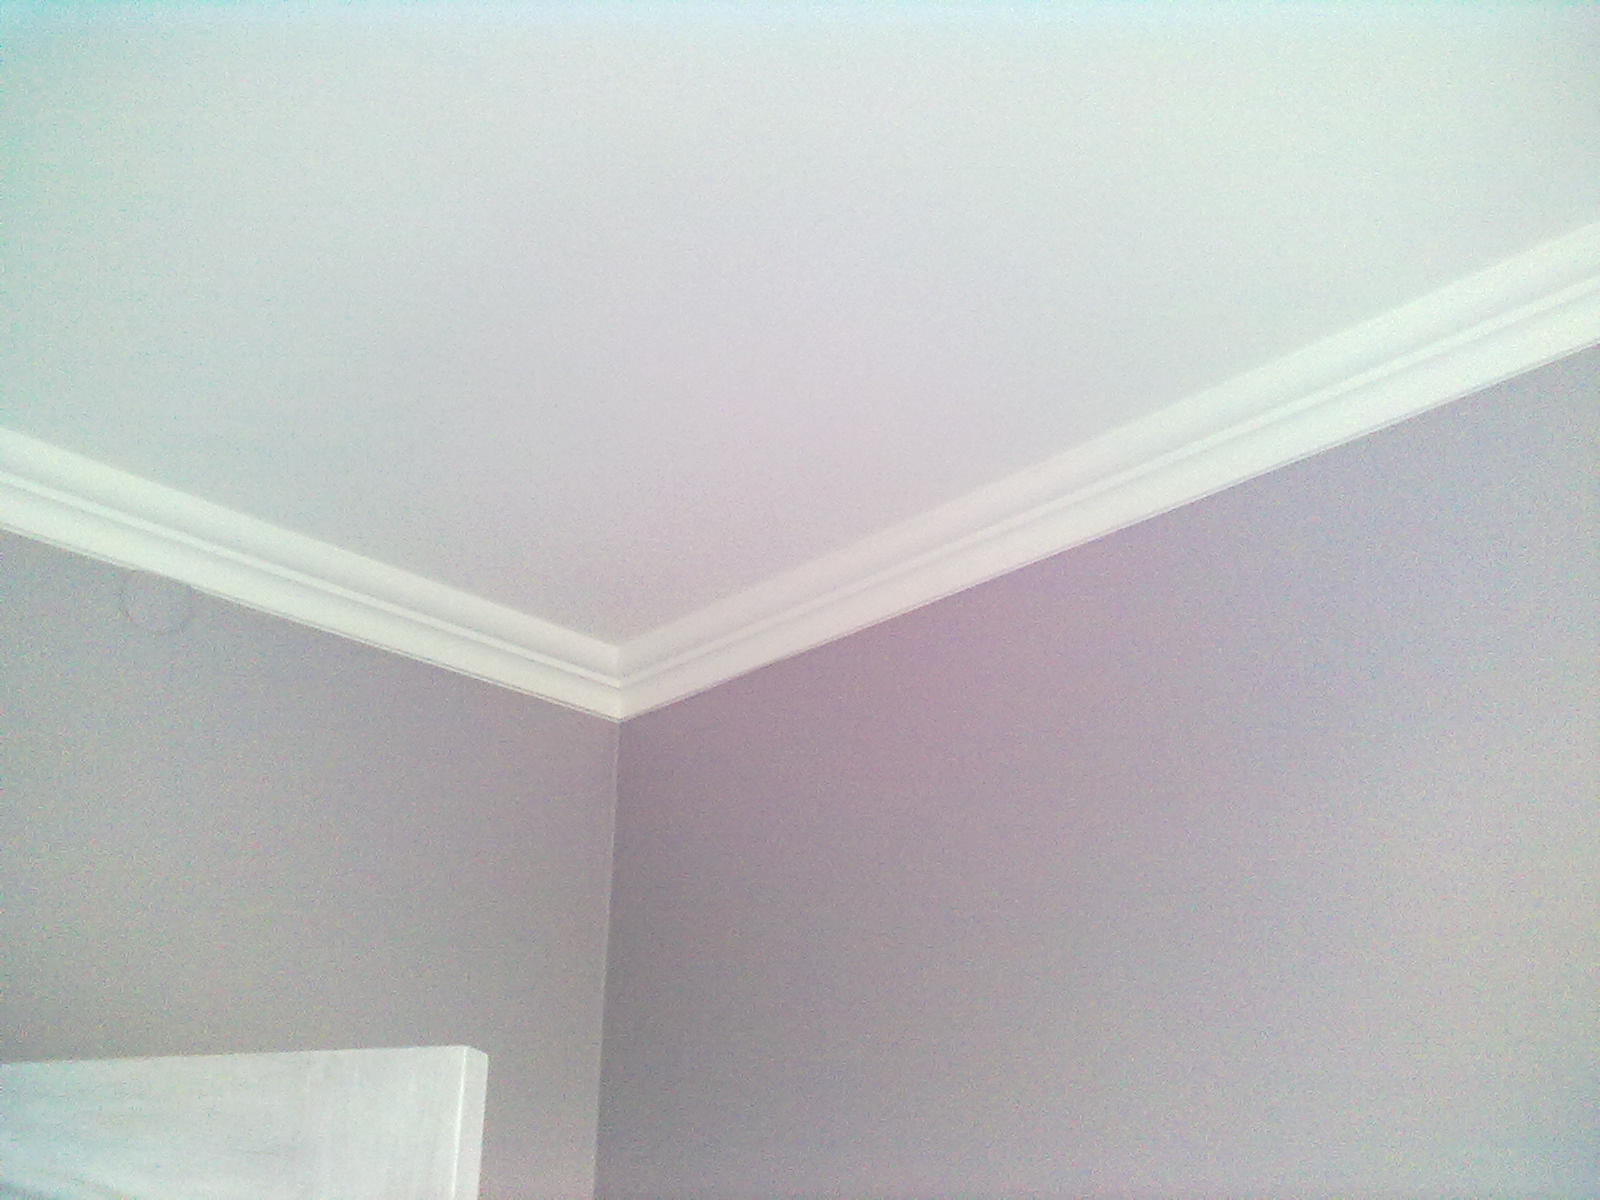
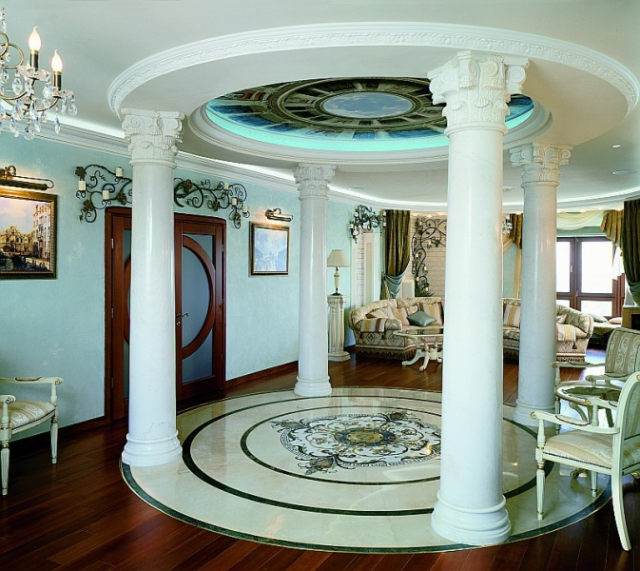
Using the PVC ceiling plinth or a quilt, which is not at all difficult to install, you can completely transform the interior of the room. Softing the line of transition from walls to the ceiling, you can give the room the effect of completion and integrity. The plinth itself may differ in its colors, but many people prefer traditional white options. They look catchy and interesting, helping to get rid of the wallpaper or paint line.
The result when applying the ceiling plinth from such material as polyvinyl chloride will be the ability to aesthetically complete the interior. He will definitely like it and will delight for a long time. Remember that you should choose with your own requirements and preferences, as well as in accordance with the interior design.
How to make plastic plinths? Their main purpose is the design of plastic ceilings, which are quite popular for finishing the premises where there is an increased humidity.
When assembling there is always a small gap between the ceiling and wall or there is not a very neat junction. In this case, the optimal option is to install with your own plastic plinth, which will hide all defects, and sometimes serve as a fastener.
Features of ceiling plinths
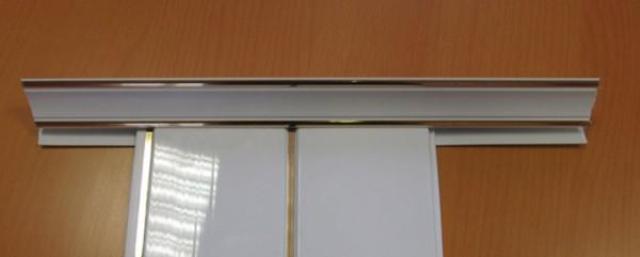
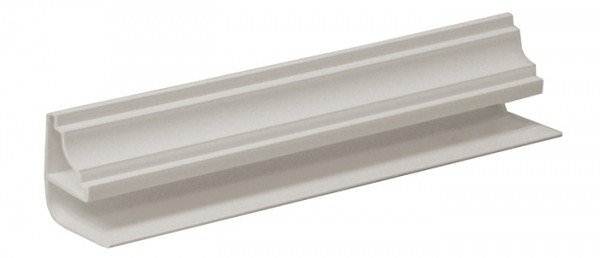
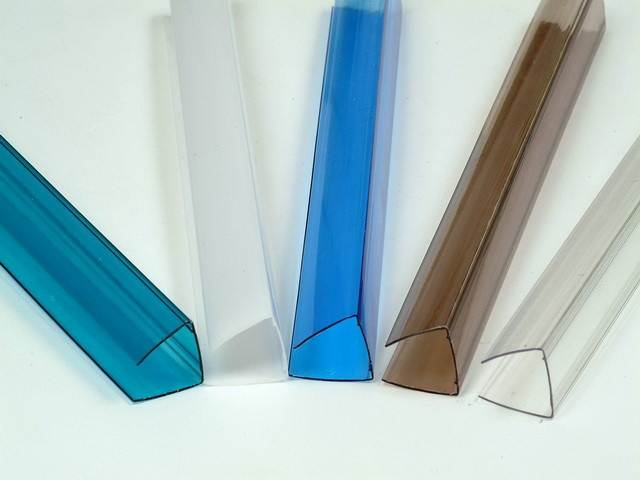
For the manufacture of such decor elements, the same materials are used as for panels - polyvinyl chloride or PVC. The form of cartoons is similar to the standard L -Fofil for fasteners.
Wherein:
- From the usual mounting profile differs only by decorative species.
- Unlike standard cartoons made of polyurethane (see) or polystyrene, plastic plinths have a fastener, in the form of a groove, in which the edge of the panel is inserted. When installing the ceiling, this additional part allows you to tightly fix all its items. But, fix panels only on them should not - the design will not be durable enough.
Tip: I will very help such a quilt at docking PVC planks on one wall and other material on the second. In this case, on the one hand, the plank will be inserted into it, and the other side will become tightly to lay down to the second type of coating with the difference only in the fact that the quilt is located vertically, and not horizontally.
The advantages of plastic plinths before ordinary are:
- They are easy to wash using a sponge and non-abrasive detergent.
- Over time, products do not turn yellow.
- After installation, the plastic ceiling and the plinth make up a more holistic picture, compared with other types of finishes.
- Absolute moisture resistance.
- Low price.
- Large range of colors.
- Low weight.
Disadvantages are as follows:
- When installing, all the irregularities of the walls will be noticeable, due to the complexity bend plastic.
- It is impossible to repaint.
- It is afraid of high temperature.
- A small width of these decorative elements. For example, the foam products are much wider.
- Installation of the ceiling, when applying only plastic plinths for its mount, quite complicated - it is very difficult to put in place the last element that does not apply to the detachable varieties of cartel.
- The fixation must be performed by screws, self-draws or nails whose nozzles are difficult to hide after installation. Glue may not hold the plinth.
The standard length of products is three meters, which should be considered when calculating their number on the room.
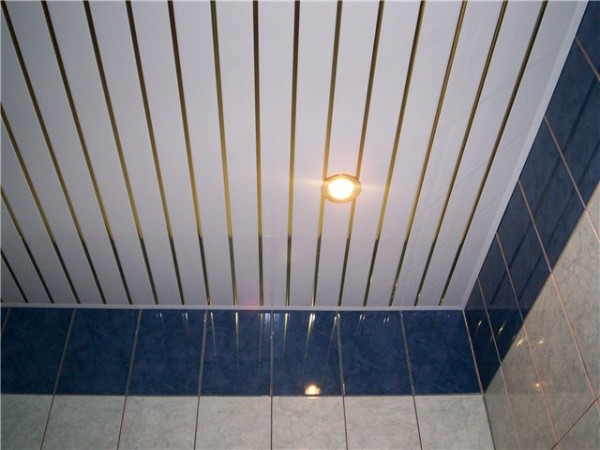
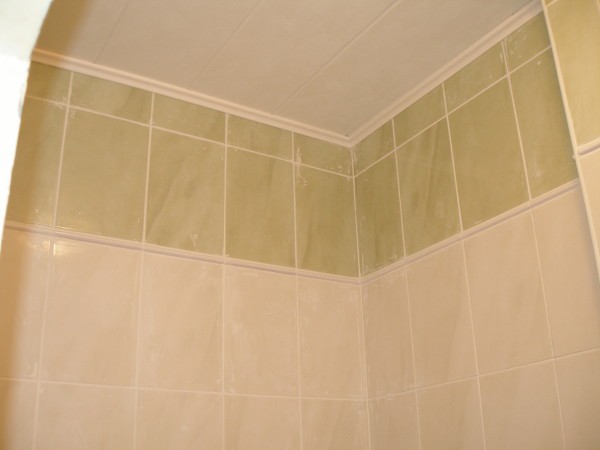
Tip: Because of a small width, such elements should not be used in rooms with high ceilings. Best of all, they are suitable for the bathroom and kitchen, as shown in the photo.
For cutting of the plinth, you can use a stationery knife, and better handcraft for metal with small teeth, which will make the cut more accurate. High-quality cuts at an angle will help to get a stubble.
How to mount plastic plinth
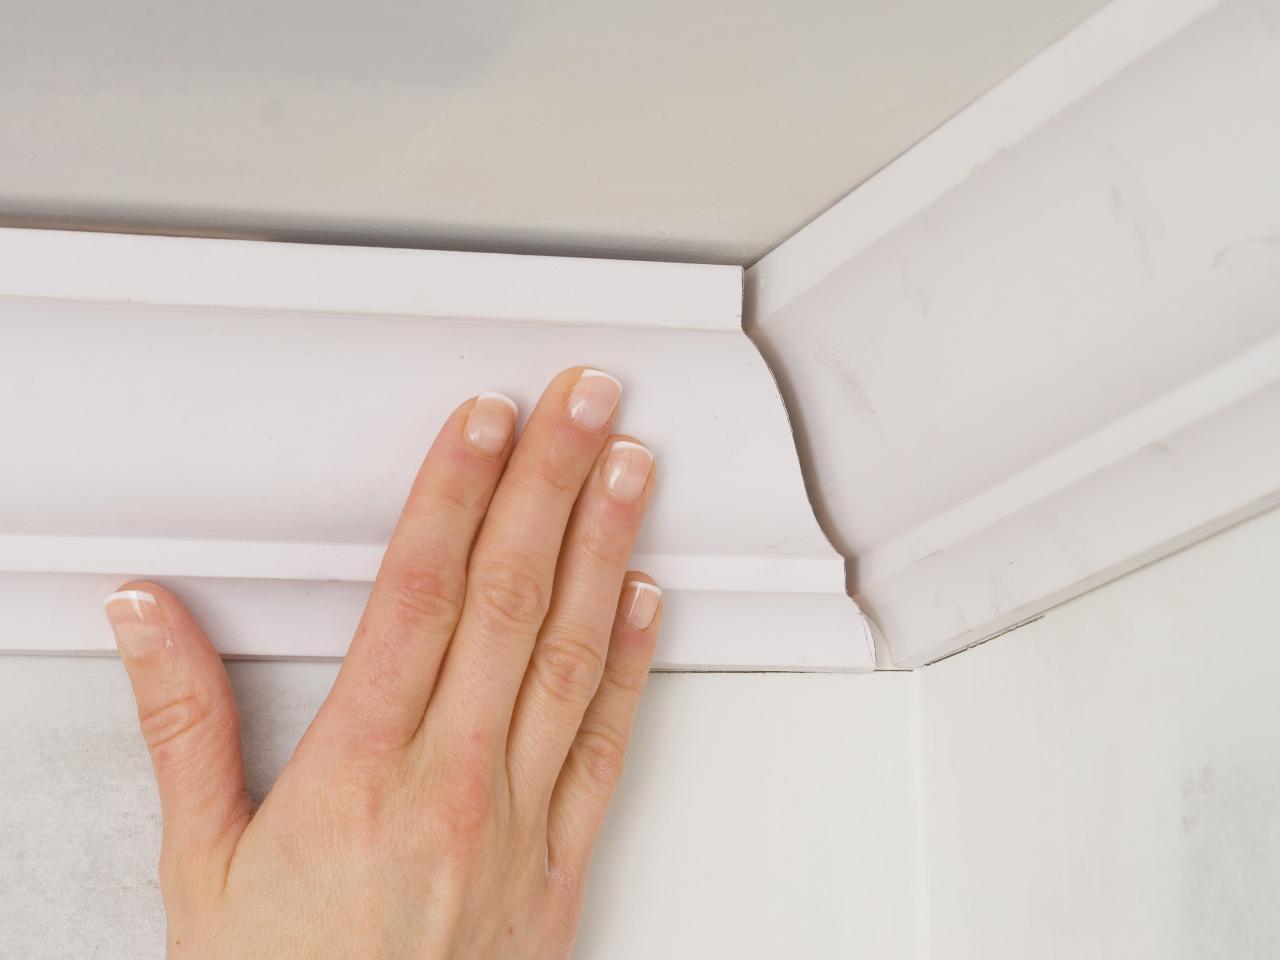
Before fixing the planks, it is necessary to properly cut the corners under the ceiling plinth plastic.
How to make the angles of plastic plinth, in the absence of special decorative elements, which are made of angles?
The instruction offers:
- Purchase special wort.
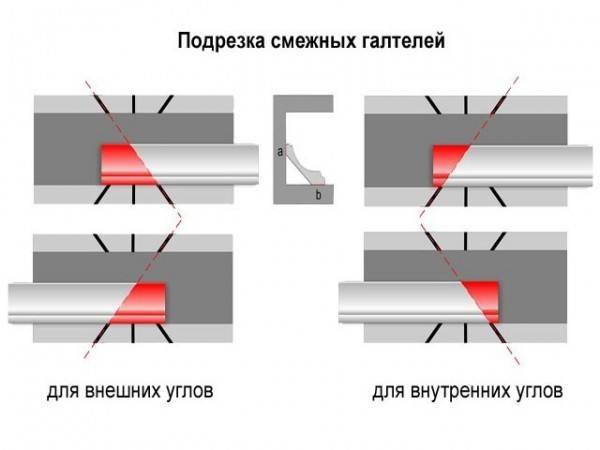
- Pinning edges trim first need to be produced in one directionBy setting the edge of the part in the stub (see). In this case, the angle of inclination on the element must be 45 degrees. At the same time, in the plastic plinth, the grooves should not be cut to the end, and leave about 0.5 centimeters, it will avoid the formation of the gap in the corners. How to do everything right prompt video.
Tip: It is necessary to keep in mind that the next plank will trigger under the same degree, but in another direction.
This will provide an opportunity to connect all the workpieces on the corners in such a way that they do not have ugly gaps that may appear due to small errors in the corners of the walls.
Tip: in the formation of cracks after docking framing, they can be seen by a special silicone sealant. When planning the design of the corners with decorative fittings, careful fit of the plinth will not need.
- Plastic ceiling plinths are installed. If plastic panels are used then to the extreme parts of the trim, you should start the spuns available in the plinths, they will snap into the panels.
It is necessary to perform it with great care: in some models edge lamellas with very thin walls. When forming between the plinth and the wall of the slot, it can be masked, as a silicone sealant.
When embelling small gaps, it is impossible to use a putty, it is unlike silicone, it will become crumble due to the shock shock.
The required number of planks is calculated after determining the perimeter of the ceiling, separating the resulting value for the length of each plinth. After that, the number is rounded up to the whole number.
Before mounting the plinth, the number of fasteners is calculated, which will be needed for operation: one screw is tightened for every 50 centimeters.
Tip: Before fastening plastic plinths, screws should drill small holes in the places of screwing them. It will be a guarantee that the peller will not get cracks and get up exactly in his place.
How plastic plinth is attached, it is not very difficult to figure out. The main principle is accuracy. More attention should be paid to the exact segment of parts, and use the edge to use as well.
Why do you need a plastic plinth for the ceiling, which represents himself and how to fix it - it is for these questions that we will try today to give an answer.
What it is
Often, under the concept, plastic ceiling plinth implies L-shaped starting profile for PVC panels. At our usual corner, the surface is flat, and has a decorative look. Such a ceiling plastic plinth can use both for fastening panels and only for their decoration. Please note that the mounting panels only to the plastic baguette is allowed only in the case of an installation in a narrow corridor.
Similar ceiling plinth for plastic panels are made of vinyl (polyvinyl chloride).
Plotted ceiling plastic plinth - installation
Features of the material
What advantages have plastic ceiling plinths compared to fontoam?
Dignity
The installation of plastic ceiling plinths makes it possible to achieve more refined interior design. You will immediately notice the difference in the texture and quality of PVC panels and plastic plinth. But the foam plinth will stand out against the background of the panels, thereby not allowing to create a single composition (read also: ""). Due to the use of PVC plinths, it is possible to achieve a better visual effect.
Polyfoam is distinguished by high porosity. And this means that such unpleasant factors like dust, soot and fat will inevitably accumulate in plinths. And it will not be easy to remove them. Plastic is not subject to a similar problem. First, vinyl in less degree It is subject to pollution accumulation, secondly it is very easy to wash. To clean the plinth, there will be a sponge with a non-abrasive detergent.
When exposed to direct sunlight, the foam begins to yellow, PVC is absolutely inert to the effects of ultraviolet. Therefore, the material does not fade over time.
disadvantages
Unfortunately, scientists have not yet come up with such a material that will be deprived of the shortcomings. The plastic ceiling plinth also has some flaws.
If compared foam and PVC profileThis can be understood that the products of the first type have a wider base. Due to the fact that the vinyl profile has a narrow basis, it cannot cope with the hide of the wide gaps. And the point here is not only in mistakes when installing.
PVC has a rather high coefficient of thermal expansion. And the greater the size of the room, the greater the distance between the adjacent baguettes and the wall should be. And this in no way contributes to the improvement of the aesthetic species.
"). Plinth is simply put on the ledge on the edge of the panel. After the installation is ready, the junction with the wall is enough to wash the sealant.
In addition, the plinth can be used to the UD profile, which is looking for the room. For use glue and screws. At the points of attachment of the plinths, the holes are better to seal the holes. This will protect the plastic from cracking.
In small rooms you can do without crate. This method is suitable for spacious rooms with smooth walls. Plinth is simply attached to the wall screws. At the same time, the holes in the wall or plasterboard box are pre-drilled.
Special corners are installed in the corners of the room. An alternative method is self-cutting of the plinth with a stouch.
The slots on the joints are masked by a sealant, which is chosen in the tone of the plinths.
How to glue ceiling plinth, detailed video:
Conclusion
Finally, let's give you a simple advice of how to correctly calculate the number of plinth into the room. To begin with, you measure the length of all walls of the room (that is, they find the perimeter of the room). After, this value is divided by standard size Baguette. The resulting number is rounded into the biggest side. At the same time, it is advisable to buy another one or two plinth about the reserve. That's all simple technology for installing ceiling plinths. You can evaluate the results of such a job in our album. Yes, and after you fulfill the installation of plinths, you will probably notice how harmonious will be the interior of the room. We wish you success in repair!
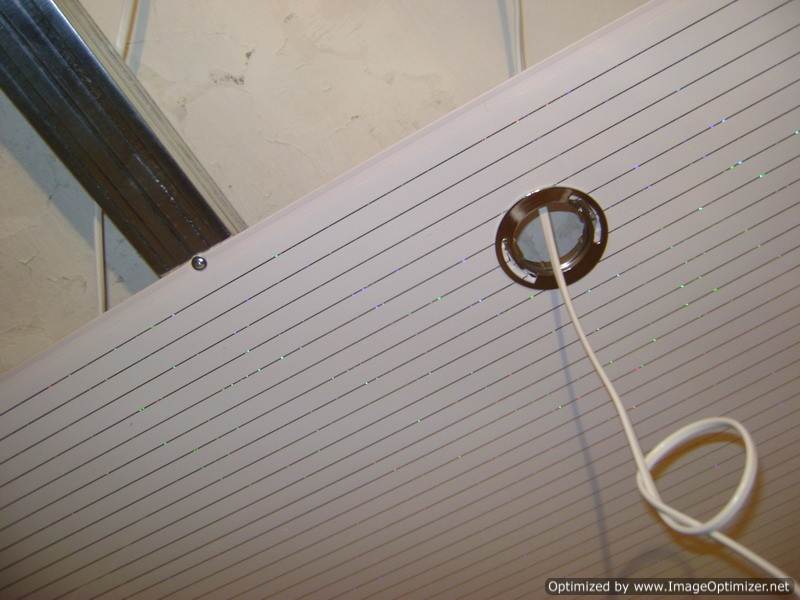
IN lately Ceilings, lined PVC panels They became increasingly interested in our citizens.
This can be explained by the fact that they have a fairly impressive list of advantages:
- inexpensive price;
- ease of care;
- practicality;
- durability;
- beauty;
- fast and easy installation;
- do not require additional processing after installation.
After the ceiling cladding, such material, as a rule, there are always unaesthetic seams between it and walls. In order to disguise them, you need to install the ceiling plinth for plastic panels. Since it is precisely for such surfaces that either plastic or polyurethane quantities are used, consider each of these options separately.
Features of plastic plinth for the ceiling made of PVC panels and its installation
First of all, it should be noted that the design of this fixture differs from similar decorative slats. It includes a special fastening element - a lamel, which is present along the entire length of the product. Such a special device allows not only to disguise the gap, but also makes it possible to leave the necessary space so that plastic ceiling plinths can move a little.
It is extremely necessary, since if the installation of the ceiling plastic plinth will be made firmly, then there is a high probability that the covering due to temperature differences can be deformed. In short, if you follow proper technology, then such ceiling plinths for plastic panels should be installed only after the facing is completed.
Note!
Despite the fact that now there are many varieties of framing, however, masked the gaps on the most convenient and economically.
Pros and cons of plastic cartel
In addition to the fact that the price of this type of framing is considered the most budget, plastic ceiling plinth also has such advantages as:
- 100% moisture resistance;
- big choice colors and textures;
- plastic plinth is made from the same material as the panels, due to which the ceiling and cartoons are found as a single integer;
- unearned care;
- a light weight;
- planks are produced with different widths;
- reparatively simple installation technology, thanks to which it is possible to establish such framing with your own hands.
The plastic plinth for the ceiling has two drawbacks: it can not be repainted in another color and it is afraid of high temperatures. In this regard, the framing data cannot be installed near the lighting devices that have the property to be heated.
Tip!
If for any reason no ability to find such a plastic plinth for the ceiling, then it can be replaced by a P-shaped end profile.
At the same time, the resulting clearance will need to additionally decorate molding.
But it should be noted that the desired effect will not be.
Installation of the Ceiling of PVC panels and the design of its plastic cartoons
Setting the planning data is an integral part of the entire ceiling process. In order to understand how the installation occurs, the entire procedure from scratch should be considered. So, where to start work and how to fix plastic plinth for the ceiling of PVC?
Creating a ceiling of this type (including the installation of a plastic framing) occurs as follows:
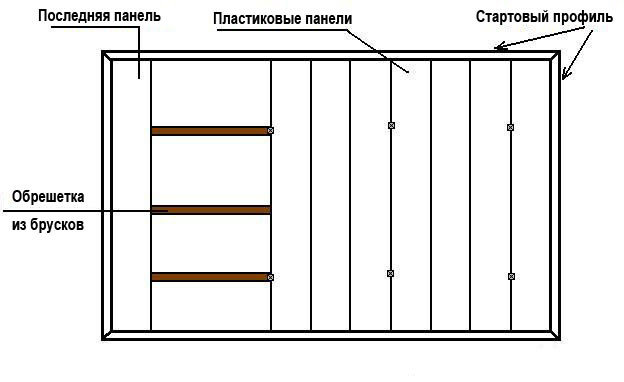
- At the first stage of work, markup is made and the base ceiling is mounted. For this, or wooden rails are used, or metal profiles (UDI CDs) with P-shaped suspensions. First, they are coat horizontally, and then fasten with a step of 40-50 cm across the guides.
It should be noted that starting profiles must be present in the crate, which should be placed on the edge of the base surface, retreating from the wall by 1-2 mm. They must be fixed not only on the ceiling, but also on the walls. This is necessary so that the extreme panels fixed to them does not be resolved.
In the course of the work, all the framework details are set by level. More detailed information About how the presence of the PVC surface is created with the material without difficulty can be found on our website, since it is already written not one instruction.
- Next sized panels are cut.. They are well seen by the usual hacksaw or electric bison. The length of all parts should be about 5 mm less than the distance between the walls, since it will require a gap to install the plinths.
At this point should be taken carefully, since if you move to the calculations, then the bar will not firmly fit into the walls, as a result of which the walls are formed big gap. It is better if after cutting the blanks will be made to fit all parts and, if necessary, their fit. - At the next stage, laying of blanks on the crate. The whole process should be started with an angle towards the door or window openings. To do this, first the first panel is attached to the starting profile. If the carcass is metallic, then screws are used with a brown.
In the case when the lamp is made of wood, it is attached using a construction stapler. The fasteners should be placed in increasing somewhere 50 cm. The panel is fixed from the ridge side, not a groove. Further, when the first component of the ceiling was fixed on the profile, you can begin directly assembling the entire design.
All subsequent details are collected by the type of designer. To prevent sagging panels, they should be fixed by self-drawing to the crate.

- Then, if there is no special decorative elements for the design of the corners, first the edges of the plightener are used in one direction using the stouch. The angle of inclination should be 45 degrees. Please note that the next bar will need to be trimmed in another direction under the same degree.
These actions allow you to combine all billets at the corners so that there are no ugly gaps for them. Sometimes the corners indoors have small errors.
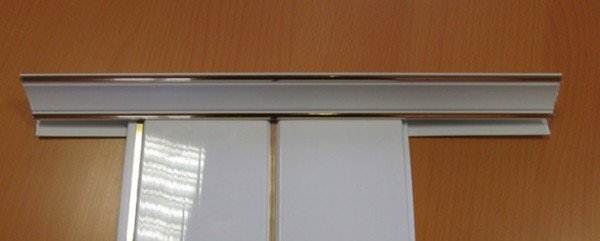
For this reason, when docking frarangements, slots may form. They can be seen by silicone sealant. If the angles are planned to make decorative fittings, then a careful fit of the plinth is required. - At the last stage, pre-prepared ceiling plinths for plastic panels are installed.. To do this, in the extreme elements of the sheathing, the tongings are available in plinths that snapped on the panels.
It is necessary to do it with great care, because in some models, the edges of the lamella have thin walls. If it still has a gap between the wall and the plinth, then it can be masked, again, with the help of silicone sealant.
Note!
To seal small cracks in this case, it is impossible to use, for example, putty, because unlike silicone, it will crumble due to the shock shock.
Features of the polyurethane plinth for the ceiling made of PVC panels and its installation
This type of cartoons is made from "foamed plastic". A relatively new technology on which polyurethane is made, thereby become a versatile means for framing ceilings with any complex configuration where columns, arches and erkers are present.
In addition, they have many more advantages:
- durability (at least 30 years);
- moisture resistance;
- environmental friendliness;
- a wide variety of colors, textures and sizes;
- simplicity in montage;
- over time, it does not lose its external qualities;
- painting opportunity;
- resistance to temperature drops (from -50 to +70) and ultraviolet.
Perhaps the only drawback of these ceiling frames is their high price. Therefore, compared with the previous option, it is impossible to say that this is a budget option.
Recommendations for the installation of polyurethane ceiling plinth
Polyurethane cartoons are mainly relevant for ceilings from plastic panels and vinyl. They are very easy to mount them.

To do this, just need to pick up suitable. It may be "moment", and "liquid nails" and a variety of silicone-based sealants.
Such cartoons can be installed both after the skin and before. Some special technology for their installation is not available.
Corners in such framents are adjusted in the same way as in the previous method. If the protruding pieces are accidentally formed on cuts, they can easily be removed using a building knife.
Conclusion
As can be seen, the main difference only lies in the cost of cartoons. In the video presented in this article you will find additional information on this topic. It is possible that this visual instruction will help determine the choice. "\u003e
Conclusion
From the written above, it can be concluded that both, and the other type of plinths perfectly comes to plastic panels. Which of the options is preferable, it will depend only on the wishes of the house owner, in which it is planned to decorate the ceilings.
As can be seen, the main difference only lies in the cost of cartoons. In the video presented in this article, you will find additional information on this topic. It is possible that this visual instruction will help determine the choice.


