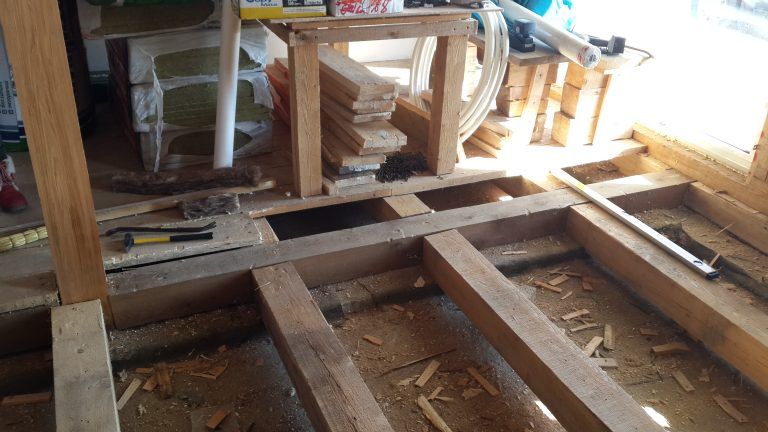
The construction of walls begins with the foundation, and repair or installation of the base - from the installation of lag for the floor in wooden house. The surface is experiencing heavy loads, therefore its strength and service life depends on the qualitatively performed works.
Violation of technological requirements will lead to the fact that the boards will lie unevenly, and some of them will begin to creak over time.
To avoid this, starting the installation is necessary with the prior calculation and creating a project of work. Only after that, it is recommended to start setting the lag (samples).
Technical features
 Lagi, unlike beams - independent design element
 First of all, you need to make differences between lags and beams. The first are characterized by independence from the walls of the structure and are considered a separate element of the structure.
After the installation of beams embedded into the carrying partitions, dismantle or move them is quite problematic. Pullings are installed on independent pillars, which makes them moving both in horizontal and vertical direction.
 Calculate the step between lags
 The length is determined on the size of the structure, while it is recommended to use a timing of 3 - 4 cm less than the specified value.
This will avoid strain when the temperature regime and the change in air humidity.
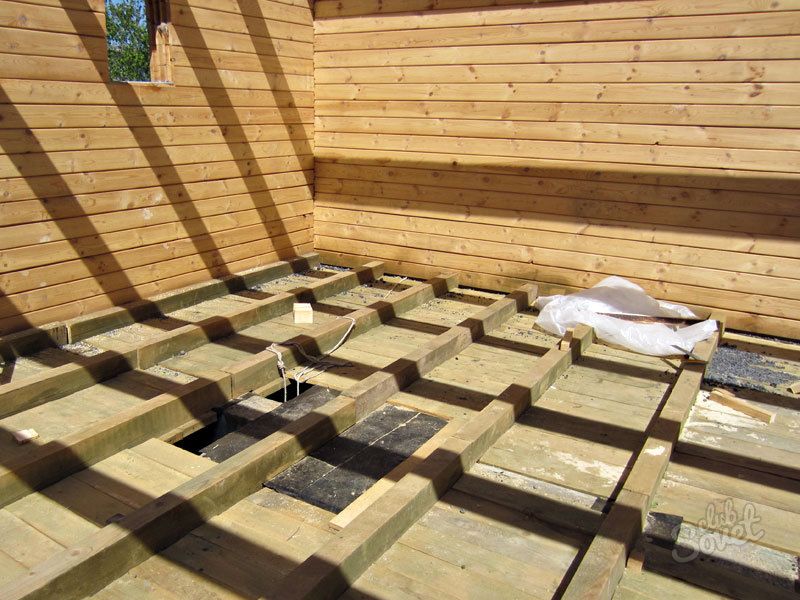
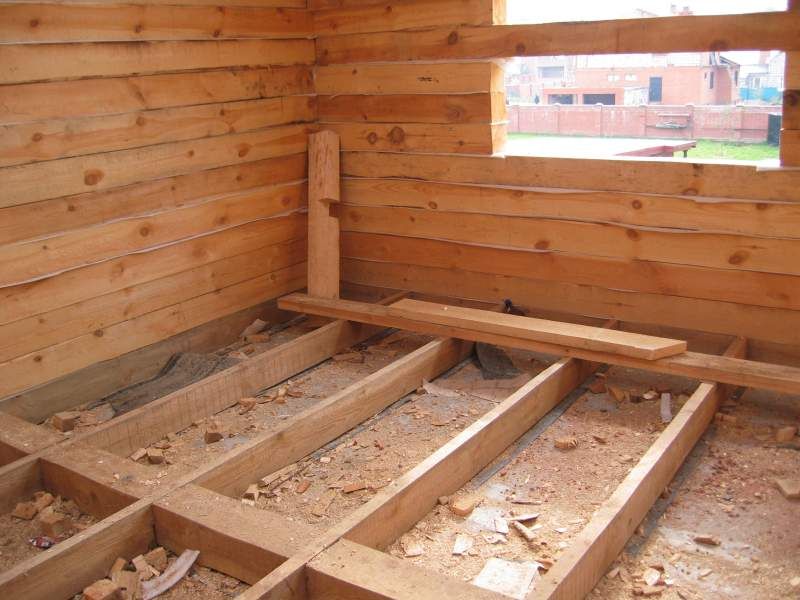
The flooring device on the lags begins with the determination of the thickness of the bar and calculate the step between adjacent elements.
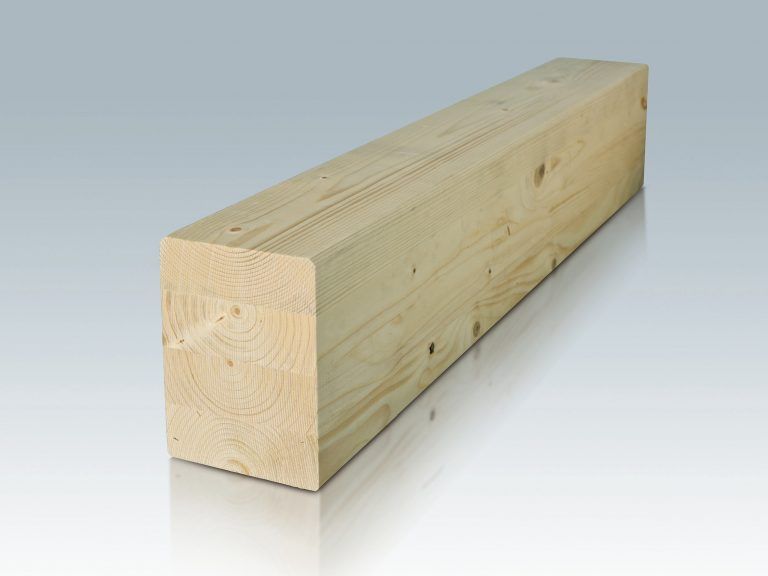
 The thickness of the used timber depends on the planned loads
 It is more difficult to determine the cross section, for this you need to take into account the calculated characteristics of the future foundation.
For a separate unit takes the maximum load on the floor, in which the weight is taken into account outdoor coating, ties, furniture living people.
 Metal elements will strengthen the design
 On average, for residential premises, it is 300 kg per 1 m2. Based on this value, there is a special table designed to independently determine the thickness of the timber and the length of the span between its columns.
| № | Length of the room of the room, m | Cross-section of stems (lag), mm |
|---|---|---|
| 1 | 2 | 110*60 |
| 2 | 3 | 150*80 |
| 3 | 4 | 180*100 |
| 4 | 5 | 200*150 |
| 5 | 6 | 220*180 |
The form of an element in the form of a standard rectangle, the bar is installed on the edge, thus, it can withstand the maximum load.
 Large distance between lags will require the use of thicker boards
 The use of metal elements allows smaller size of the lag. It is explained by the fact that such rearries are less susceptible to bending and able to withstand heavy loads.
The distance between lags is determined directly from the thickness of the board used for the floor.
The principle is similar to the more step, the stronger the material from which the flooring is performed. It is possible to calculate yourself due to the standard table, the ratio of values.
| № | The thickness of the genital boards, mm | Distance between lags, see |
|---|---|---|
| 1 | 20 | 30 |
| 2 | 24 | 40 |
| 3 | 30 | 50 |
| 4 | 35 | 60 |
| 5 | 40 | 70 |
| 6 | 45 | 80 |
| 7 | 50 | 100 |
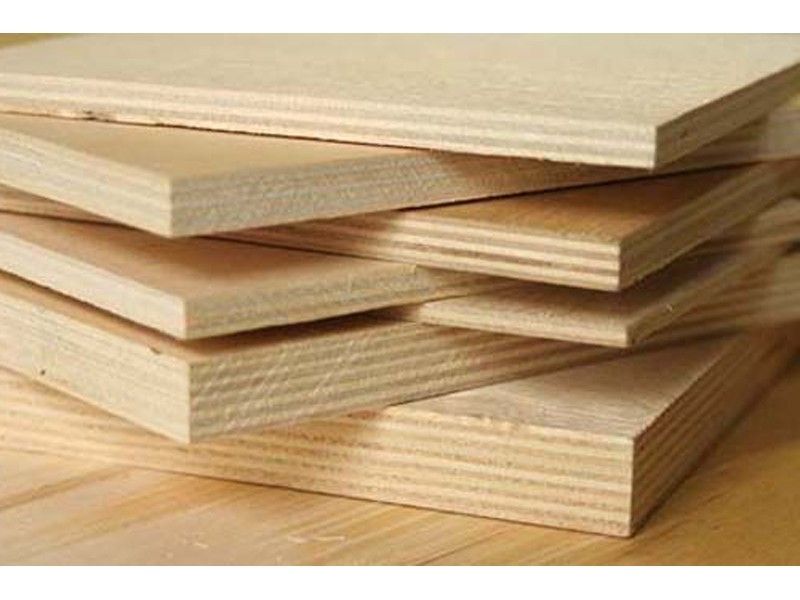
If laying of plywood or chipboard is planned for a bar, other methods of calculations are applied. This is due to other characteristics of materials, but more specifically the rigidity for bending.
 In this case, for sheets with a thickness of 1.5 - 2 cm, a distance of up to 40 - 45 cm is allowed.
Fixation is performed in several places, the flooring is located so that it is attached along the edges and in the center.
Installation methods
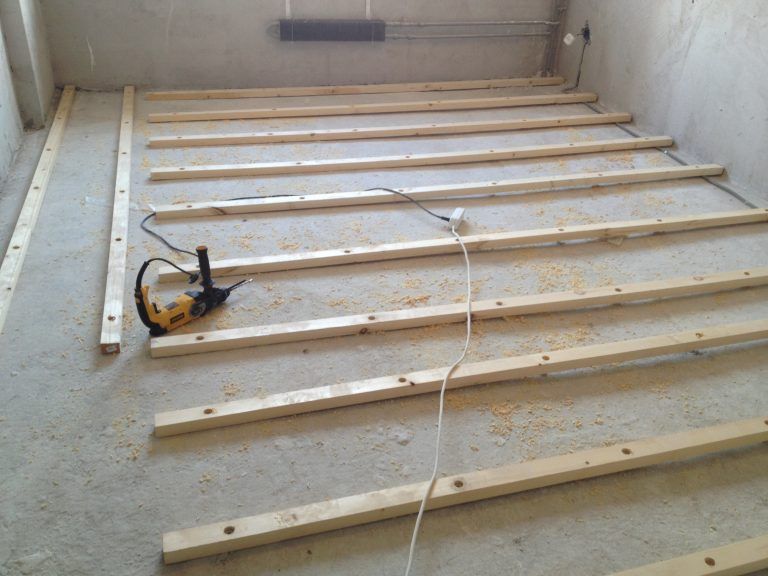
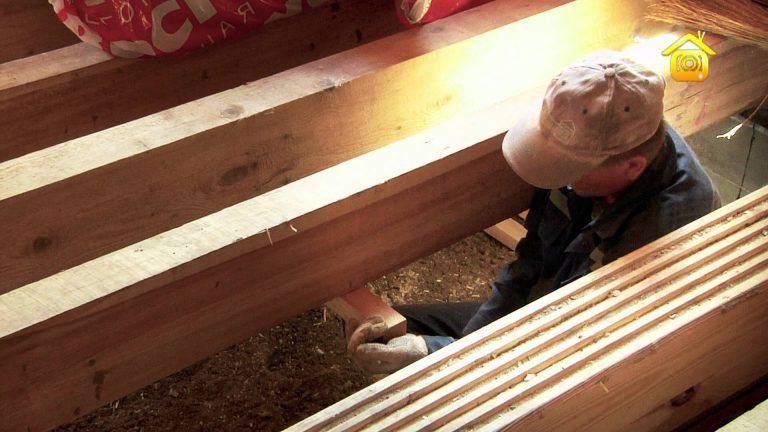 Installation of lag for floor in a wooden house can be performed on a wooden, concrete base or soil. Each of them has its own characteristics relating to both the technologies for performing work and operational characteristics. The specific choice of the method of mounting overlap for flooring is determined, taking into account what operating properties will be inherent in the room (the cooling gear installation technique in this situation is not considered).
Wooden base
 The floor device also depends on the climatic zone in which the house is located
 Floor Paul wooden base Used for all types of residential buildings. Depending on the technique, it can differ significantly from each other, so the installation scheme must be developed at the wall design stage. The main difference will concern the climatic zone of residence, the financial capabilities of the owner and the requirements for the microclimate of the premises.
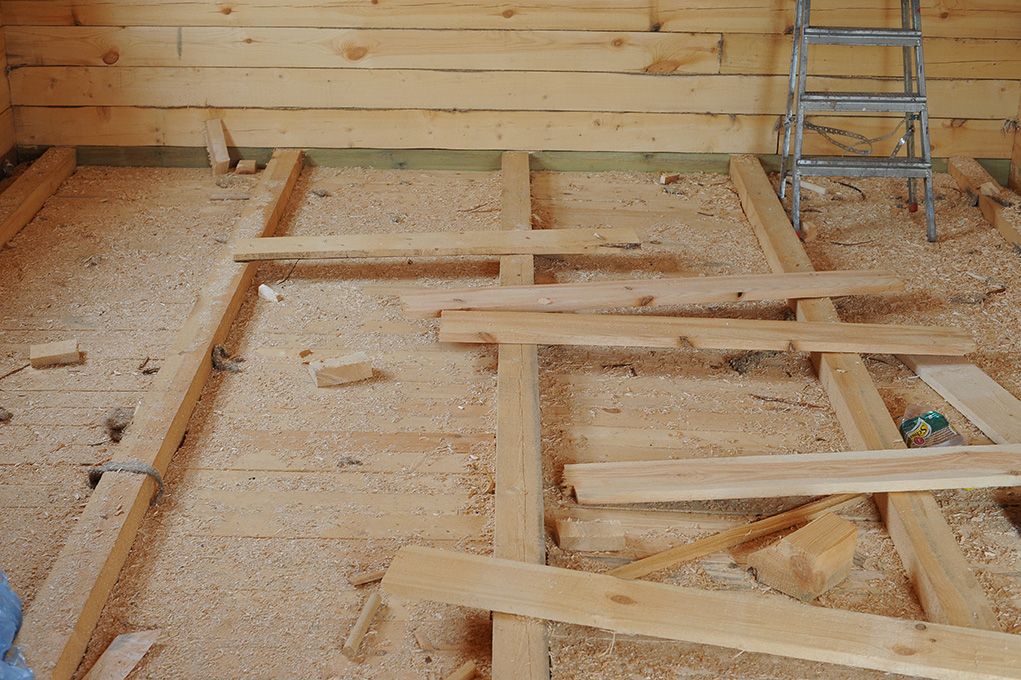
 The procedure for mounting overlaps can be slightly changed, but all actions must be fulfilled.
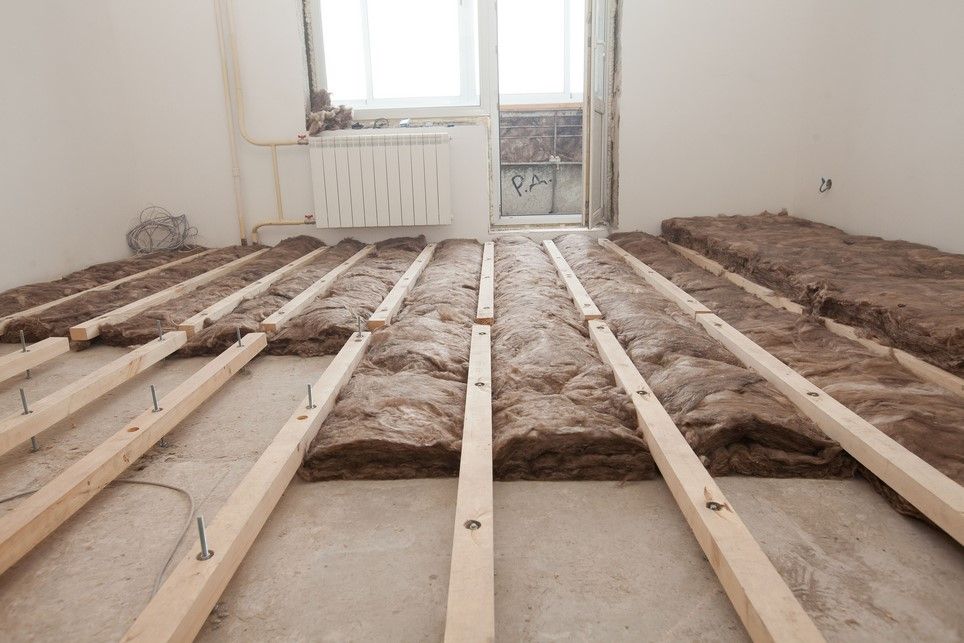
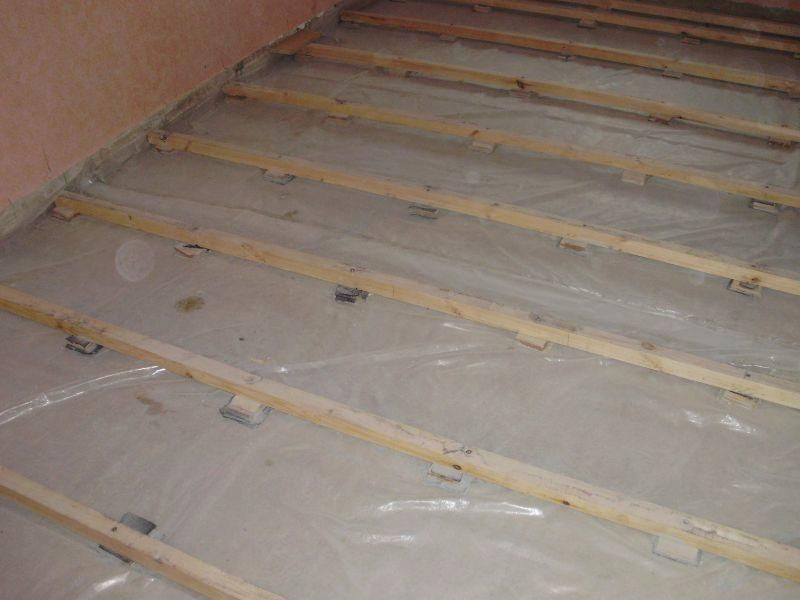
The device involves laying heat, vapor and sound insulation materials.
This can be done using glass gambles, polystyrene foam, ceramisite, mineral wool. The order of work is as follows:
 Lags in such floors are located along the beams
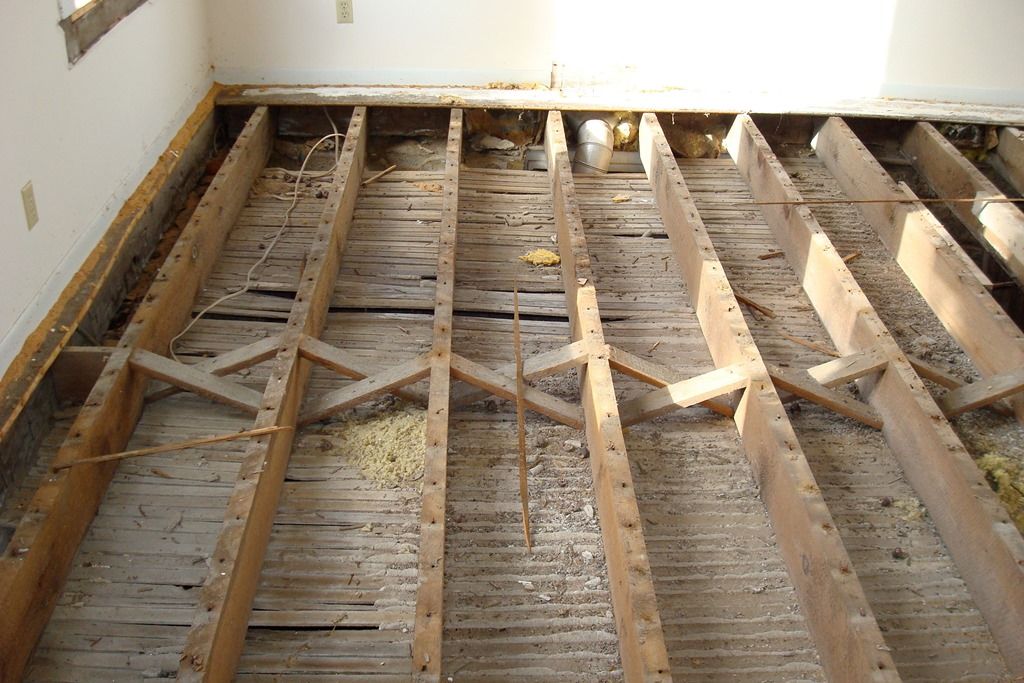
 The lag laying device on the beams of overlapping, called differently, as the ventilated floor, is made for non-residential premises. With such technology, the surface is aligned with subservit, and fixation is carried out using nails.
The difference between the previously described way is that lags are not perpendicular, but along the beams, in parallel. The order is similar to the previously described: 2 extremes are exhibited, on them is the installation and alignment of all others.
The movement of the air masses is carried out through the holes (produced) in the foundation. The ventilated gap between the soil and lags should not be less than 50 cm.
Concrete pillars
 Protect wooden elements from contact with concrete
 The flooring device on the lags along concrete is considered one of the most difficult. In this case, all wooden elements must be protected from direct connection with a concrete base.
If this is not done in a timely manner, the elements will quickly come into disrepair, start rotting and a few years later you will have to completely overlap the floor, so before you put lags, they need to be carefully treated with an antiseptic that protects the mold.
 Polyethylene can be used as waterproofing
 Modern formulations effectively prevent the formation of fungal compounds on all types of coatings. However, after such treatment, the tree loses part of its natural properties and ceases to be environmentally friendly. Thus, the main reason for choosing wood, as a natural material.
Laying Lag on the entire area of \u200b\u200bthe room on a concrete base requires mandatory waterproofing. At the same time, if used for fixing metal corners, you can make a small gap. However, it should be borne in mind that in this case the bearing characteristic of the floor surface is significantly reduced.
 Installation is carried out as follows:
- using the rope, there is a location of the furnaces on the basis;
- the perforator drill holes intended for fixing the corners;
- after the 2nd end of the extreme lags are exhibited according to the labels and the level, they are fixed to the corners;
- the extreme bar from the opposite wall is established in the same way;
- between them, the rope denoting the horizontal;
- intermediate lamps are fixed according to the stretched level.
Fixation thus has its advantages, since the contact of concrete and wood completely excludes. In addition, the subrights can be installed not only on the capital base, but also on the draft unanswered floors. Corners can compensate for the screed irregularities. Due to this, it is possible to significantly save not only time, but also forces, as well as reduce the cost of waterproofing. For more information about laying the lag on the floor, see this video:
If the floor is on wooden lags It is performed directly on concrete, polyethylene, bitumen or component compositions are used as insulation.
Laying on sad
 Lugi on the ground can be laid only in warm latitudes
 Installation of Lag directly to the ground is used only in the southern regions of our country.
For the middle strip of Russia, this method is used to arrange non-residential premises (baths, verandas, arbors, household buildings).
It is advisable to install in buildings on foundation FoundationIf it is planned to make a major belt, it is necessary to consider the presence of products for ventilation.
 To protect the tree, use pieces of rubberoid
 Installation lies in the following actions:
- Fertile soil is removed and removed on the garden plot.
- There is a location in the room of the columns on which lags will be installed. The distance between them is determined according to the maximum load calculations described earlier.
- The base is pillow from sand with a thickness of 5 - 10 cm.
- Supports must be at least 40 cm in diameter. They can be put out of the brick or pour the cement-sandy mixture. In this case, the solution is manufactured in proportion 1 to 2. For formwork, you can use any blowing materials: Faneru, boards, chipboard, metal sheets.
- The upper horizontal point is determined by the rope or water level.
- After all the columns are posted, you can start laying the lag. To protect the tree from concrete or stone, small pieces of rubberoid are stacked between them, which serve as high-quality waterproofing.
Installation is carried out similarly to the previously described methods. 2 extreme rearries are aligned, the rope is stretched between them and laying the internal elements of the base base of the floor. Read more about Montage Floor on the soil, see this video:
 If the installation of the lag is made with a violation of technological requirements, it may be necessary to fully open the floor of the house to eliminate problems.
At the same time, depending on the selected floor material, not each of them can be dismantled without disrupting the integrity (tile, porcelain tile), so it is necessary to pay special attention to the issue of flooring in a private house. Only the combination of the quality of the material used and compliance with the installation technologies will avoid unplanned revealing costs.
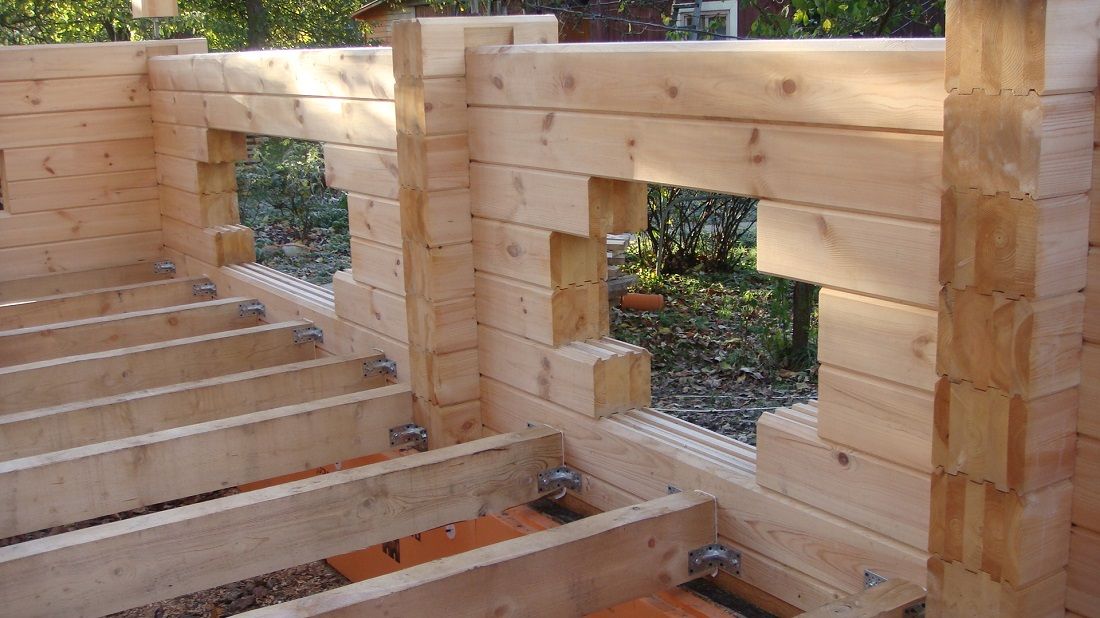
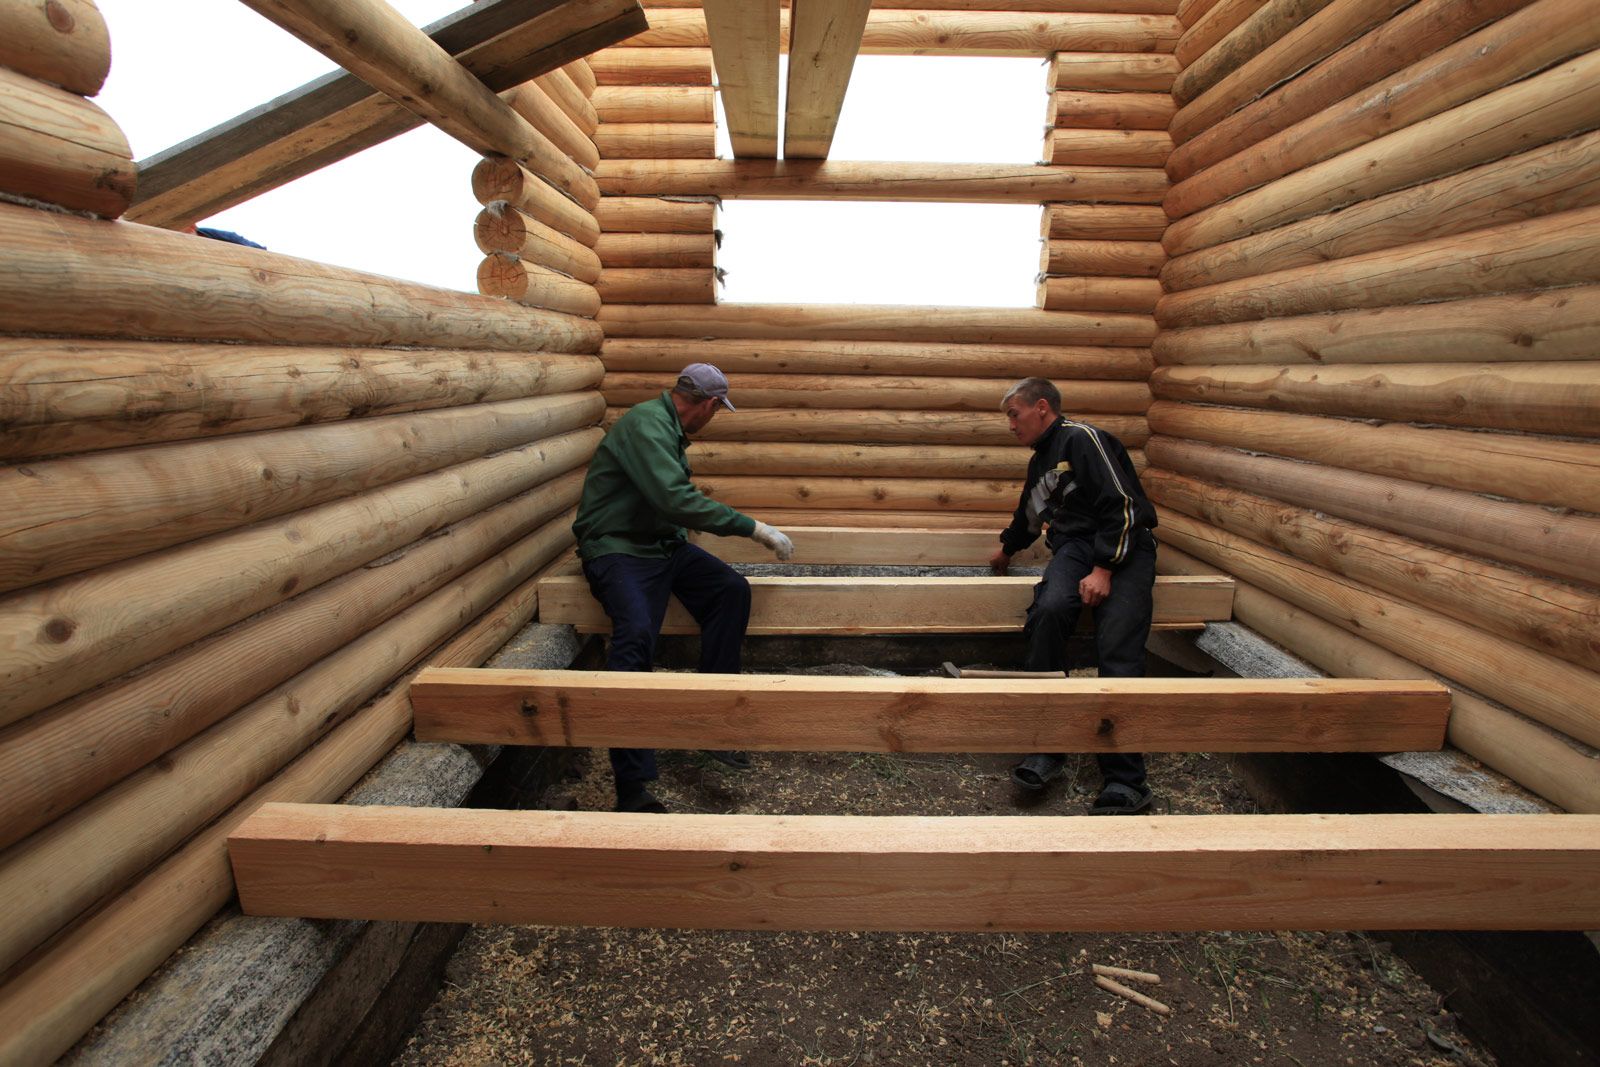
This article will tell you how to fix the wooden beams to the walls of the bath from the log cabin, and there will also be possible ways to connect. When taking a log cabin or at home, the question often arises about the right fastening of overlaps to log walls. Therefore, let's stop in more detail.
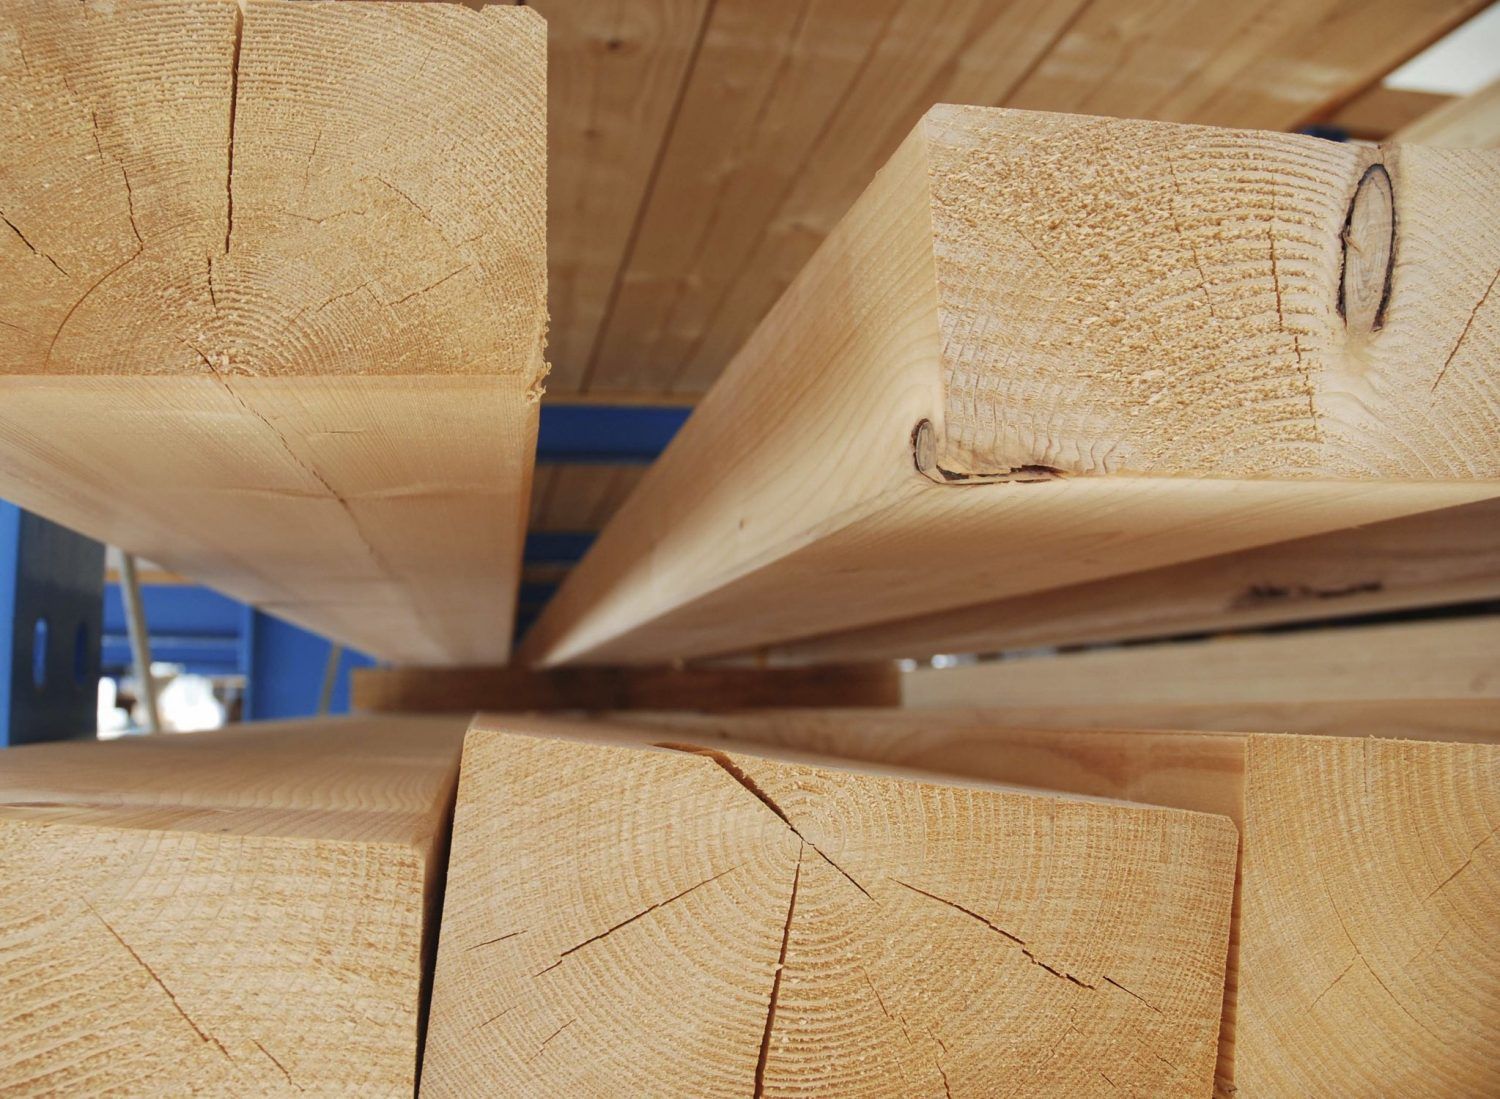
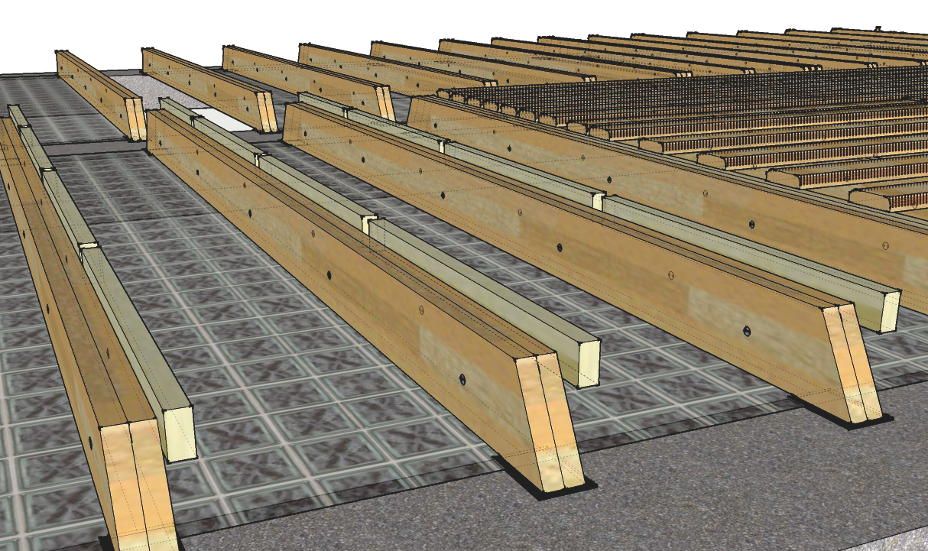
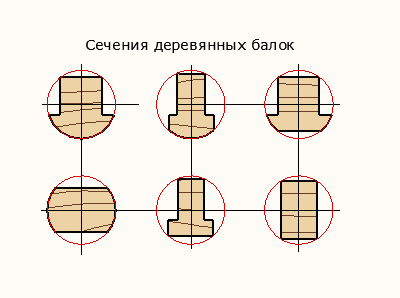
Section profiles Wooden beams for cutting cutters
Depending on, the cross section of wooden beams can be different species. For example, if a profiled timber is applied to the overlap, its cross-section has a rectangular shape. With the arrangement of roughing, rectangular bars are nailed to these beams, which are stacked by the black floor boards. If there will be a pinned or solid log to the lag, then for the support of the black floor in them, you can choose the grooves in such a way that the lag looks like an inverted letter "T".
Below are samples of profiles used for wooden floors of floors, ceilings and attic.
Methods for fastening wooden beams to log walls
When laying the crowns to ensure their horizontal position, building levels can be used different types: Water, laser and standard liquid. It is important to put logs correctly, starting with the first crown, otherwise there will later be big problems.
In order to remove the beams for repair or replacement, they are driving them in the "semi-core" and press with wooden wedges from the end side and along the log. For disassembly, it is enough to knock out these wedges and take out the beam. It is important to do the mount in such a way that the beam has a free move along its longitudinal axis. Therefore, the landing place in the log should have such a gap between the end of the beam and the groove so that when it is displaced along the axis, one end completely came out of the wall. That is the length of the grooves in the opposite walls there must be more lengths of the swallow tails in the beams.
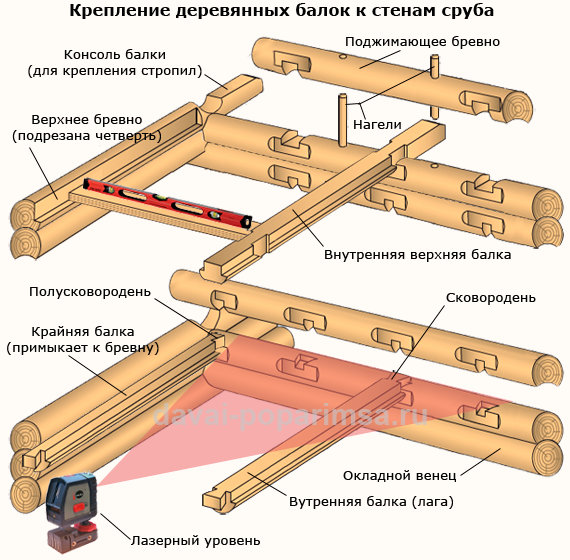 In non-collapsible compounds, Methods are used "Frying", and for extreme beams - "semi-sovereign" (see examples).
Fastening wooden beams in a groin crown
As a rule, the lower beams in the Srub are used as a lag for which the installation of draft and finishing gender is made. If they are made of a log, then longitudinal grooves are cut into them to mount the draft floor: for extreme - on the one hand, and for internal - on both.
The main condition for the words of the lower beams is not to weaken the bold crown, which carries the weight of the whole bath. Therefore, if there is a column or ribbon foundation, The fastening of the beam can be made to a bustling crown. Otherwise, the connection is made not lower than the second crown. But the best option It will be if the lags are not fixed to the bustling crown at all.
Unlike the overlying crowns, it is not allowed to remove the ends of the lower beams (lag) for the external dimensions of the walls. Word is done deaf, in which the ends of the lag should remain no less than ¼ the thickness of the wall log.
Methods for fastening beams for upper overlap
The upper beams can be displayed as the wall dimensions, that is, to do with the "residue" and cut down inside the log. If the beams are displayed with the "residue", their protruding consoles can be used to mount the rafting part of the roof.
In order for the upper crown of the cutting of the cut and not rolled out, the end of the beams are made in the form of a T-shaped end, and the corresponding groove in the wall logs. The protruding parts of the beams do not give the upper crown to deform as inside the bath, that and out.
When using "residues" (consoles) as the support elements of the roof rafted, the upper crown is pressed by one or more logs, which are additionally fastened with brass lower Crown. This is done to ensure the strength of the cut in strong winds. Otherwise, there is a possibility that with strong wind gusts, the roof simply can demolish the roof.
So we reviewed an important question about fastening wooden beams When building a bath from a cut. There are also other options for mounting and fastening the beams of overlaps, which was not told in this article. For example, with the help of steel holders, as shown in this small video:
This article will be described about the requirements, technology and device of the floor and inter-storey overlap on wooden beams in log fires. This material is a supplement to articles on how to do and, and can serve as a reference guide in building a bath with your own hands.
Overlapping, separating rooms with a temperature difference more than 10 ˚C, should be equipped with thermal insulation protection. A bright example of this can be the attic and outdoor wooden overlaps in the steam room.
Any overlaps, including wooden, should have sufficient durability to withstand the load from their own weight, structure structures, equipment, furniture and weight of people. The minimum calculated values \u200b\u200bof the specific limit load on 1 m² are as follows:
- For outdoor (base) and inter-storey overlap - 210 kg / m.
- For the attic overlap - 105 kg / m².
The limit values \u200b\u200bof the deflection when calculating wooden beams must match:
- For floor and inter-storey floors - no more than 1/250, for example, for beams with a distance between the supports of 4 m, it will be 4/250 \u003d 0.016 m (16 mm) in the center of the beam. If when used ceramic tile, this value should be taken at least 1/400;
- For attic floors - no more than 1/200.
Regulatory norms of sound insulation of inter-storey premises, for example, between the washing department and the attic one should be ensured. Recommended sound insulation values \u200b\u200bfor residential premises - 40-50 decibels. Therefore, it is of particular importance to carefully close the gaps, places of passage, hot and bath pipelines.
Maximum length Wooden beams (the distance between the supports) depending on the type of overlapping:
- For an attic - not more than 6 m;
- For other species - no more than 5 m;
- With an increase in these sizes, additional supports should be provided.
All overlaps on wooden beams must comply with fireproof requirements and should be treated with flame retardant compositions, for example, such as Sezhes Ognabio, which also has biological protection from bacteria, insects, mold, rotting and fungus. The steam room refers to the fourth (fire-resistant) category of fire resistance and must be appropriately protected from arbitrary fire.
Wooden beam overlapping device - Installation and processing
Wooden overlaps in the house or baths are structures consisting of log or paving beams closed on both sides by boards or sheet material. Heat-insulating materials, such as mats or rolls from mineral wool, clay, sandwall, sandwood, sandwood, sandwood, plant soil or other modern heat protection products are placed in placing heat inside the ceiling.
In such bathrooms, as a pair and washing compartment, a device of pair-protective layers of polyethylene or polypropylene films, as well as various membrane materials with one-sided transmission of steam and moisture, is of great importance. Parotic films are caught below and over the heat shield layer with reliable sealing, eliminating the penetration of steam or moisture inside the room.
To exclude deflection over the norm, the fastening of wooden beams to the fire walls should be made through certain intervals, putting them across the long side of the span. Recommended sections of pine beams depending on the specific load on the overlap of 400 kg / m² and the size of the span (the distance between them) are shown in the following table, mm:
Polllet length | Section of beams, thickness x height |
|
Span width 600. | Switch width 1000. |
|
Note: About what configurations of sections of the beams can be found in the article.
Attic and inter-storey overlaps in cuts Ban and houses
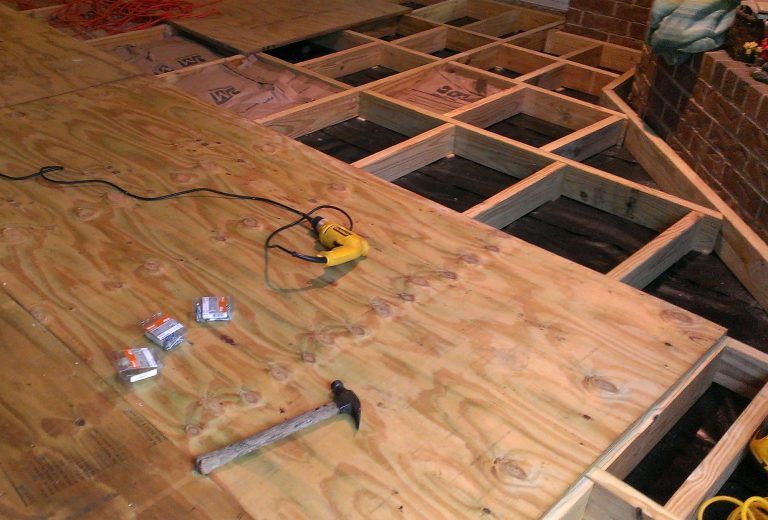
Installation of such overlaps can be made from boards, OSB, chipboard, fiberboard or plywood, laying them on a quarter carved in the beams or on the cranial bars nailed to them. The device is such a view of the overlaps received the name on the "turtles" due to the similarity with the profile of the human skull. Depending on the design of the bath, the lower trim can be fixed immediately on the beams. In this case, it will play the role and ceiling, and the black floor of the upper floor or the attic.
The lined bottom layer can serve both the ceiling, and carrier design For the heat insulating and sound-absorbing layer. The upper flooring on the beams in the attic can be laid, without navigating it with nails. But it is necessary to take into account the fact that it will weaken the carrying ability of the overlap.
Depending on the thickness of the boards, the distance between beams in overlaps with dynamic loads (walking of people, moving furniture, etc.) can be reduced. For example, for the attic floor, with a thickness of the board, less than 28 mm should be no more than 500 mm.
Outdoor or basement overlap on wooden beams
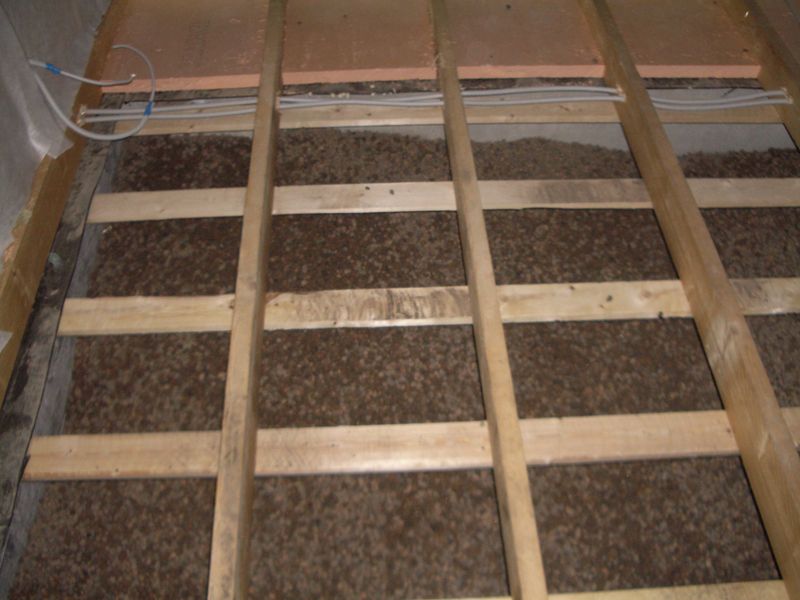
Unlike the above species, the floor (basement) overlaps are made with "cranial" beams. It is necessary for styling a draft floor, which is focused on edged boards, a hill or a log dance. As mentioned above, a quarter is cut in the beams or cranial bars are nailed, as a rule, with a cross section of 40x40 or 50x50 mm. On quarters, the black floor boards are stacked, which can not be fixed, but just to put together to each other.
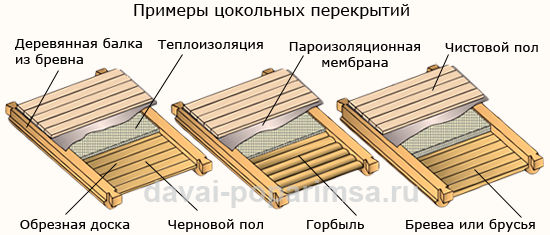
To preserve heat on the draft floor, clamzit, wood sawdust or chips, dry sand, slag, or mineral wool with a thickness of at least 100 mm is stacked, and all this is covered with a steam-protected film. This is especially important for the floor in the steam room, in which the impact of hot steam with high humidity can have a significant impact on both the service life of the floor itself and on quality.
Heat and sound insulation of overlaps
When selecting materials and mounted floors for residential premises, it should be considered that the first floor temperature should not be less than 2 ˚C ambient temperature. Of course, this does not apply to a pair, where it is not possible to withstand such a condition.
Currently, various mineral, slag and basalt wools in the form of rolls or mats (plates) of both domestic and foreign production are widely used as insulation. Their heat-insulating, sound-absorbing, flame retardant and sanitary properties are at the highest level. In addition, they are not afraid of moisture and are absolutely not subject to rotting, mold formation, the development of malicious bacteria, insects and bugs. Having bought a basalt wool "Rockwool", you can safely insulate overlapping, and, and roofing, and high sound insulation walls.
You can not write off with bills and old proven ways of insulation baths. If you wish, you can make one of the following insulation:
- A solution of sand with clay is applied to the detachable runner, give it well to dry, and then fall asleep over it or slag, or wood chips with chips. For winter temperatures Minus 20 ˚C The thickness of the slag layer - 14-16 cm, sawdust - 5-6 cm, chips - 7-8 cm.
- Make a solution from the following components in volumes or parts:
- Water - 4.0.
- Clay - 4.0.
- Cement - 0.3.
- Wood sawdust - 1.0
Keyboard pattern with cells under the required insulation plate sizes, such as 400x600 mm. Fill the cells with the prepared composition, align it in thickness and let go dry in the shade. Laying ready-made plates to produce on the runneroid, and the locations of the joints are embedded with clay mortar.


