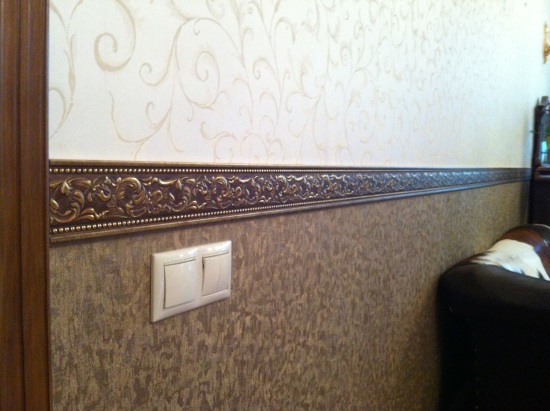
Plastic corners In most cases, it is used to protect external angles from shocks, for aesthetic underscores of window openings and all kinds of arches, and there are cases when not bona fide finishers cover their own shortcomings and "shoals" allowed during repair. With these corners, it is advantageous to cover the wall-pissed in the corners, so that you will protect these places from the blows of small furniture or protect them from small hand-made kids (the last with personal experience). Sometimes with glued corners, everything looks more beautiful and tasteful.
What would be correct printed plastic corners You need to do several uncomplicated stages of installation. We will analyze everything in order.
Plastic Corner Fastening Technology
The entire action begins with marking and cutting plastic under the desired length and converging it in 2 planes. I will advise only from personal experience, plastic I cut as not strange curly scissors for metal, the fact is that they are very convenient to do this work, please believe the word, ordinary household scissors are not suitable here. Also, plastic corners are easily cut off with a stationery knife (trauma is dangerous!), Bulgarian with a disk on metal 115-125mm, a musting saw, if not to do sharp movements by lowering disk.Remember that the general type of work will depends on how you cut the corner.
I do not even advise you to silence the "shoals" of Silicon. First, everything looks very neatly, but one will pass, and maybe two months and construction silicone will cover mud from wiping dust. Follow the employees to replace windows, they usually do not try, and at the end, they make all the White Acrylic Silicone, including your ears with eyes (this is figuratively).
I will say so - better smooth slot around the perimeter than dirty clearly smeared. Specific advice on the selection of builders and testing the quality of individual finishing works need to know, I shared a lot in . All that is written better to know in advance, before you pay the money to the contractor.
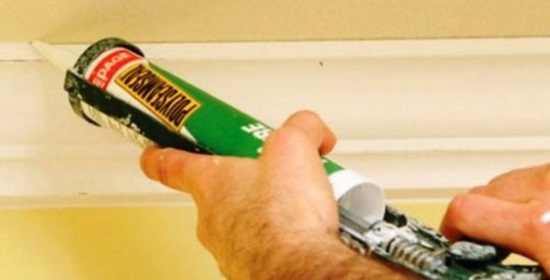
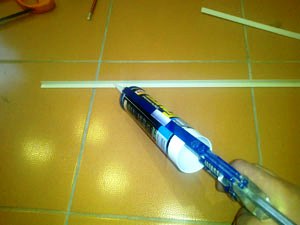
The next step is to apply glue on the back side. Buy "liquid nails" and "gun" to extrude this adhesive. Order in the online store, which will first be cheaper, as one tube you will not have enough (minimum 2). And if you are in addition to this use, then in the aggregate will cost 2 times cheaper.I recommend as I myself use when orders for Aliexpress.
The best liquid nails with a function of instant grip ( or otherwise super strong, over strong ), It is not cheaper to buy, otherwise every month everything will be lying on the floor! Carefully review the instructions on the tube, it is also desirable that the glue after drying becomes colorless.It is worth squeezing with one wavy stripe in the center of the back side, so the probability that the glue will come out on the wallpaper, extremely small. If nevertheless he got out, then in no hurry to wipe it with a finger or cloth, it will be more correct to leave it untouched to complete hardening and then gently cut off with a knife with replaceable blades.
If you want to completely eliminate the likelihood of just described, then it is not necessary to do without a glue pistol. Only it is able to provide a complete tidiness of gluing plastic corners, everything is kept incredibly tight, and to sleep surface (be it wallpaper or what else) you simply do not work, unless very curves hands. Any corners of plastic are attached almost instantly, not even on a straight surface.
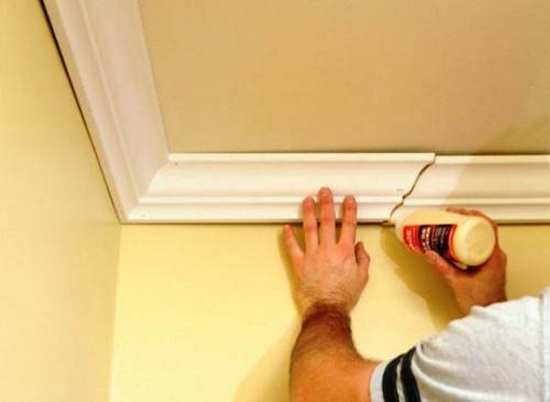
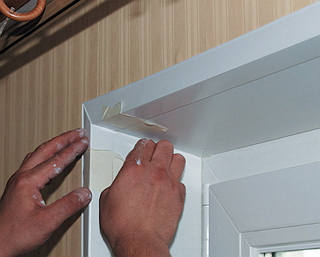
We will continue. Pressing plastic fingers to the right place, try to direct it as accurately as possible, re-breaking and gluing does not lead to a good result, especially with regard to wallpaper. If you had to fix corners on direct plane, then there should be no problems here, the other - where to press and fix in the desired position at the time of drying the glue may seem an impracticable task. Everything is simple - Scotch! That's just an ordinary polyethylene tape, and certainly packing brown.
Opening such a material from the surface, you will leave both on it and in the corner of the traces of a hardwamged adhesive, and the upper layer of wallpaper will come off at all! Therefore, the only right solution is a raner tape, which is easily removed without damage to mood and materials.

So, the next day you can tear scotch. Remove, starting from one edge slowly. If the corners were glued into the chlest one to another, you can encounter such a situation that one "hangs out", for correction I use ordinary instant glue sold in any stall. A single colorless drop is enough, press the finger for a few seconds and is ready. Exclude a stupid situation, make sure that the finger is not glued.
Successes! Good luck!
Flying G. P.
In the process of repairing the apartment, it is not enough only to whitewash the ceiling, stick wallpaper and paint the batteries. There is a mass of parts framing or underlined interior - plinths, corners, moldings that should be glued on already prepared (repaired) surfaces. Usually such a surface is the wallpaper. Therefore, the choice of such adhesive composition is relevant, which at the same time would have a good adhesion for plastic (foam) and paper (vinyl, water-emulsion paint).
In the article proposed to your attention, we will tell you how to glue the corners on the wallpaper, which glue is better to use and what tools to use for cutting foam and PVC of which corners, plinths and moldings are made.
Application of plinths
In addition to traditional outdoor plinth, the main tasks of which serve:
- Elimination of gaps in pricing places outdoor coating to Wall.
- Holding a soft floor covering (linoleum, carpet).
- Protection of walls from shocks and damage when cleaning the room.
IN modern interiorsWith a complaint to the "renovation", ceiling plinths are often used. They allow you to level the irregularities of the upper edge of the wallpaper, give the room more elegant look.
Such plinths made of pressed foam plants are made, very easy.

Regardless, what kind of plinth will give preference, you will stand the task to strengthen it in place at the same time, not blurring the ceiling and wallpaper glue, traces of which cannot be eliminated.
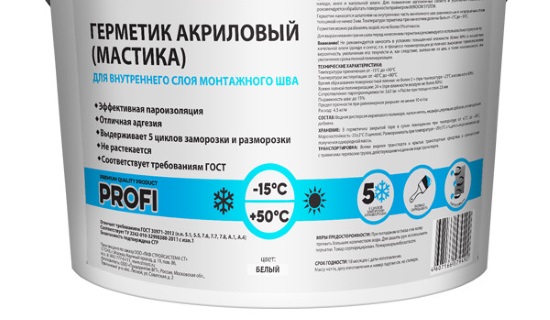
The optimal option for such works is white acrylic (not silicone !!!) sealant.
The advantages of this material before the "liquid nails", PVA emulsion, other adhesives is its water solubility, excellent adhesive properties to all known types of construction and finishing materials, high viscosity, not turnover, the ability to dismantle without disrupting the integrity of the glued plinth and without damaging the surface layer of wallpaper or ceiling.
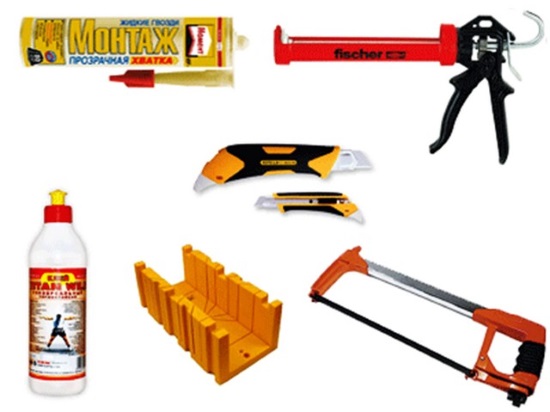
To work with the ceiling plinth you will need:
- Stuslo.
- Handsaw with a fine tooth (you can handwheel for metal).
- Retractable construction knife with replaceable blades.
- Rubber spatulas from 25 to 100 mm width (sold by sets).
- Painting tape.
- Unbroken (1-1.5 inch) painting brush.
- Pistol for spray sealants.
To roam the edges of the plinth, in places of articulation in the corners, the stub is used in which the edge of the plinth is placed and the angle of 45 ° is made. Without the use of the stus, it is almost impossible to achieve a smooth articulation of the edges of the base in the corner. The skills of using this simplest device are usually mastered within 10-15 minutes. The main thing to learn how to lock the external and internal angles.
Glue the ceiling plinth from the foam should only come dry in the ceiling, walls or when the wallpaper is dry. Acrylic sealant is applied along the entire length of the plinth of a uniform slightly silent strip along both shelves of the plinth. It does not flow, does not drip, well holds on the plinth and after pressing it to the wall and the ceiling perfectly fixes the item, without requiring a long retention or additional fixation.
Another feature of the acrylic sealant is that it allows the ceiling plinth from the foam on their own to alone and take a flat shape in the event of the irregularity of the wall. An hour later, the sealant is polymerized under the influence of air and one can proceed to the final stage of the decoration of the room - climbing the slots between the plinth and the wall.
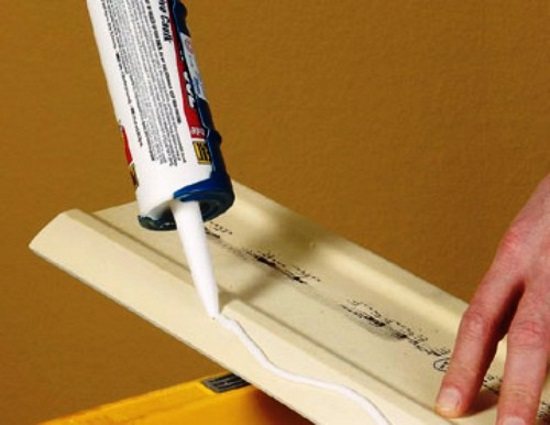
To do this, under the plinth paste a painting tape with an indent of 1-2 mm. From the lower edge of the plinth. From the mounting gun along the entire edge of the plinth, a thin "sausage" sealant is squeezed, which is immediately labeled with a finger or non-trap rubber spatula. Surplus acrylic sealant are cleaned with a damp cloth. She is also removed the surplus sealant from the hands and spatula. If necessary, the upper edge of the plinth is also processed at the articulation area with the ceiling.
The painting tape on the ceiling is not pasted. After 10-15 minutes, the ceiling plinth from the foam blasts the same paint that was used for painting the ceiling. In the case of the arrangement of the stretch ceiling - close by the tone of the water-emulsion paint. Immediately after painting, a painting tape is removed. (You can never leave it before drying paint! You can damage the wallpaper.)
We stick corner
Plastic corners can be glued to emphasize the shape of the door or window opening, protect the wallpaper on the outer corners of the walls, especially in the hallways or premises where there is an intensive movement.
For the articulation of the corners in the corners, as well as in the case of ceiling plinthYou will have to clean the edge at an angle of 45 °. Only in this case it is used not a stub, but a flushed corner, which is marked. Plastic corner is best cut with straight scissors for metal. (Stupid tips to cut with a hacksaw of metal - give those who have never saws these plastic corners).
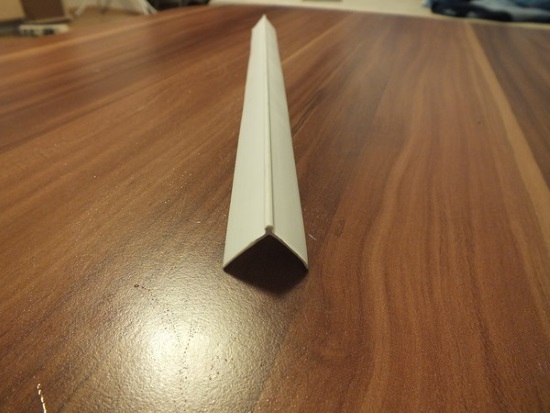
In the future, the application of the acrylic sealant on the shelf the corner is no different from that on the ceiling plinth. The glued corner, like the plinth, does not require additional fixation or retention. The form of the corner is different from the shape of the plinth. His shelves are slightly bent along the edges inside. Therefore, the slots between the wall and the shelf is usually not formed.
But if the wall is very uneven and the cracks were still formed - they are eliminated in the same way as when working with the ceiling plinth - paste along the edge of the corner painting tape with an indent 1-2 mm. Apply sealant. Wrap your finger, the surplus is cleaned with a damp cloth. Immediately remove the painting tape.
Mounting molding
Moldings are a convex curved part that serves to imitate stucco in the interior. Since it is very difficult to eliminate the slots in the event of an uneven fit of the molding to the surface of the wall or ceiling, it is recommended to highly thoroughly align the surface before it is placed.
Moldings should be glued as acrylic sealant. When sticking molding on wallpaper it is better to use not white, but a transparent acrylic sealant.
Let's summarize
Glue plastic corners, plinths, moldings are not difficult, but very painstaking work, associated with the need to rises many times to the ceiling and bend many times, roating the edges of the plinth. But after such "gymnastics" you can be confident in harmony of the feet of feet. The work by the assembly gun with a sealant - give your hand trafficking and unforgettable power with handshake.
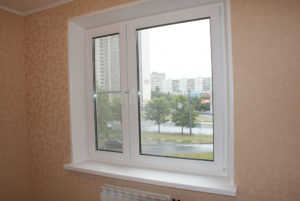
When the doors and windows are installed, you need to study the finishing of slopes, as a rule, this is the final stage. To hide small roughness and give a completed aesthetic look, many use ready-made corners. How correctly cut and glue a corner of plastic, cork or MDF? Below are the detailed recommendations for their installation.
1
Let's start with the most important thing - why is it necessary? What role do corners play - only decorative or do they have more serious functions? We will not argue with the fact that if you form or winds with special decorative elements that perfectly fit into the design of the room, the interior will immediately change for the better.
Corners will protect slopes from damage
But besides this, they still perform a very important protective function. Sooner or later, it is necessary to rush through the opening of the opening things, which is fraught with a damage of the corners, and simply can accidentally touch the outer angle and damage it. Situations may be mass, the main thing is the result of the same - a spoiled surface and, accordingly, the view. In addition, as practice shows, most often the wallpaper begin to be squeezed in these places. So it is best to protect the external angle of slope using a decorative element, which also transforms the interior.
Corners are not only protection, but also a neat aesthetic appearance
2 plastic, wooden or from MDF - which choose?
Making sure that the installation of the corners is not just a whim, but the need, we will study the construction market in order to do right choice. These products are divided into species depending on the material from which are made. So, the corner can be plastic, wooden, bamboo, made of traffic jam or MDF. Absolutely, each type has its pros and cons, consider them in more detail.
They are made by the hot bending of the polyvinyl chloride sheet. Basically, they have the same shelf width - from 10 to 40 mm in 5 mm increments. However, asymmetric instances are found, for example, 10x25 mm, but regardless of this parameter, the angle between the parties is 90 degrees. If you need to transform the arched out, then this is done by means of a special flexible profile. Their advantages can be called a relatively small cost, they do not need painting, unlike the same tree.
Next view - corners from traffic jam. Such decorative elements are often used for arched openings, but it does not mean that their application is limited only by this area. They can also be used to finish slopes of various shapes. The plug has a number of advantages, among which strength, refractory, practicality and environmental friendliness. In principle, such material practically no disadvantages, except if your pet wishes to swam on it claws, it hurts the surface.
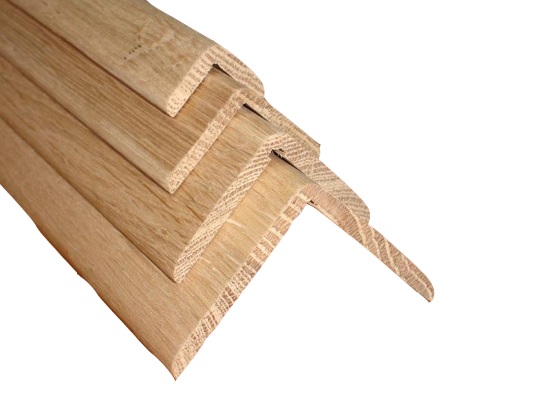
It is also worth noting wooden and bamboo products, which will always be signs of excellent taste and fit into almost any interior. In addition, it is impossible to forget about their environmental friendliness. True, such elements are somewhat more expensive than their analogues from other materials, and besides, often need painting. You can also compare such material with a natural tree as MDF, only it is significantly lower, because woody dust is used to create it.
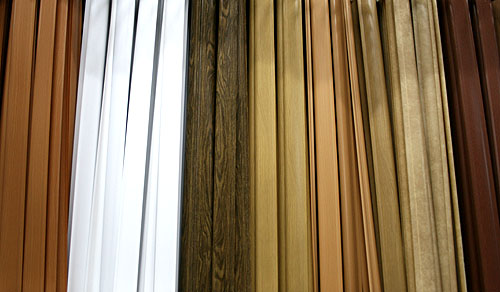
Photo Gallery: Finishing Materials
It can be seen that the range is quite extensive, and choose from what. But what are you guided by this? Of course, no matter how much we want, but almost always the budget is limited. Therefore, first of all, it is necessary to proceed from our material situation. As mentioned above, plastic products have a quite acceptable price, while them appearance slightly inferior to the analogues from natural materials. But, besides the price, you should also pay attention to the fact that these elements of the decor harmoniously fit into the design of the room.
For the arches, special arched outdoor corners should be purchased, they perfectly retain the position when flexing. Note that the wider the sides of this element will be, the larger loads it is able to withstand.
3
What glue to use
In addition to the corners themselves, we will also need an adhesive composition with which we will fix the selected item. When it is elected, it is worth remembering that quite often, especially if you need to glue a narrow product, glue seeps from under it and, naturally, falls on the walls. As a result, the latter may be damaged, respectively, will negatively affect the appearance of the room as a whole. Therefore, it is necessary to choose such a glue composition, the surplus of which can be removed from the surface.
Basically, the corners are glued to new slopes, but nevertheless, check that the surface is relatively smooth, since large bugs will not be able to hide any scenery. There should be no foreign objects like nails, self-tapping and so on. It is also necessary to degrease it, the White Spirit is suitable for this purpose.
How to cut
Before discussing how to mount corners on the slopes, you should find out how to cut them correctly. After all, this stage is of everything the most time consuming and, maybe even most important, since it depends on it, as far as their edges will be shown, and this directly affects the aesthetic look of the entire room. It is best to carry a trimming with a fine tooth. First, it is necessary to measure the length of the day, then we apply marks to the corner itself so that the segment corresponds to this parameter. Then the part that will be adjusted directly to the slope, cut off strictly by marks, and the one that the wall is at an angle of 45 °.
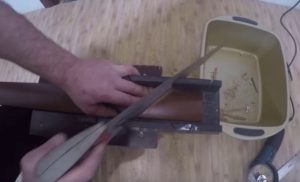
For trimming Corner should use hacksaw with small teeth
How to glue
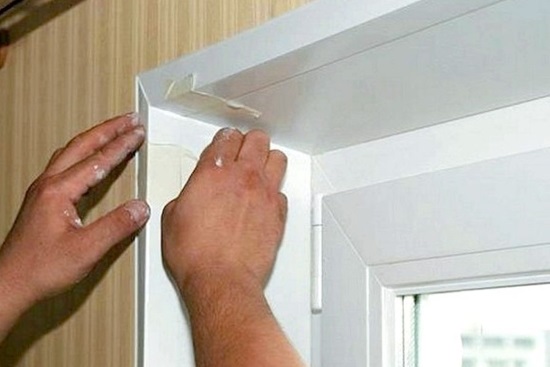
Now, finally, they got to the main issue, how to stick the corners to the slopes. However, before proceeding directly to fixation, you should implement, so to speak, fit. Making sure that everything is cut correctly, you can go on. We apply to the inner part of the corner, at the place of the sides of the sides, the adhesive solution with a step of approximately 10 cm. At this stage, an indispensable assistant will be a mounting gun. After that, quickly press the product to the surface and fix it in this position by painting scotch. You should begin with a horizontal slope, and then already start up. We remove a damp cloth an extra sealant from the walls of the walls and give a pretty dry. You can only remove the scotch after 24 hours.
Video: Fresh Corners on window slopes
Thus, plastic corners can be put on the slope of the window or door. As you can see, there is nothing complicated in this process.
Video: How to cut and glue corners on door slopes
Having understood with the fact that such products are manufactured, what are their features and deciding with the choice, you should study how to install corners on the slopes. detailed instructions is shown below.
Such decorative element, as plastic cornerIt has, among other things, important practical importance. Its main task is to protect corners, as well as materials exterior decoration from mechanical damage. Such materials for walls include wallpapers, slopes for windows and window openings, arched structures (arches), and sometimes baselinits. Today we will look more detailed how to glue a plastic corner which glue to make, what kind of types of this structural element are, and what size it is better to choose.
main destination
As already noted, just above, the main reason for fastening the protective PVC corner for wallpaper, arches and tiles, is not only a decorative function, but also the protection that it gives for certain construction or finishing materials in the interior of apartments and houses. With this design, you can protect various vulnerable areas from damage, which can be caused by blows from pieces of furniture of various sizes, inaccurative appeal with household appliances, and sometimes overly playful children and pets.
Attention! If you decide to stick a decorative plastic corner, then be sure that this mounting element will not only provide security for wallpaper, PVC panels and window slopes, but also will make the interior of the room more "finished" and attractive. So let's consider the blending process in more detail.
Types of plastic corner

It should be noted that in its destination, as well as in appearance, this fastener can be different. The following types can be distinguished: outdoor, internal, perforated, color, decorated "under the tree". In addition, some of its kinds can be used for.
Tip! If you are not satisfied with the color of PVC corner and you want to paint it, you should use those rules and instructions as when painting other PVC surfaces.
As for what size is better to choose: see the situation, guided by both aesthetic and practical considerations.
How to stick
Before fixing the corner, you need to spend certain preparatory work. To begin with, plastic material must be cut and adjusted. This can be done using a sharp knife, or strong metal cutting scissors, since their household analogs can be easily damaged during the cutting process. Consider the fact that working with a knife is associated with danger, therefore, it is necessary to perform it extremely carefully, in compliance with all the necessary security measures.

In addition, trimming work can be performed using a grinder. Note that in this case it is recommended to use the disk for the metal thread. Take into account the fact that it is precisely how exactly the overall quality of the work has been completed, the overall quality of work has been performed.
Do not forget! No need to use silicone in order to hide the shortcomings of uneven trimming. The fact is that by expiration of some time covered with silicone spaces can begin to be covered with dust, spoil the overall appearance of the corner, as well as the place that was closed them. If you do not perform work, but hired specialists, then we also recommend closely following how they perform their work.
Think ourselves: after all, it is better to have a small, but even slot over the entire length of the corner than dirty, and not always neatly squeezed with silicone or acrylic sealant. The fact is that this fastener may have different color and be color.
Here are the most common color options:
- The black.
- Grey.
- Transparent.
What to glue and what glue to apply
So, what glue is better glued plastic corners? One of the most optimal options are so-called. "liquid Nails". With their help, it is possible to firmly and securely glue this decorative element not only in all rooms, but also in the bathroom or in the kitchen, which are known to be places with high humidity, requiring all fasteners with increased resistance to similar difficult conditions. By the way, choose such liquid nails, which after installation will become transparent. In addition, the use of acrylic sealant of the corresponding color is allowed.
In addition to purchasing glue, you will need to buy a special gun, with which you can apply liquid nails to the working surface. When applying glue, it is necessary to be attentive: a thin wave-like line, closer to the middle of the wrong side of the corner. Thus, you significantly reduce the likelihood that the remnants of glue, when pressing, fall on the decorative face. In the same cases, when the remnants of the adhesive were still on the front side or on the wallpaper, it is necessary to first wait for their complete drying, and then neatly remove them with a sharp knife, scalpel or blade.
Now a few words about how to correctly fix the corner at the time of drying the glue. If when working with smooth and flat surfaces (for example, window slips) you will have less problems, then for example, when installing the arches, which have a curved silhouette, certain questions may appear. In order to secure the corner, in such cases it is desirable to use tape different species (Choose in each specific situation based on your conditions). The most common types of assembly scotch are:
- Malar.
- Packing.
See useful video Instructions:
Output
In our case, of course, the most proper decision will be the use of painting tape. With it, it will be necessary to fix the corner. It is necessary to remove the adhesive tape the next day, provided that the glue is completely drying. By the way, many wonder: how to bend the corner. In fact, it is not necessary to do this in the arched structures, because it is soft enough, and the arches itself will take out (if they are certainly not too sharp).
In the same cases, when the angle of the working surface is sufficiently sharp (for example, 45 degrees), or the radius of the arch is small, you can cut a plastic corner into several parts and secure each of them separately described above by the method, gently docked them.
Plastic corner on wallpaper
After performing work on the pasting of walls, wallpaper in the apartment, home or office arises the need to protect internal angles premises. As practice shows, the internal angles are most often damaged: when transferring furniture or equipment, when cleaning an apartment or simply by negligence. How to be? The solution to this problem is a plastic corner on the wallpaper.
Features of the material
Plastic decorative corners are produced on wallpaper in factory conditions strips, which have a length of 2.7 - 3 m. It is a practical and supportive material. It is easily cut by conventional scissors or scissors for metal. It has a wide range when choosing a color and shades. Its width can also be different, which depends on the taste and wishes of the customer.
Dignity
Consider what advantages has this material:

- simplicity in processing;
- easily glued to any surfaces;
- protects wallpaper from mechanical damage;
- strength - sufficiently stable at shuffles;
- hides minor defects of the corner itself;
- environmentally friendly material - made of environmentally friendly raw materials and does not cause allergic reactions.
Necessary materials and tools
Before starting work, you need to purchase the desired toolkit:
- scissors for metal - precisely scissors for metal it is better to cut this material, since simple scissors may break;
- sponge or pure rag;
- stuslo.
Also for cutting fairly wide and thick elements of the corner (for example, when the crossing of arched structures), the metal should be used. The stub is used when fitting the joints, if the joints, for example, must be accomplished strictly at right angles.
Important: For gluing to the surface it is better to use silicone glue. Using other glue, can lead to the appearance of traces on the wallpaper.
Installation
Consider the fasteners sequence:
- Marking - each item must be placed according to the length of the corners.
- Cutting and fit - strictly by markup with scissors or hacksaw cut the required number of elements of the desired length. Also we caught the corners that are cut at an angle of 45 degrees.
- Glue is applied on the inner side of the plastic.
- The strip is directly applied to the corner and with the help of a sponge or dry cloth smoothes.
- After drying, the reliability of the attachment is checked and the lack of glue residues on the sides of the corner.
For reliability, some experts are advised immediately after gluing to secure the strip, applying greying tape. But as practice shows, the use of not necessarily. Silicone glue reliably holds plastic even broad sizes.
With such work, it will be much easier to cope with such work, if you first get acquainted with the photos on the installation of plastic corners on our resource. Also, before proceeding with direct performance, you can consult with a specialist. Given the simplicity of installation, all work related to fitting and plastic fastening can be done without difficulty.
The decorative plastic corner on the wallpaper will be a decent decoration of any room. The versatility of the material will protect both direct and rounded (on arched structures) internal angles.
Video: How to cut a plastic corner on slopes and niches?