Frame sauna with his own hands
Traditionally, the chopped baths are built in the country. Such structures have a lot of advantages, but they are very expensive. So today is increasingly gaining popularity bath Baths. They erected much faster than chopped and broken, do not give shrinkage and much more economical in terms of costs.
Necessary materials in the illustration
Construction of foundation
To begin with, let's figure it out with how to build a foundation under frame bath. So, as a structure is very easy, you can use a cheap bar base under it, how to build a column foundation with your own hands here. If you stayed on foundation Foundation And you are not going to pour aside, then the lower strapping should be made of a bar (up to 200mm).
Digger device
Such a structure, as a bath, of course, requires draining. It is also not difficult to arrange him. Even before the fill of the foundation, you should dig a trench for the pipe and the well of the receiver. The concrete base under the floor is poured with a slope of its exit (where a small receiver-tray for water is digging).
When pouring, the floor can be additionally insulated. For this, the soil is first compacted (withstanding a slope), put the pipe into the trench and fall asleep it. Top puffed crushed stone in 20 cm and pour concrete screed In 3 cm. More about the drain device for the bath can see here.
Tip: Arranging concrete base Under the floor, do not forget to leave a place for the foundation of the Kamenka.
Assembling wall frame and roof
The lower strapping is fastened to the foundation pillars using anchor bolts with hex nuts and wide washers (in more detail about the mounting of the bottom strapping, see here). On each pillar, 1-2 bolts are used depending on the distance between them. At the next step, the angular racks are installed. Fasten them on steel corners. Next, begged for the installation of intermediate racks. The step between them is usually 0.6m. Then fasten the upper strapping and constant drives from the inside of the bath (four for each rack). Step by step instruction by erection frameless walls You can see here.
At the next step to the upper strapping, overlapping beams are fixed with corners or wrinkles. Further on the anchor with an additional fastening of the brackets are set by rafting legs.
Wall insulation frame bath
Building a skeleton bath, attention should be paid, including the insulation of the walls. This operation is performed in several stages:
1 Between the racks are installed fiberglass plates.
2 At the racks, the waterproofing film is fixed.
3 on bars is attached to a blockball.
4 From the inside the baths on the racks are also a pair insulator mounted.
5 The inner cover is performed by board or clapboard.
Important: Pain in the board used for the inner sewing can not. It is not allowed to use lacquered lining.
Before insulation of the walls, it is necessary to warm and roof. To do this, the waterproofing film is first stretched on the rafter. Fasten it with a small provis. Then the lamp is stuffing and the roofing material is mounted.
Heat ceiling
The ceiling of the frame bath is ashamed about the same as the walls. Here is an accurate step-by-step instruction:
1. The beams are fixed by a vapor polyplator.
2. Ceiling with clapboard or board.
3. Thermal insulator is placed on top.
4. Sew the sex attic.
At the final stage Concrete floor baths are baptized. Next mounted windows and doors. On this construction of the bath is considered finished. You can start up the construction of the heater, build shops, etc.
Today I will tell you how to build a hiking bath with your own hands and not to suffer at the same time \u003d)
And then in the taiga, you know, anything happens ...
To drink, eat, sit by the fire, to talk - it's of course cool ... But the coolest, without jokes, in a taiga is hiking bath, exactly, it is self-made, when you pierced with your own hands, well, or took part \u003d)
Such a sauna is almost all.
Before writing this instruction, climbed into the Internet, looked like there with the coverage of this question ...
In general, it is good with lighting, I would even say that there is a powerful such lighting, almost searchlights shine ... but ...
I noticed two curious moments - either the bath is put on the purchase (including the stove), or homemade, but such sizes and design, as if there will be a motorized rifle platoon ... it can scare it ... it can scare away - buy expensive, and building a hefty design - troublesome ...
Both, both, in my opinion, or impractical, or suitable for big company, inserted a camp for several days, either generally a majority ...
I want to tell here how we do, when the departure for a couple of days (respectively, the bath is needed for 1-2 pm), the company is small, and with a grain material or a problem, or I don't want to bother ...
To begin with, we consider the easiest option in which only the film and the tape is taken to the manufacture of special materials for the manufacture (also, possibly cloves).
So ... how to make a hiking bath with your own hands ...
Frame
First of all, we need to make an acting room in which we will bathe.
What will take:
* Toporic
* Wide Scotch (Minimum 1 Motor)
* Local vegetation (Ivnyak or something else, the main thing is that the branches are smooth)
* Film. Meters 10-15. Take the finest, it will be cheaper, and it is easier to carry. As practice shows, more than 1 times the film is used well, it is very rare, so it is not necessary to break.
* Stationery clothespins (pieces 20). You can use the same tape instead.
When suitable branches are found, start doing the frame.
We need 8 sticks long minimum meter. Maximum - at your discretion. Suddenly, you have a basketball players or sums there. \u003d) It is better not to do a lot more meter, it is problematic to warm the steam room.
Of these 8 sticks, you will make a cube or parallelepiped, pretend to be what sizes you need it to fit. If the company is big, then it is better to bathe in part of 3-4 people, a motorized rifle compartment in such a bath is not recommended at a time)). 3-4 people are quite optimal.
You can make more spacious premises, but then the frame is different, and the firebox is specific, about it in another post.
So, take 8 long sticks and make the framework of the main premises, where people will sit. Sticks fasten with a scotchball among themselves, and no need to regret it. In addition to the attachment, he will also protrude and will not give the film to the acute ends of the frame, because the ventilation in the bath is completely nothing to do ... ![]()
When the frame will be ready, added to the side of the stitch)) There will also be three more sticks for 50 cm and three to 30. 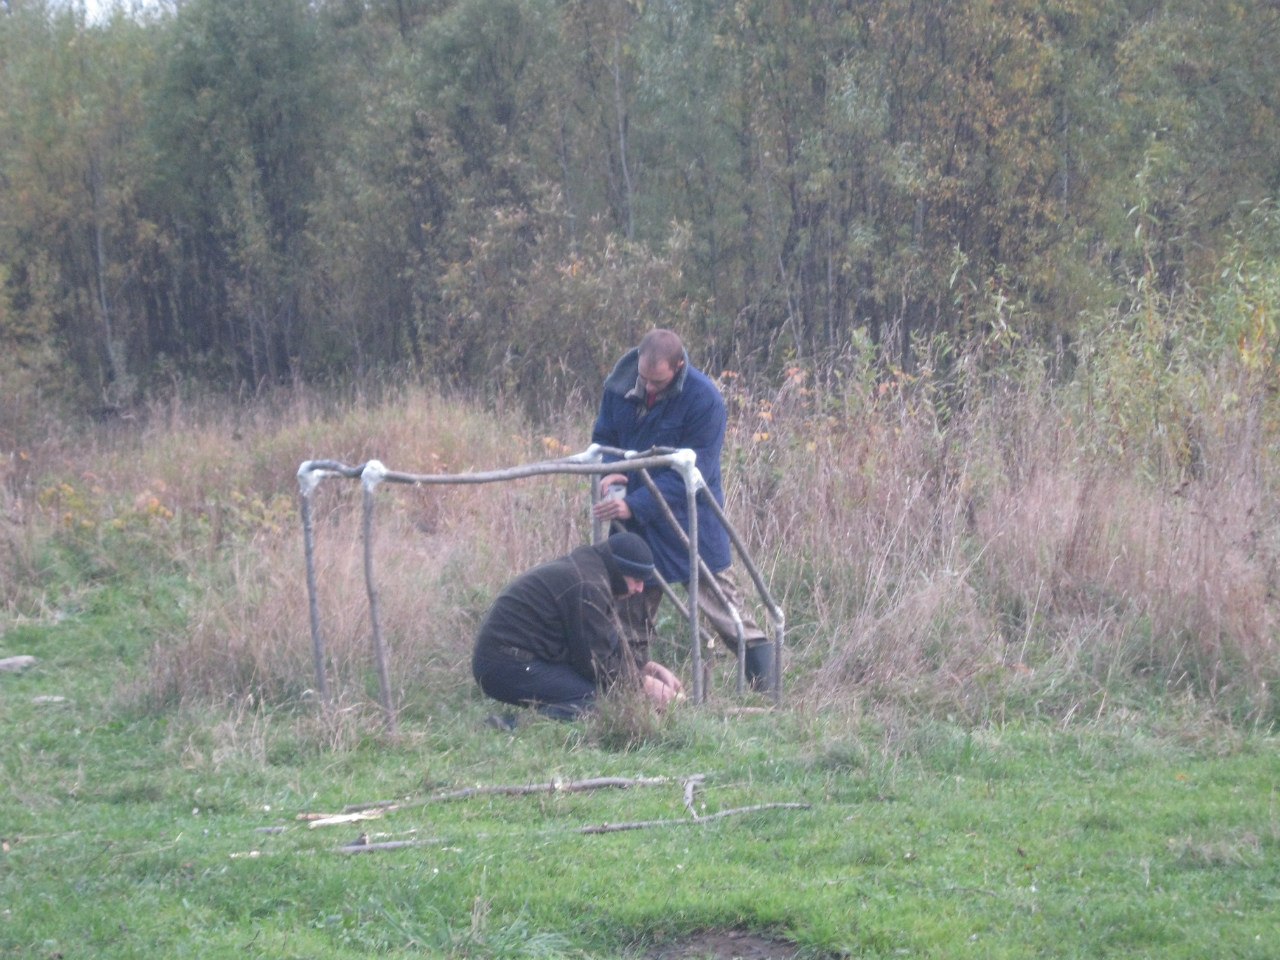
As a result, you should get this design. The stones posted the bottom of the future "stove", however, it is optional. In this bath, there is generally more optional \u003d) the main thing is to catch, and then there is already a space for creativity ... 
By the word about optionality and work ... you can not bother at all and it is simpler - just three podlitsa podlins at an angle from the main frame. At the same time it will be necessary to just closely monitor so that hot stones accidentally do not pay the film where we put them. 
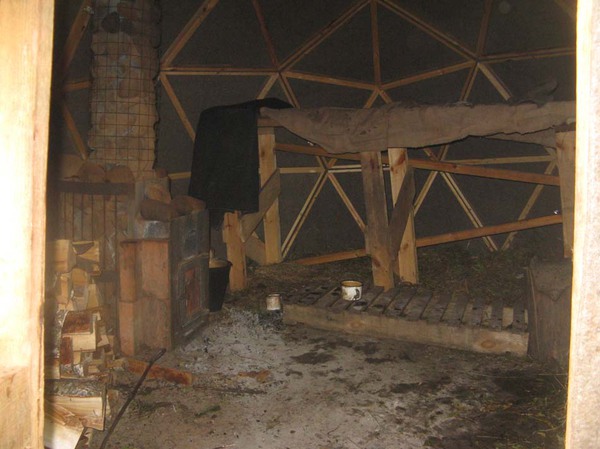
If the time in the edged or very badly with natural material (we once stood on the island almost without trees), then you can make an economy version in the form of Figvama ...
Here you can see the frame from only three branches. It will be cramped, but it is better than nothing ... in Tesne, as they say, styled)) 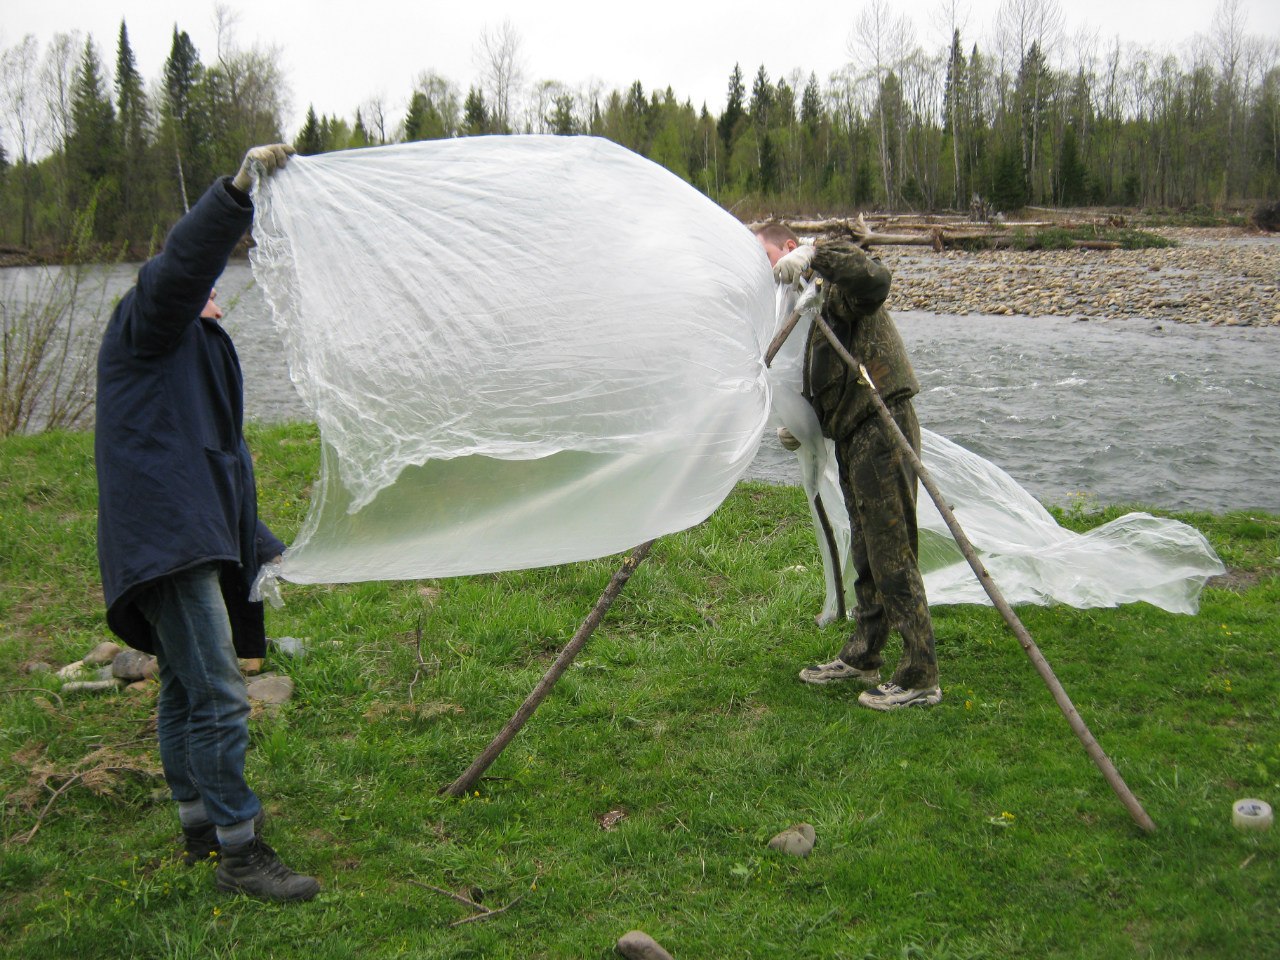
The next step is to tighten the frame of the frame. Usually sleeve films of the width of a meter and a half. Cutting it, we obtain a film of 3 meters of width and 10-15 meters of length (surplus in case of which apply in the farm - firewood there to cover from rain or beds to cover Caica \u003d)).
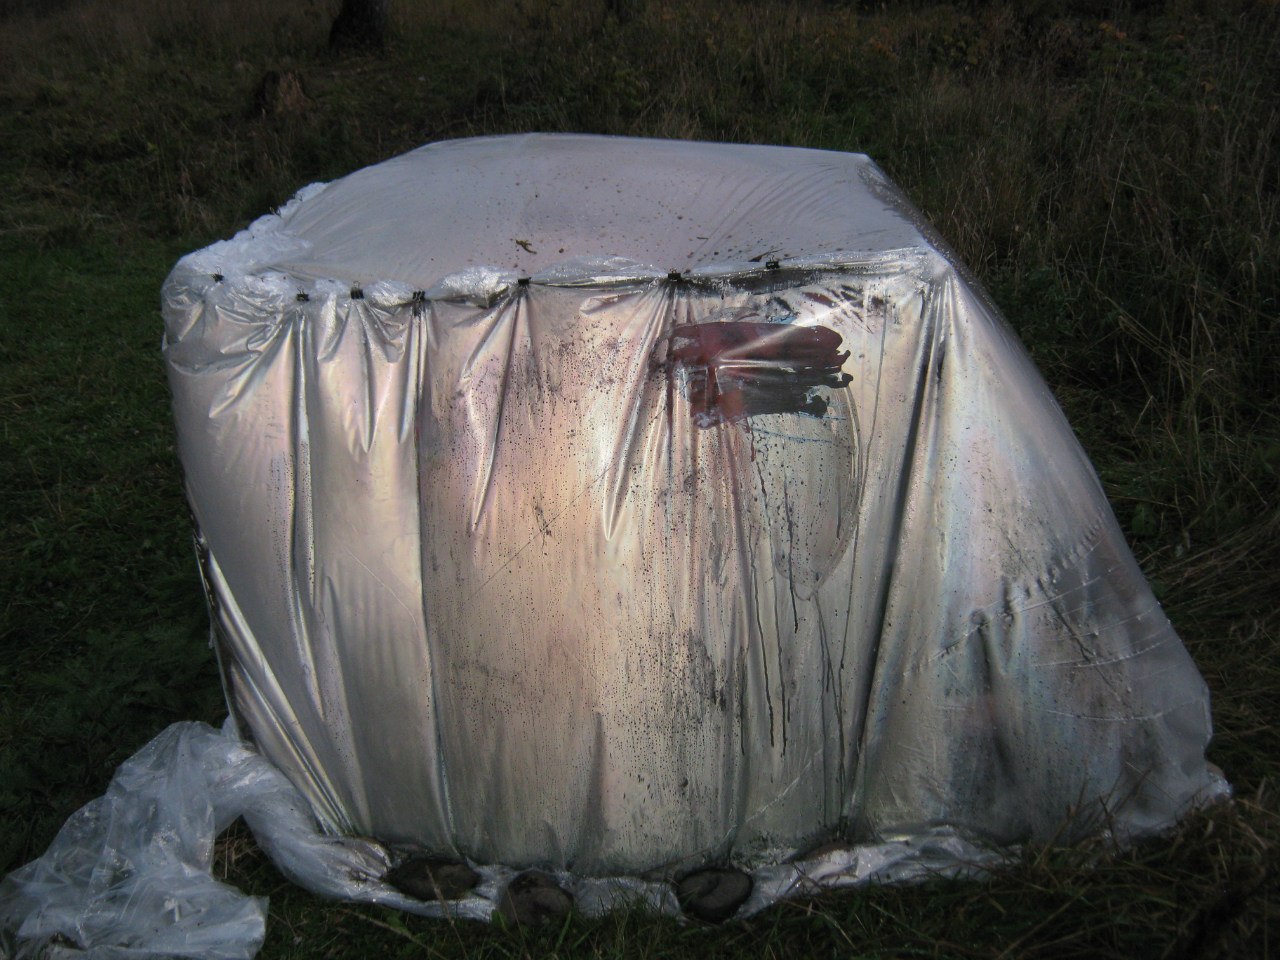
This film is tightened by the frame around the perimeter. We do it carefully so that any knots do not sneak the film. I repeat, we don't need a colander ...
For convenience, it is possible to make such a frame size, so that the width of the film (3m) has been enough for the walls, and on the roof, then the tightness is carried out quite quickly, without unnecessary hassle in the form of additional seams and everything is made from a single piece of film (including the door). Everyone likes to love and quickly and quickly? ..

Turn on FIGURS \u003d) 
Clothespins or scotch fasten the film on the frame. 
From the other side, from where you come to the bath, leave enough film on the "door" and think how to close it look so that steam does not go out. We either from the inside clutches to the film fasten, or someone at the entrance sits and sticks the door \u003d)) 
In the earth in the perimeter, the film is pressed by stones. 
The floor in the bath can be lined up. The smell is pleasant and healthy is useful. (See the topmost picture). You can sit right on the booth, you can put a hemp, chairs folding, tourist rug. In general, optionally at your discretion \u003d))
Stove
Now, understandable, the steam room must somehow warm up.
What is needed for the stove:
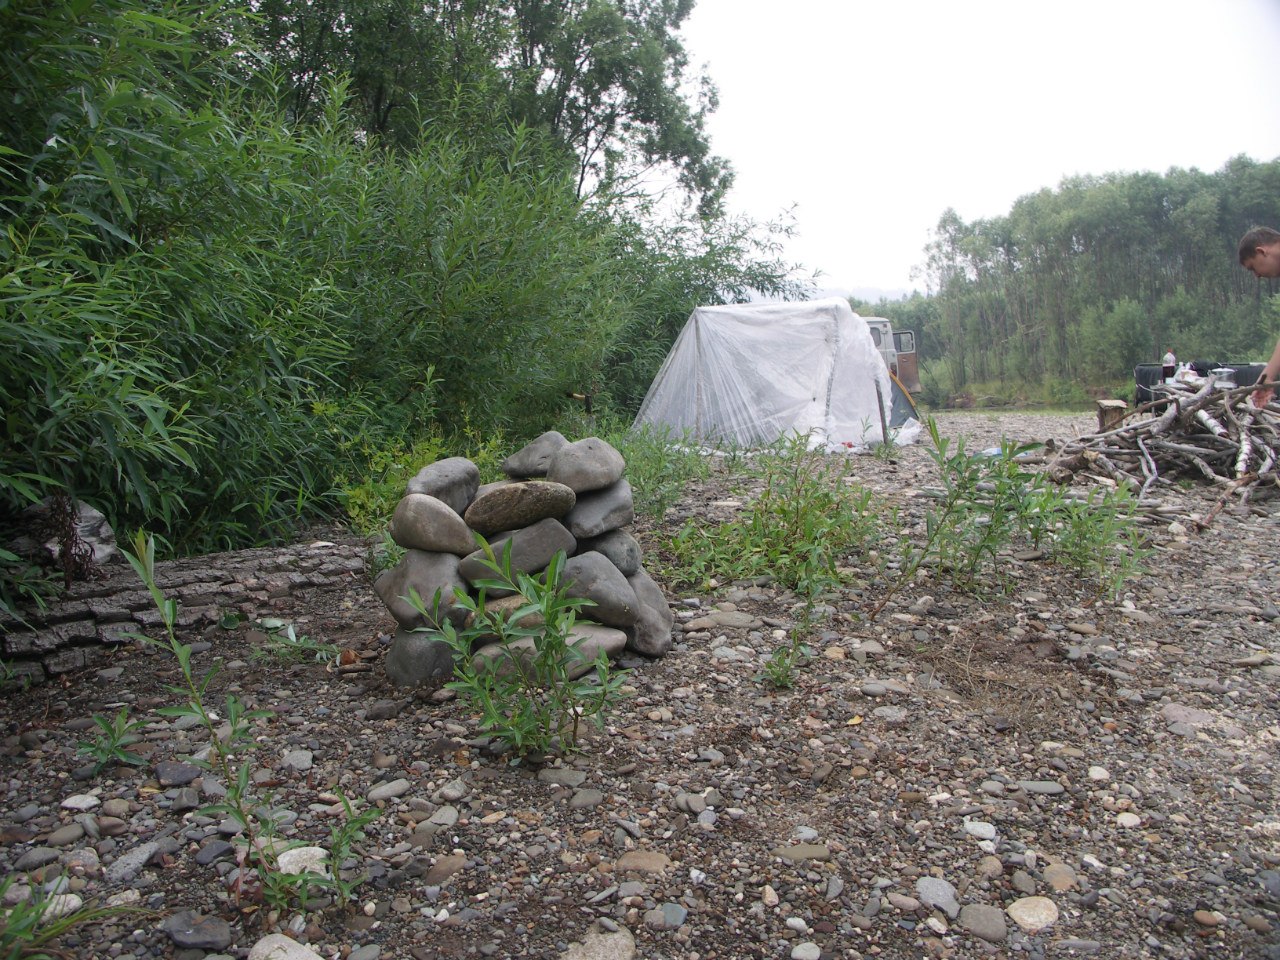
* River stones in the amount of 20-25 pieces (not necessarily straight from the river, better from the shore \u003d)))
* Dry firewood,
* Rogatulins from branches or sapper shovel to wear stones from a fire in a bath
Stones are needed by a medium size about 2-3 male fists. If your girlfriend is engaged in weightlifting or bodybuilding, you can stand it with fists)))
Remember that too much the stone is more difficult to warm up, and the little cooled will cool. The shape of the stones is desirable oval-flat, but here it turns out, no one specifically decides on the shore of the stones of the desired size and shape \u003d))
In no case do not use a sandblast or other fragile stones that can split either in the fire (this is still okay) or in the bath itself (it will be sad). Shard wounds to us in a taiga for nothing ...
The collected stones are folded in the form of a well nearby (meters at 10) from the bath, so that while you will sort out the legs, the stone is not cooled on the road.
The well should be sufficiently stable (for which they needed flat stones).
After 4-5 times we ruin everything nafig and ignore, you should have exactly, we believe in you \u003d) 
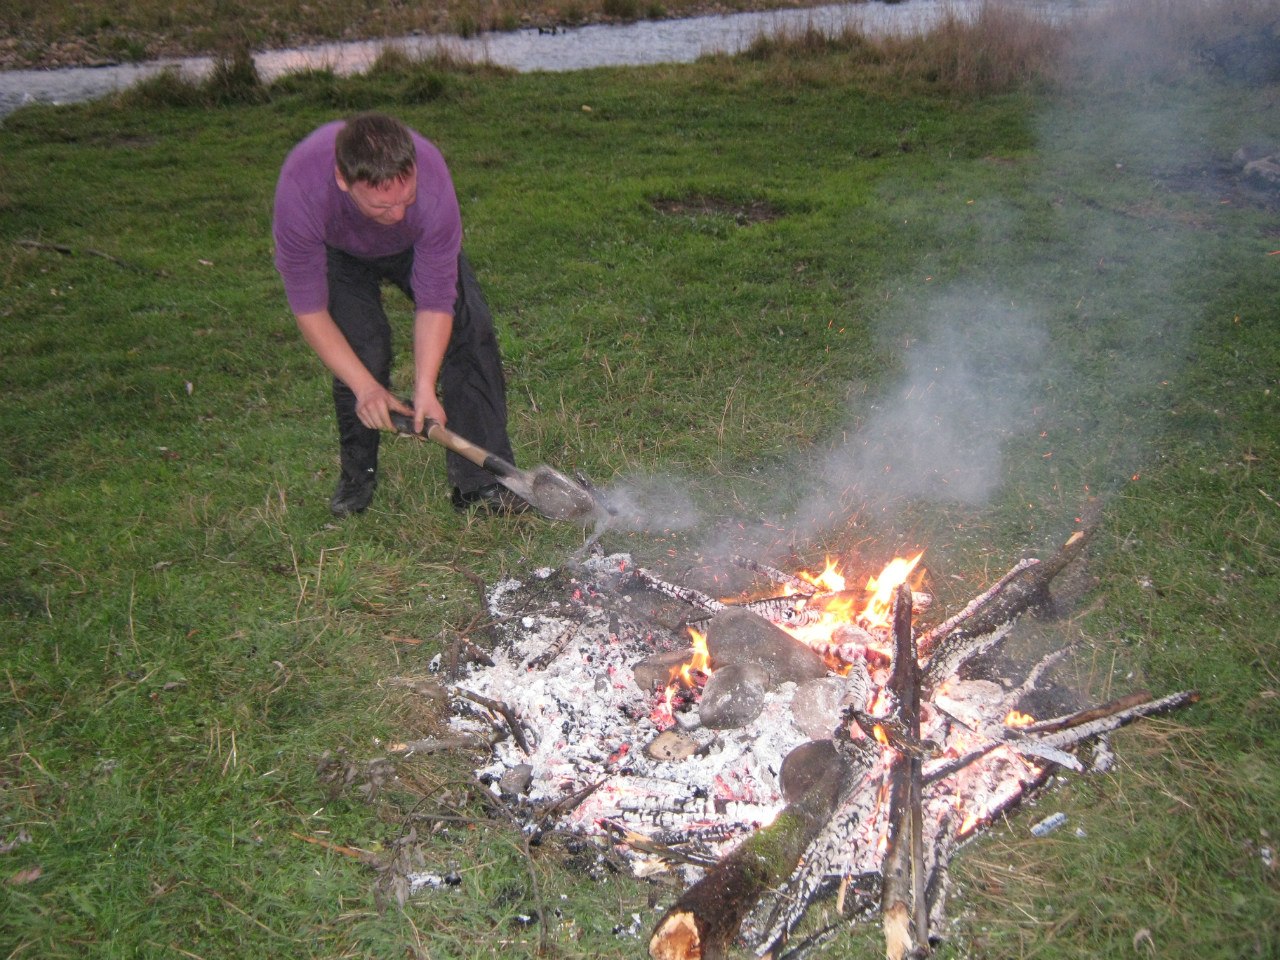
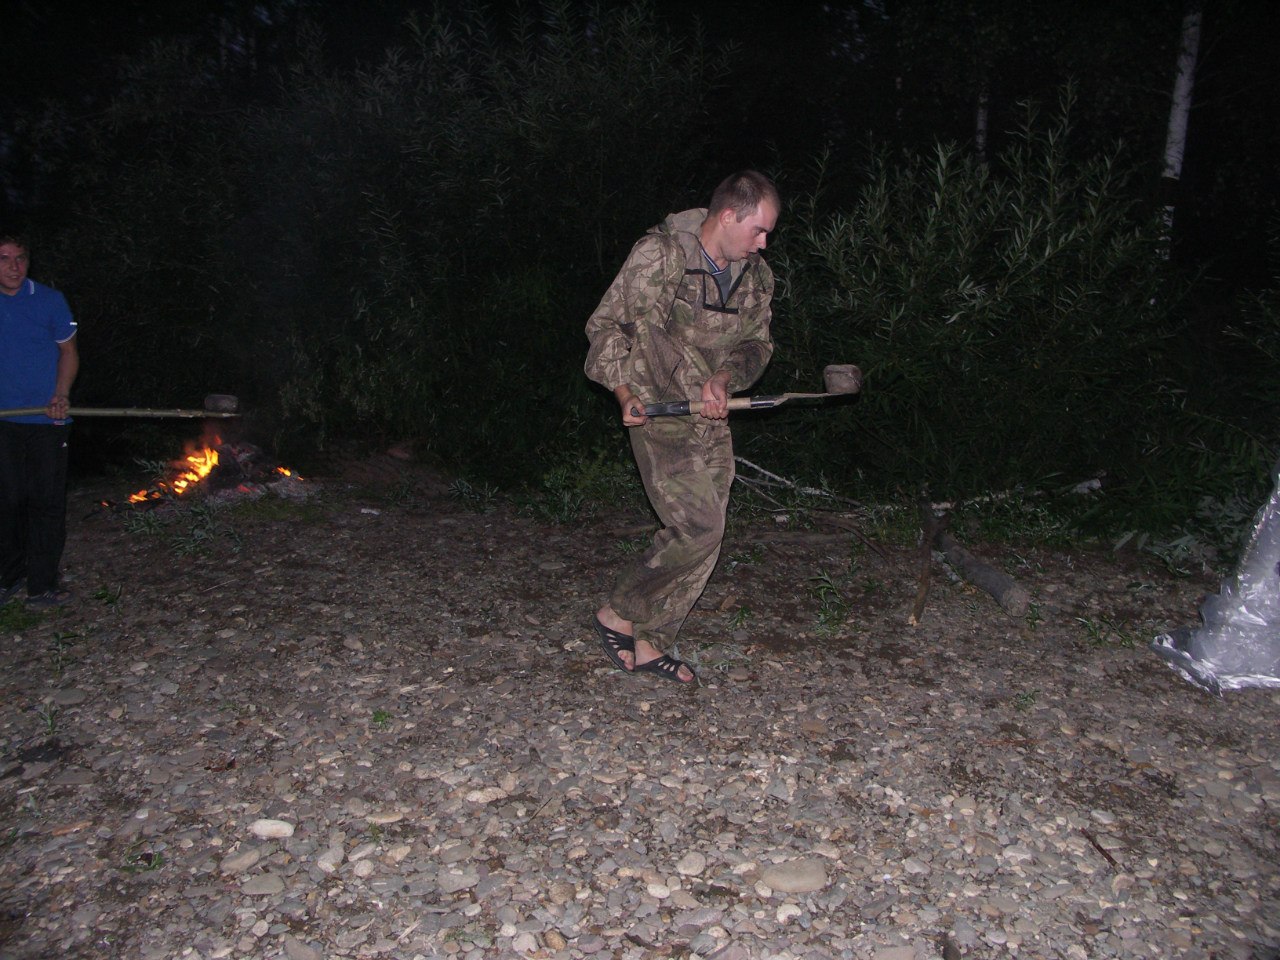
Next, carefully peel the well to firewood so that the stones are not visible, well, and ... Mahmoud, ignite! (with).
It all depends on the presence of firewood and your desire.
The fire may turn out so small and neat: 
And maybe this: 
Or even here, from the series: I do not refuse yourself \u003d)
Please note, there is also a frame from above covered with branches, so that it is warm to keep it longer, and for entourage))) Straight some partisan camp with a slurry and alarm bond for aircraft))) 
While the stones are warm, prepare horns or sapper blades to wear heated stones in the bath. Here, too, you need to pre-eat, experience ... He is the son of difficult mistakes ...
Stones warm to the desired temperature for about an hour. Firewoods must be actively burning all this time, no coals for kebab or potatoes, we do not yaw, put firewood as they are combustion.
As soon as the stones have grown grate with coatulins or shovels in hand and a mild walk in the pace of the Waltz quickly wearing hot stones in a bath. It is better to run in a pair, so that you pull everything faster and do not cool, we still want to get out, and not just to work out the physical culture ..
Do not forget about security techniques - stones will be very hot. You do not need blisters in the taiga, as well as fragmentation injuries?


The process went
Well, then happens then, for which it was still treated \u003d)
Those who want the bullet fly inside, close and ... let the whole world wait \u003d)
Put in advance in the couple of semi-cable bottles of cold water in order to water hot stones, but what will happen later - you know without me, in the bath everyone was at least once))
Above the ferry can be held with the laps - it turns out a great effect. You can even attach through brooms if there are brooms and a space for a duel \u003d)
However, it is optional ...
As for any bath, it makes sense to wear a head if not a special hat, then at least a Panama somehow relieves suffering significantly \u003d))

And here is just in cramped, yes ... what are the insults there at such a temperature ... 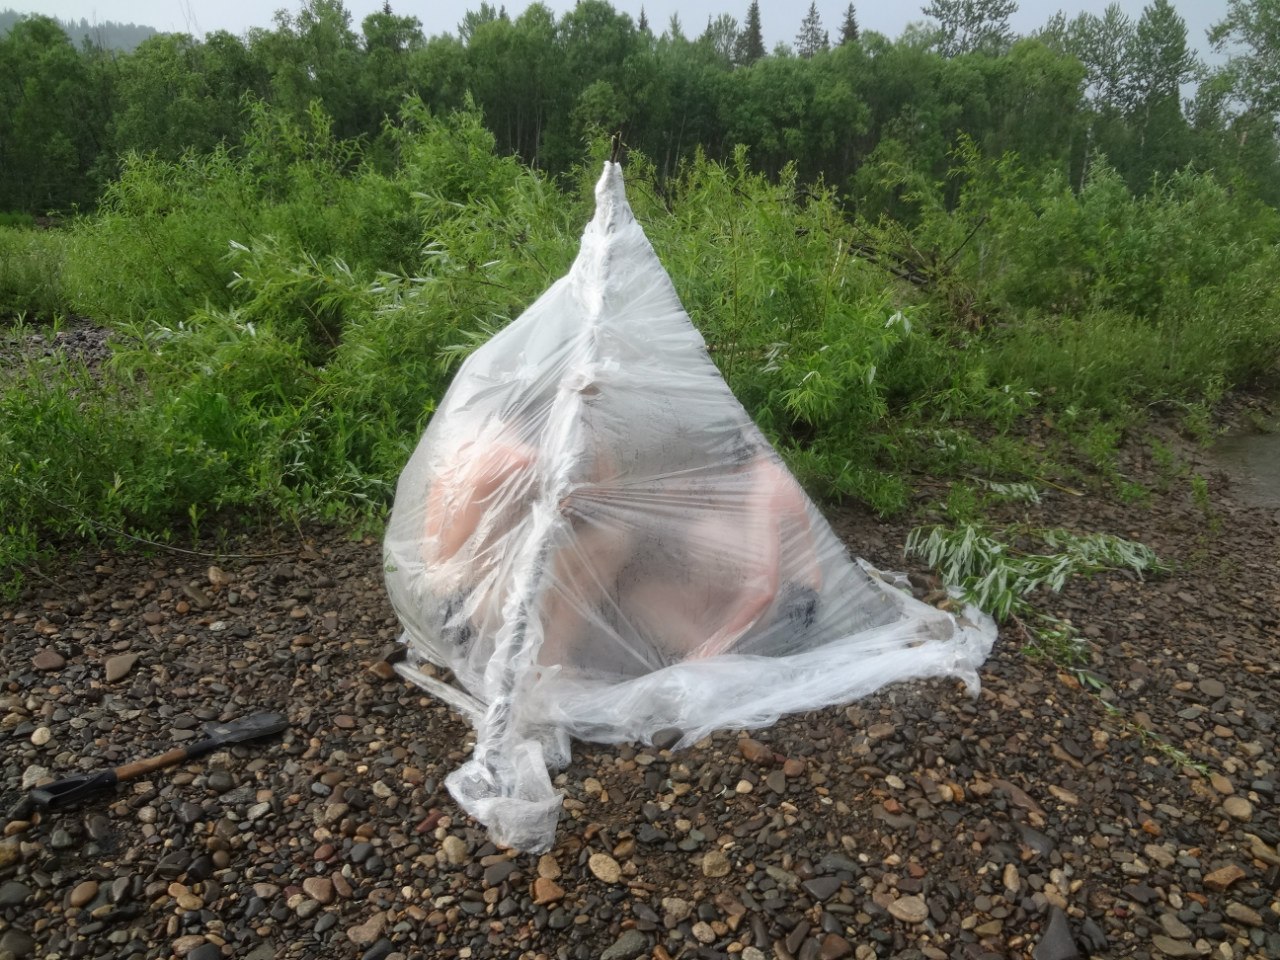
Help!..... 
Well, as soon as it comes to "staying there is no more strength" the same bullets fly and buy-buy in a mountain river))) awesome, I tell you, feelings ...
Thus, the heated stones, in such a type of bath there are enough approach to 4, after which the stones are already cooled. I want more - then you need a bath type "Major", which I will tell next time))) 
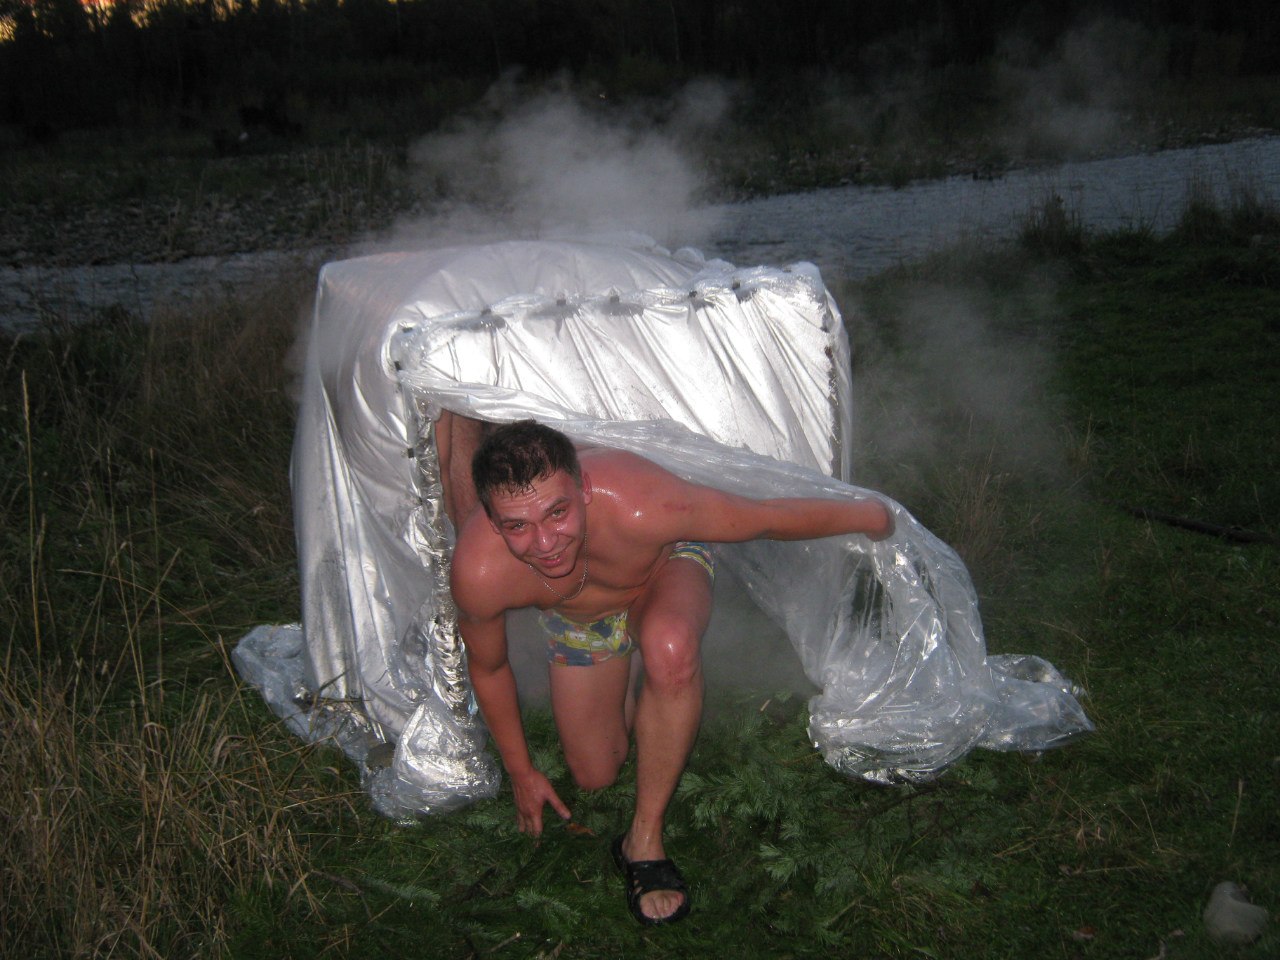


After all this, you can also arrange a photo session ... 

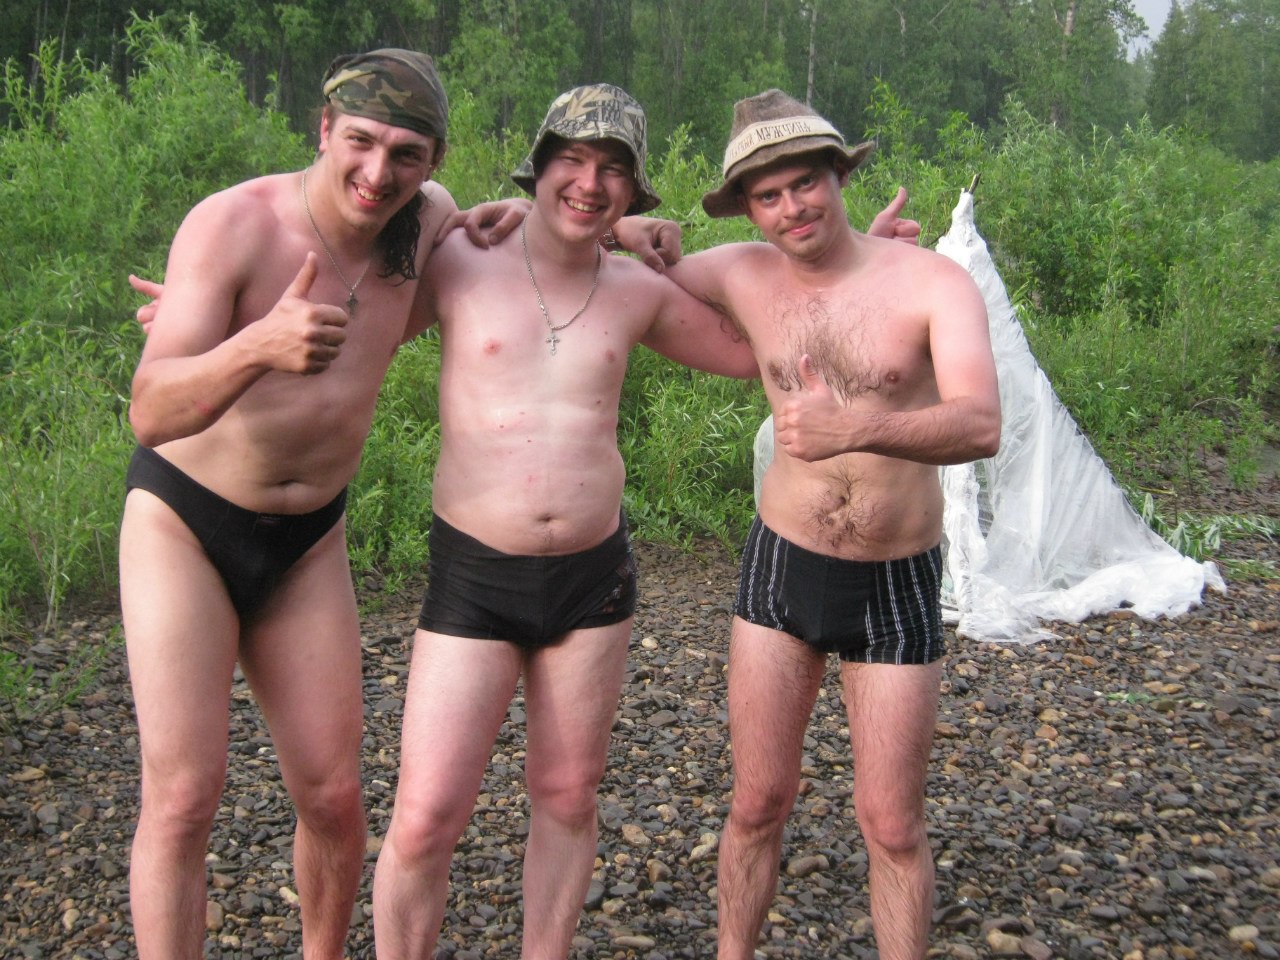
Well, naturally .. and I was there, honey beer saw \u003d))) 
Next time we will talk about homemade hiking bath Type "Major" \u003d))
Thank you for attention)))
Mobile (hiking) bath is an excellent invention that will be useful in various circumstances. Holidays in nature, a tightening campaign or simply weekend behind the city - all these leisure options will be much more pleasant and interesting if you can combine unity with nature and such a blessing of the civilized world as a bath. In building mobile bath There is absolutely nothing complicated. The frame is collected from the available materials, and I am improvised, the furnace is laid out right in place.
If you wish, such a bath can be collected even on your own cottage plotHaving placed it in a secluded corner of his own garden and introducing new sensations to the traditional countryside.

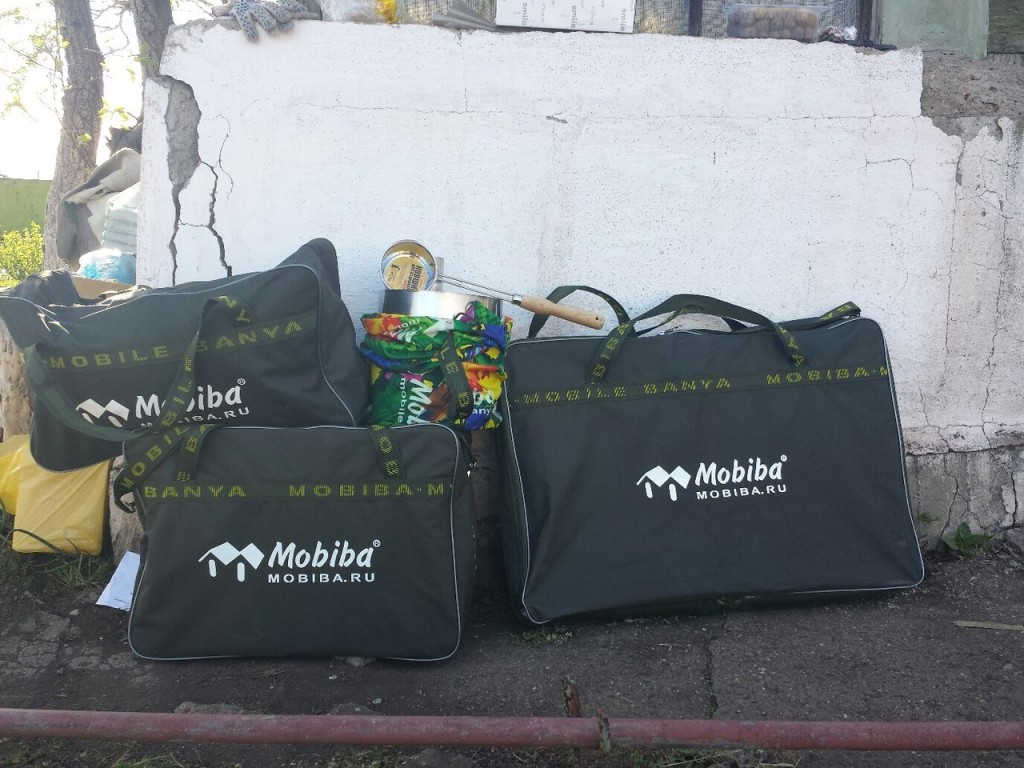
In the modern market is presented big choice Mobile bathing factory production. A full-fledged factory kit will include a tent, stove and even shop with a variety of accessories - manufacturers tried to fame.

However, there are similar kits quite expensive. And why spend big money to buy what you can do yourself? Moreover, a homemade hiking bath will not give up its analogue of factory production.
The stove for the option of the bath version can be made from the segment of the old pipe. But this version of the furnace will be acceptable only if you go to the campaign not on foot, but on personal transport. Next in the hiking backpack even the most miniature metal furnace - the undertaking is not pleasant, especially in the event of a long trip, when every centimeter of space in the bag on the account.

Therefore, in order for the bath in reality, it was possible to call mobile, from traditional furnace structures should be refused. For heating, I will be used improvised the heater, collected directly on the site of the prival.
The advantage of such a furnace is the absolute lack of financial costs for its arrangement - you simply collect the desired amount of firewood and stones, lay out them with layers and incite.
What is needed to build a hiking bath?
We decided that you would not pay it is not clear to whom the money for the finished mobile bath and bring it with your own hands? The right decision!
A hiking bath consists of several basic elements. Explore information about each of them so that in the future it was easier for you to navigate in the construction of the construction.
Mobile bath frame
In addition to the already mentioned polyethylene or "tent" fabric, the frame assembly will require the use of special racks. The best way - Aluminum or carbon fiber stands. If you have any racks from a tent for 4 people.
Practice has shown that aluminum and carbonistics perfectly carry the "bath" temperature, while maintaining their original performance.
You can also make a rack from wooden stories. However, wood fails much faster than metal.

In addition, the tree is a flammable material, and instead of relaxing and fully enjoy the bath procedures, you will have to constantly monitor whether the racks are not torn. Yes, and weighs wood significantly more than the same aluminum.
Purchase material
Pay attention and material for the manufacture of the awning. For example, polyethylene used used to be used before. The material, of course, is well suited for the assembly of the steam, however, in the rolled state, the film takes quite a lot of weight, and it is unlikely to call it easy.
Therefore, it is better to immediately buy a special fabric for making tents or simply a finished tent - weigh all this will be much smaller than the same plastic film.

If with the type of material for the construction of the awning you have already been determined, then the definition of the optimal size should be given a separate attention. Practice shows that for a comfortable pastime, in a mobile bath, one person needs at least 1 m2 of space.
Recommend to this value in the calculation process. That is, for example, if you make a bath for 6 people, you will need to buy at least 6 m2 of material with a mandatory additional reserve.
Awning can be made from an old tent. The only important note: the regular awnings of the tent of the modern sample for the implementation of such tasks are not suitable, because They very quickly deteriorate under the influence of high temperatures. Excellent option - Soviet tents from tarpaulin.
Operating conditions
For the successful use of such a bath, there will be 3 main components: firewood, stones and water. Install your mobile pair where there is access to a large number of firewood. For extractors, you will use dry firewood to 10 cm in diameter. Thicker logs will not fit - they flared up too long.

Stones should also be prepared before the start of the framework of the frame. Minimum - bucket of stones. Try to collect large stones of a neat round shape. From using boulders with chips, inclusions of third-party rocks, as well as layered stones abide. If you failed to find the required number of suitable large boulders, replace them with pebbles.
The best place to build a mobile bath is close to some reservoir. Pre-prepare a dam for swimming after the steam room.

Simple furnace for homemade hiking bath
To build the stove, you will not need any special tools and materials. The only nuance: you need to collect a large number of boulders and firewood. In general, orient to the time you plan to bathe.
I am improvised by the Kamenka lays out in one simple step.

Place the wood layer on the ground and cross it with a layer of stones. On the stones to put another layer of firewood, on top of them - again stones again. Alternate layers until the stones are run. Firewood Prepare in such a quantity so that the stones in the process of the bantas are fused to red. After you need only to keep the fire so that the stones are not cooled.
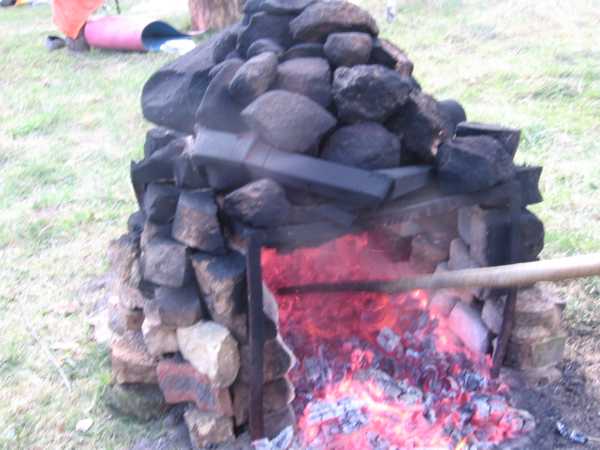
The stove collect close to the frame so that the hot stones can be quickly transferred to the steam room. Lovers of Bath "in black" can add such a stone directly in the bath.
In the steamer, hot stones need to be folded into a slight recess. Stones can be transferred with shovels either manually, pre-nodded thick gloves to protect hands from burns.
Frame assembly guide
The frame of the bath in question is going to a few simple stages.

First step. Secure the prepared reference racks crosswise. Frame Install near the fire. When used to assemble wooden jersey framework, consider these elements should have a thickness of at least 30-40 mm.
Connect the framework elements with each other with the help of a tape, durable rope or scotch. As a result, you will have a pretty slash.
If you make an awning from polyethylene, close the ends of the supporting racks with some fabric, otherwise polyethylene can break.
Second phase. Start setting the awning. It can be started to do immediately after the stones in the fire will grow hot. In the middle of the "floor" of the obtained room, hide a small pit for hot stones. For more convenient transportation, stones can also prepare a small hinterland from the fire to the center of the steam.
Third stage. Tension the awning. The edges of the material spray sand either press to the ground logs.
If you do not have anything against the bath "in black", the frame, as already noted, you can install directly above the lightning. It will eliminate you from the need to transport hot stones.
However, in this case, the stove will have a slightly different design. You need to assemble the structure in the form of a pyramid with a huge boulder in the middle.

The steamer "in black" is less safe and convenient. You will have to watch all the time to make the framework of the framework and stretched awning not starting to burn and melt.
In the process of heating, the stones begin to crack noticeably, so better hold from the fire at a distance. But when you already carry stones and water them with water, they will not fly into pieces.
Follow the temperature in the bath. If a hot wave couple rises to the "ceiling", the temperature in the steam room is high, and you can enjoy the procedure for a long time long enough. In the case, if the pair begins to step down the bath with thick fog - it's time to turn.
Additionally, you can make a comfortable bag-case for the awning.
Thus, the own mobile bath is not the limit of dreams, but the simplest design, with the assembly of which anyone can cope. Quite simply follow the instructions and not forget about the safety technique.

Good job!
To learn how to fold the stove for the bath, about its device, how to put the masonry correctly, make the necessary details possible from special literature and from the Internet, where there are even a video about homemade furnaces. View video makes it possible to get the best idea of \u200b\u200bsolved tasks. And in order to make your own hands, you will need skills and skills, tools, materials, schemes, drawings and spokes. The order is very specific and little where else is used. Therefore, the order can be missed out of sight and fold the oven in the catch of inspiration only according to the drawings, but it will be incorrect.
It is best when the project of a bath or sauna is developing from scratch, because it easier to make or find the right drawing of the room and the stove drawing, or choose the design you like after video views. But, when there is no free space on the household site, and there is a barn, you can make it reconstruction at least under the mini sauna. However, then, most likely, it will have to re-invent the steam locomotive, as suitable drawings can not be found. Although some craftsmen are quite able to not only independently make the drawings of the self-made furnace even make the project of the room, but also put the masonry. Since the sauna provides simple bath procedures and does not require a large room, the variant with the reconstruction of the shed will be the easiest solution.
Next, you should make a choice of furnace design. If the size of the room is obtained very small, it is best to use several infrared emitters instead of the stove and place them experienced by the sauna room. Found from emitters "" icon with proper binding to the required electrical scheme Grounding.
From the pipe
If there is a place to install the furnace, you can do homemade electric furnace heater from iron pipe and P-shaped industrial electric heaters. Next is recommended:
- the diameter of the pipe must be selected according to the size of the electric heaters;
- place the heaters in one of the pipe holes by contacts to the outside, along the perimeter of the hole make grooves for the attachment of ceramic passage insulators for wires connected to electrical heaters;
- pipe opening Close up a durable metal sheetwhich will be the base of the stove;
- a sheet to connect with the pipe;
- the connection can be either welded or threaded;
- the free space of the vertically standing pipe must be filled with stones of the basalt type of 6 - 11 cm.
At the bottom of the pipes should not put pressure on electric heaters. To do this, you can position along the pipe between the electrical heaters of the reinforcement, which will be the supporting device for stones. The pipe and the reference sheet must be grounded. All, the most miniature stove Kamenka for mini sauna is ready. Left to do proper connection to the network and grounding device. The stoves with power up to seven kilowatts are connected to a 220 volt network, more powerful - to the network 380 volts. The same design can be used for a furnace device in enough big bath. You should use a pipe of a large diameter and length and more electric heaters.
From barrel
![]() The device of the homemade stove of the chain on firewood can be performed in with one bottom. You will also need a durable iron sheet and chimney of round or rectangular section, located between the bottom of the barrels and the pipe on the roof of the bath. When the stove is ready, the barrel stand upside down. Foreway, the opposite bottom, we call the ride of the barrel.
The device of the homemade stove of the chain on firewood can be performed in with one bottom. You will also need a durable iron sheet and chimney of round or rectangular section, located between the bottom of the barrels and the pipe on the roof of the bath. When the stove is ready, the barrel stand upside down. Foreway, the opposite bottom, we call the ride of the barrel.
The manufacture of homemade stoves of the heater will begin with the fact that:
- Bulgark cut out a rectangular hole with a side of about 25 cm at a distance of 4 - 5 cm from the vertex. Through this hole will be laid firewood.
- In the bottom of the barrel is completely close to the edge, cut the hole for the addition of chimney.
- We put the barrel on the bottom and fill it with stones of the basalt type 11 - 15 cm. The level of the stones should be approximately 5 cm below the top rib ribbon barrel.
- From the reinforcement, we cut the rods of the required length, we fold their crosswise, so that a lattice with a side of the smaller sizes of stones is optimally 7 - 9 cm, and a rounded loop close to the barrel circuit.
- Rush rods in places overlay on each other we are tightened by iron wire. We lay the grid on top of the stones.
- We take one and a half of the middle of the clay brick and put them on the grille and on each other smaller side, having a brick and brick. The layer of stones plus the length of the brick should correspond to the height of the barrel, but be slightly lower than the top. We laid along the wall of the barrel brick on the solution suitable for the furnace. We give the solvent to harden.
- We turn the barrel upside down and install on a metal sheet.
- Fix the chimney and smear the slot.
Everything, the simplest bathhouse on firewood is ready! Now you need to master homemade stove in work.
For efficient burning, it is necessary to use only the wood of oak, ash and alder, which, in fact, is recommended for all wood stoves.
When using resinous firewood in the furnace, the potato cleaning should often burn or use the chimney cleaning agent.Long burning furnace from barrel
The bass furnace from the barrel, which was discussed above, requires a normal combustion of firewood of a certain relationship between free space in the furnace, the amount of firewood laid in the furnace and the amount of air entering the furnace. With the referred to the ratio of firewood will burn well, but quickly. Therefore, it is often distracted by bath procedures in order to add firewood to the stove. Mode long burning Allows you to pay attention to the stove. For creating long combustion regimes It is necessary that the wood of the treli, highlighting the gas. Gas burns in a special chamber. In the construction of a long-term combustion stove design, a barrel filled with stones will be part of the barrel. Gas will burn in space between stones when air supply.
- For supplying air required for burning gas in a barrel with stones, we use iron pipes With a diameter of 4-5 cm. It is permissible to use and pipes with a rectangular cross section of the same area.
- Throughout the pipe at a distance of 2-3 cm from each other, the grinder we cut the wall, making a through hole with a length of 1 - 1.5 cm.
- The pipe is one end restricts into the angle between the bottom and the barrel wall, intersects with an imaginary axis of rotation of the barrel and relies with another end to the wall of the barrel throughout its perimeter, which is achieved by cutting the part of the pipe at the appropriate angle. The end of the pipe relies on the wall of approximately 5 -10 cm below the top rib ribbon barrel standing at the bottom.
- In the wall of the barrel within the perimeter of the hole at the end of the pipe, which it relies on the wall of the barrel, the hole is made. For this, the baccoon on the barrel in this place two naves are made in the form of a cross and a hammer of the edge bend inside the barrels.
- In the barrel, we set 4 pipes in the same way.
- When the pipes are installed in a barrel in her stones fall asleep.
The remaining actions are the same as already outlined above after the subtitle "from the barrel".
It remains only to experience a durable burning furnace.
- It is necessary to first burn the stove in the furnace of the stove of a number of firewood to produce coal.
- On top of the coal to load the firewood firebox.
- The flap to adjust the minimum amount of air required for the decline of firewood and obtaining the effect of long burning.
For long combustion, the furnace material is not important. It matters only the presence in the stove of a separate chamber for cargoing the gas with a separate supply of air and maximum loading of firebox with firewood in the presence of the adjustable heat in the firebox to make the air supply adjustment at a fairly wide limits.
For masonry chamber for cargoing gas is necessary refractory brick.
From brick
 Most. best project A homemade bath stove will, of course, the project in which you can post the masonry of the bath and. Brick bath furnace requires a device of its own foundation And, usually, it cannot be folded in the finished room. Therefore, a project is needed, in which the lack of a common foundation of the bathroom is laid, including the foundation of a brick bath stove. The implementation of such a project will be the longestAnd the project is the most expensive of all possible projects. It will also be necessary for strict adherence to the coaches, sizes, drawings and other project conditions, good brickwork skills. Therefore, before making a choice in favor of the device of a homemade brick bath, and even the construction of the bath itself in addition, you should see several relevant videos, to calculate the costs of time and money and then start working in order to correctly lay out the masonry and do everything.
When going to build a bath, many think about what kind of furnace to use. Buy ready in the store or put homemade, manufactured by your own hands or hired for this? The homemade oven for the bath will cost cheaper, besides, you can choose and make such a design that is most suitable for your bath. And what they can be taught in this article.
Species of homemade banya furnaces
Homemade stoves For baths can be different species, depending on the material of manufacturing and design. By material from which they can be made can be:
- metal;
- brick;
- combined - metal with brick "casing" or screen.
Metal furnaces are more compact and quickly heated, but also cooled quickly. The surface of them is heated too much. This leads to the fact that the heat from them is quite hard, when contacting with heated walls, oxygen can burn out, and simply, by negligence can be burning. In order to avoid this, often arrange the screen from sheet metalwhich is removed from its walls at a distance of 2-5 cm and is attached on brackets or guides with welding. In addition, such a screen contributes to more active air convection and heating it. Another way to increase the heat capacity and reduce surface temperature can be a lining of the furnace from the inside with refractory bricks. At the same time, however, the size of the firebox itself decreases, so by choosing this method necessary in the manufacture metal stove Increase its size, taking into account the thickness of the lining.
Brick furnaces are heated longer and retain heat longer. But they take more space. Yes, and add such a furnace only the one who is familiar with Aza brick masonry and furnace work.
In order to connect the advantages of both species, sometimes combine a metal furnace with a brick screen. In this case, there is something average: and heats up quickly, and the heat is softer, and the metal walls of which can be burned with bricks.
The design and form of such homemade bath furnaces may be the most diverse. They can be round and rectangular shape, without a tank for heating water and with it, placed directly into the furnace or with a heat exchanger and remote tank. In addition, they may differ in size, power and location of steam stones.
But there is no perfect design and view of the homemade oven for the bath. Each of them has, both their positive and negative sides. And, choosing one or another her view or design, you need to pay attention to how much it is suitable for your bath, both in size and heat capacity, heating time or a method for producing steam. Here we will look at some of the possible options that, if desired, can be made with your own hands.
Homemade Metal Bath Furnaces
The bath furnace from metal can be made using sheet steel 3-5 mm thick and pipes of different diameters and even barrels. From sheet iron usually manufactured designs of a rectangular shape, and from pipes or barrels - round. The main elements of most such structures are:
In order to make such a furnace to a bath with your own hands, except for the presence of the required metal, you need to own the skills of welding. You can, of course, choose the appropriate design itself, cut out of the metal of the appropriate size, and to invite an experienced welder for welding.
The iron furnace in the bath, although it has relatively small dimensions, but still it turns out quite severe. Therefore, it is necessary to build enough durable foundation from concrete, booton or well-burned brick to it.
An example is the following option:

Fig.1 Scheme of homemade metal stove: 1 - fuel; 2 - chimney; 3 - water tank; 4 - fuel door; 5 - a confusion door; 6 - steam stones.
Bath Brick Furnaces
 As already mentioned, brick bath furnaces More volume and more space is required for them. For their facilities, there is no need to own the skills of the welder, but the ability to perform furnace work is required. Although, the very simple designs Even novice burns are available and it is quite possible to build such a stove into a bath with your own hands. If such a work is performed for the first time, it is desirable, except for the overall drawing or a furnace scheme to acquire coaches - schemes of laying bricks for each row. Then there should be no problem.
The correctly chosen and neatly folded design of such a furnace, using high-quality brick, can become not only a heating device and a steam source, but also a bath decoration.
Masonry brick oven For the bath is carried out on a solution of clay and sainted sand. For the masonry of the fuel or its lining from the inside, a refractory brick is used, and for the main array of the furnace - the usual clay (red), but full and well burned. As an example, you can bring the following option:

Fig.2 Scheme of homemade brick stove:
1- blocking;
2 - camera for steam stones;
3 - door for steam;
4 - metal cap;
5 - Lining from refractory brick;
6 - Case from the usual ceramic brick;
7 - firebox (fifth);
8 - cooker;
9 - grate and grate;
10 - a subelevant camera with the door;
11 - steam stones;
12 - chimney;
13 - cleaning.
Metal stoves with brick screen
 As mentioned, the surface of metal furnaces is very hot, which has its negative consequences. In order to reduce them, a brick screen is often laying around it. It allows you to restrain excessive thermal radiation from metal walls and accumulates it, followed by a gradual return. Of course, in this case, the bath will warm up a little longer than a metal stove without a brick screen. But the heat will be maintained more longer, and it is more pleasant to bathe in such a bath.
To increase convection, from the bottom in such a screen, it is usually provided for the openings for the passage of coarse air, which provides an additional flow between the metal walls and the bottom-up screen. Thus, their thermal energy More actively heats the air in the bath.
Such a screen can be independently lay out from the usual high-quality ceramic brick around the perimeter of the metal furnace at a distance of 10-20 cm from its walls. If in the process of manufacturing a metal stove, a construction of a brick screen is provided, the flue door is usually carried forward to a distance of 25-30 cm, so that it was more convenient to tram it. Since then it will be flush with its outer surface. If you set up the screen the stove of the ordinary design, you will have to front to do a niche in it, which provides access to the furnace and a subepent door.


