Going to the weekend for the city, closer to nature, I want to take a visit to the maximum, and, of course, a country rest will not be full without a real Russian bath or sauna! Design and construction company "EKODOMPROM" offers the attention of visitors to the site projects of houses with a bath and sauna from a high-quality profiled timber. Russian bath is not just a banal hygienic procedure, like a regular shower or bath. This is a great way to relieve physical and mental fatigue, get rid of a bad mood, get a whole complex of healthy preventive measures, in the end, just perfectly spend time with good friends.
This section of the catalog presents projects of houses with a bath and sauna of various layouts, "Light Couple Typers can choose and buy a brusade house, ideal as a suburban residence. We can also order the manufacture and construction of a bath or sauna separately from the house, in which case all the advantages of their own country wares are preserved, but besides this, if necessary, you can use a bath and as guest house. Projects of Guest Houses-Bar from Bruus are given in a separate section of our construction catalog.
Guest houses Bani from Bruus
The company "EKODOMPROM" specializes in the professional design and construction of elite and inexpensive houses from a bar "under the shrinkage" and "turnkey". We are at our disposal there are serious production facilities and their own logging campaigns in environmentally friendly regions of the Kostroma region. The production of household complexes of guest houses and baths from the profiled bar is organized on the principle of a fully closed technological cycle: from the choice and workpiece of wood to piston finishing works and landscape design Station of the developer. Thanks to 100% to its own production, we can flexibly manage the construction of houses from the bar and often offer our customers all sorts of discounts and promotions.
By concluding a contract with us for the construction of a guest house-bath, you get a reliable and conscientious contractor in our person, whose professionalism has been proved by hundreds of implemented projects. By putting a signature in the contract for the construction of a brusade house, you can no longer worry about anything, - all auxiliary works We undertake: Delivery Domocomplekt to the site, organization of the household, assembly of the house from a bar and quality control, finishing works "turnkey" etc. And along with the keys from their new country residence you receive from us for three years warranty!
Sauna in a house from a bar - Project Solutions and Security
Houses with a sauna have long ceased to be a believed dream, and became an urgent need for most owners of private houses. Many still prefer the old Russian bathhouse, but from the presence of a sauna in the house they are not going to refuse.
And if the project house from a bar and a bath can be built separately, then the sauna prefers to build in the house in order to maximize their household comfort.
When creating brusade houses turn a turnkey with a sauna it is very important to strictly observe all building rates, and it is very important that work is carried out only experienced builderswho are willing to provide all the necessary permits, certificates, including equipment and equipment, which will be installed in the house.
Despite the fact that the sauna is better not to build a sauna, since there is always a possibility to please in a very unpleasant situation when it turns out that at the end stage of work, something was not taken into account, when ordering, third-party specialists it is desirable to control the following points.
Ventilation in the house with sauna
Inside Houses from Bruus, Cost which is consistent from the cost of the construction of pre-arrangements, the sauna is formally a separate project. And all the work on its equipment differ from other work on finishing at home.
First, the presence of a sauna in the house is always an increased humidity in the indoors itself and in the whole house. Do not stand and say that interior decoration At home should be such that it is not damaged when exposed to humidity. This means that it is advisable to make a decoration of the wood that is resistant to humidity (Kumaru, Tick and some others).
The ventilation system must be added-exhaust and must provide at least a six-time full air mass change for one hour.
At the same time, it is important to understand that when creating a sauna sometimes it is planned to build a building not one, and several rooms: Tambura, a small lounge and so on). As a result, the sauna turns into some similarity of a separate extension. Sometimes an extension is made in a separate building, which is connected to the house with a common corridor. This is the most competent way that does not require home owners to think over the placement of exhaust ventilation throughout the house.
If the house is large, then the sauna, the kitchen, the bathrooms can be located on the first floor, and all accommodations for accommodation on the second. Such bruus House 200x200 It may require more financial investments, but more convenient from the point of view of everyday comfort.
Fire safety sauna
Anyone construction of wooden houses from a bar Always produced in compliance with fire safety standards. Thus, the steam room is installed in a separate room, the floors and benches are attached only by galvanized or coated with copper composition with nails, while the caps are drilled deep into the tree, and if necessary, the recesses are closed with special plugs so that the metal does not burn the skin when heating the room.
It is desirable as possible the elements of the sauna equipment to make removable so that you can dry them. It concerns the shelves, benches, ears, door stoves and so on.
The space around the heater is protected by rails to avoid injury. Shower, like a mini-pool for diving into the water, it is better to build on a passage to the steam room.
The walls of the sauna are usually. Lay out boards. But if they are made of brick or concrete, then it is more necessary to see their boards, not forgetting about vapor barrier.
All elements made of wood in the sauna are necessarily processed with antipirens and antiseptics, safe for human health.
If you want to build a sauna in a house or from scratch build a house from a barBut not sure what to handle work yourself, contact our specialists. We will help you at any stage of construction.
When designing a private house there is a lot of opportunities to embody the most different architectural plans. In particular, if it is planned to build a bath or sauna, located inside the building. Therefore, 60% of country houses prefer houses from a bar with a sauna. This is the most profitable in the sense that the bar is well kept warm, but at the same time perfectly carries out air.
A properly compiled project of the house from a bar with a sauna exclusivity and the uniqueness of both the appearance of the building, also its internal location of all rooms. It takes into account not only the location of the rooms relative to each other, but take into account the side of the world. Such a project has many advantages and the most basic thing is that a single plan is made, and not two separate - one on the house, and the second on the sauna. Naturally, such a project will cost cheaper to developer. In addition, the area of \u200b\u200bthe plot is also saved.
When a house is designed from a sauna, located inside the building, it should first be discussed with the developer, where it will be more convenient to equip such a room so that it is displayed on the plan. In most cases, the ground floor is given under such a premises. But it is worth keeping in mind that such a sauna requires additional measures to protect this room, as well as other buildings located.
The first and most importantly condition that must be observed is the use of a very reliable waterproofing material. They need to cover not only the walls and the floor, but first of all and the ceiling, as the steam always rises up. This waterproofing material must prevent moisture absorption into the walls. And since as building material A timber is used, then not only the outer walls are erected from it, but also the inner partitions. Therefore, wood must first treat with a special moisture-repellent impregnation, and then coat and waterproofing material.
In order to understand how to do it, it is worth seeing a photo of a bar with a sauna, which is located in the basement. If you do everything right, the basement will be well protected. But it is necessary to hope not only for waterproofing, it is worth thinking about ventilation windows that should also be included in the project documentation. In order for moisture not so absorbed into the walls, there must be a good air circulation. As for the floor, then as outdoor coating It is better to use a faience tile, - she has no pores in which moisture can fall.
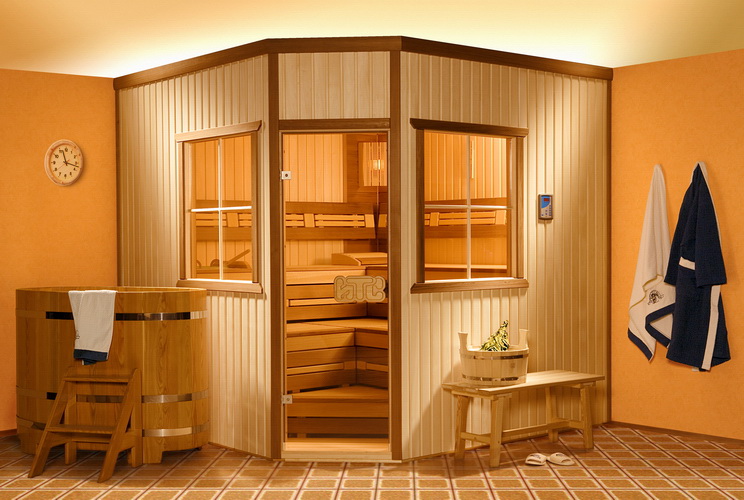
For the arrangement of its own steam room, it is not necessary to erect a separate building. A small sauna can be made right in the house or apartment. In essence, a typical home sauna is a wooden cabin with improved vapor and thermal insulation characteristics. The pair can have a different configuration, but the procedure for the construction of the structure and its arrangement remains the same. At the same time, with all associated activities, you can cope with your own hands.
The design of a typical home sauna includes the following main elements:
Place for sauna at home
Before the start of any construction activities, it is necessary to quickly plan and first choose a place to improve the sauna at home.
The best option is a bathroom, if, of course, its sizes allow you to place a cabin. The bathroom already has plumbing, sewage, ventilation and, as a rule, tiled floors.
In general, for the construction of a home sauna practically any place. The main thing is that in the room there was an opportunity to equip additional ventilation.
For each visitor, the wage should be given at least 1 m2 of free space. Take into account this moment when choosing a place to accommodate the sauna at home.
Guide to the construction of a home sauna
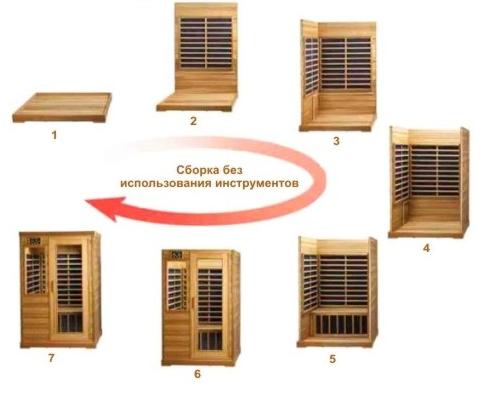
Assembling ready-made sauna infrared
The home sauna device is a relatively simple, but extremely responsible event. Step by step by step of the leadership and already very soon you can enjoy the warmth of your own steam.
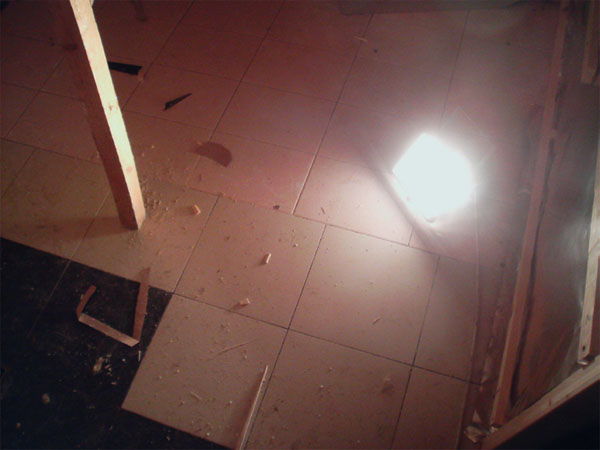
First step - Paul
The traditional floorboard floor is not the best solution for a home sauna. If you are still and give preference to the wood, under any circumstances do not cover it with paints and varnishes.
For the floor sauna at home is best suited for a warm floor with finishing tile. For the floor of the floor, it is enough to get rid of the old flooring (if there is) at the site of the construction of the sauna cockpit, put the elements of the warm floor, pour the screed, give it to dry and put the tile to your taste.
No special requirements for outdoor tiles are not presented. All departure over the floor is reduced to regular washing and disinfection.
Second step - vertical frame
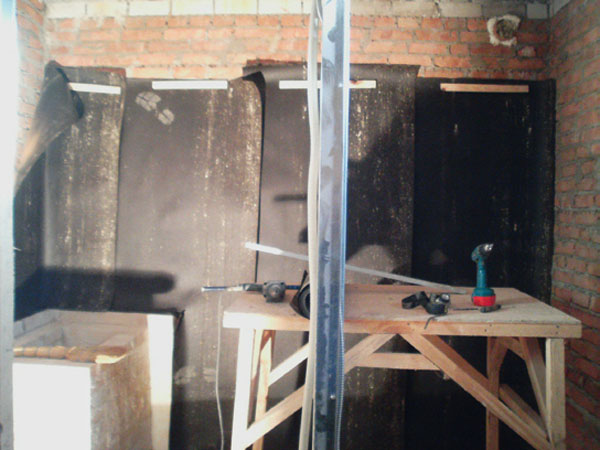
Start the frame of the frame. Before starting to mount the rails, you need to perform vapor barrier walls. If the walls of the house or apartments are made of bricks, put pergamine on them. In the case of walls from other materials, Parchment can not be laid.
Pergamine will perform the functions of vapor barrier on the material. Instead, you can use bituminized paper - the properties of materials are similar.
Parosolation is attached to the wall with an adhesive 15-20 cm and fixed with the help of rails and nails or a construction stapler and brackets.
After installing vaporizolation, proceed wooden carcass From bars. It is more convenient to use a timing segment 5x5 cm. Fix it to the floor and walls. The number of vertical racks depends on the size of your future bath. Racks must be present in the corners of the future cab. Step between supports Select the width of the insulation. It is better that the distance between the bars was a couple of centimeters is less than the width of thermal insulating x plates - so the insulation will fall as close as possible.
Mount the ceiling frame. To do this, it is enough to fix at the top of the vertical racks of the crossbar in the size of the insulating material.
At the same stage, prepare the holes in the framework for mounting the elements of ventilation and power supply. Machine t. N. Sukhroid. It needs to be inside the future cabin at its perimeter.
Also, pipes can also be paved inside the sauna, but above its ceiling. Typically, the ceiling of the cabin in height does not exceed 210 cm, so there will be enough space for wires and pipes in a simple apartment.
Inside the sauna is strongly recommended to supply 3-4 nozzles with simple sprinklers and water in case of fire. Also post inside the ventilation channel fire warming valve. It will not allow hot air from the steam room to leave the rest of the rooms at home or apartments.
Insulation
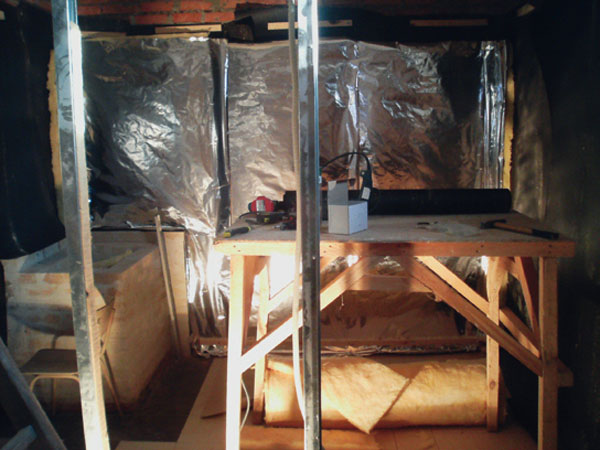
Third Step - Warming
Place the insulation in the vertical frame cell. For thermal insulation, the home sauna is most convenient to use minvatu based on basalt. Such material is characterized by high operational and and thermal insulation properties.
Fourth Step - Aluminum Foil
Thanks to the special foil, the internal properties of the sauna will be significantly improved. Foil will save the maximum part of the heat indoors. The sauna will faster warm and retain the heat formed longer.
Foil Break to the frame with the mirror side inside the steam. The ceiling is better to isolate a little later, after the ventilation arrangement. To fix the material, use aluminized tape or simple stationery buttons.
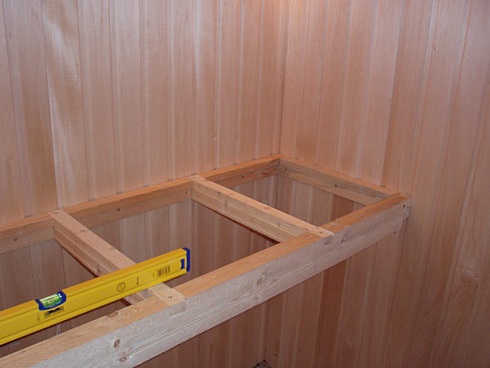
Fifth step - horizontal doom
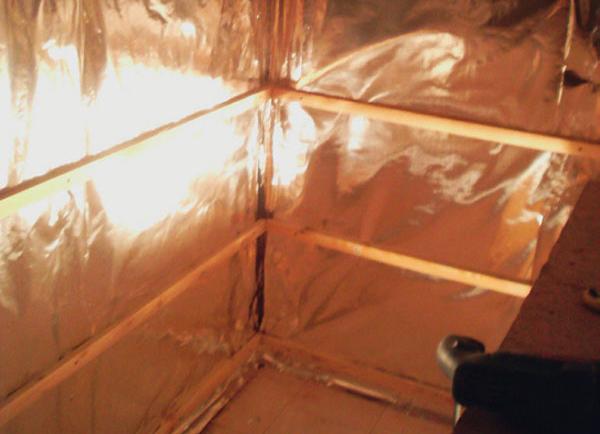
Attach the horizontal brushes to the vertical stands with a cross section of 3x4 cm in order of about 40 cm. These bars need to be placed in strict accordance with the construction level.
At the same stage, install the transverse frames from a bar 3x6 cm for further installation of the shops. Thanks to the transverse bars, the weight of the shop will be transmitted to the sauna frame, and not its trim.
Sixth Step - Cleaning
To cover the ceiling and the walls of a home sauna, it is best to use lining. Before starting the finishing work, mount a trimming vent valve over the placement of the electrocamenake. Attach the foil mentioned earlier to the ceiling, leaving the ventilation open.
If you build suspended ceiling, First, you need to fix the skin, and after that, lay the insulation.
Most often for home sauna, litea, alder and pines are used to arrange the home sauna. Linden wood has a wonderful smell and attractive appearance. Among the additional benefits of the material should be noted by its healing properties and beneficial effects on the human body.
Olha since a long time is used for the construction and decoration of a variety wooden structures. It has low thermal conductivity and wide variety of shades. Alder is pleasant to the touch, it does not leave burns on the skin. Among the disadvantages of alder, it is necessary to highlight softness, as well as a tendency to deform, damage and pollution.
Pine is traditionally used to cover the sauno worldwide. Wood smells pleasantly and has a beneficial effect on human health.
In general, when choosing a material of the trim, focus on your preferences, affordable budget and features specifically your situation.
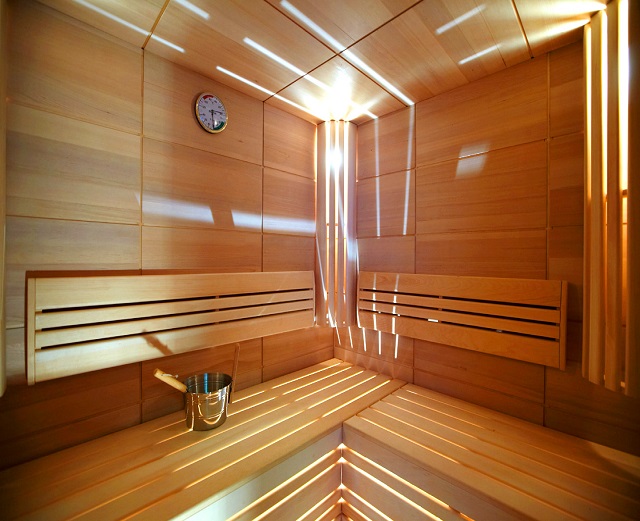
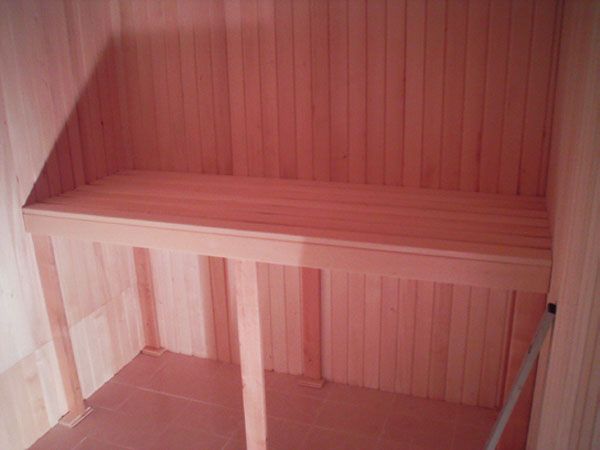
Seventh step - shops and door
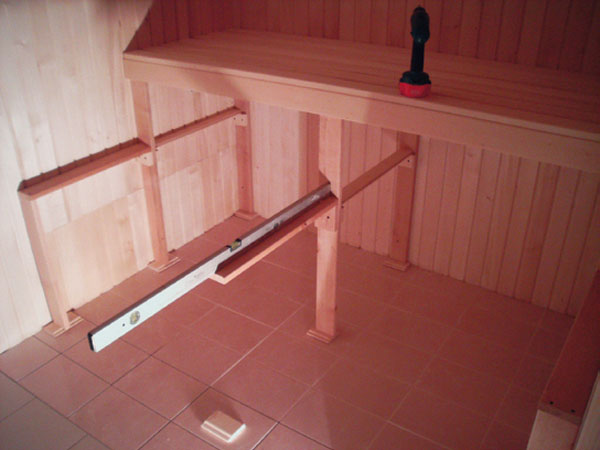
The optimal ceiling height in a conventional home sauna - up to 210 cm. At more significant values, the so-called may appear. "The effect of the pipe", due to which the thrust will increase and drafts will appear.
Top benches Install on as much as possible - about 100-110 cm from the ceiling. Low bench with a 210 cm ceiling height. Place 65 cm at an altitude. For greater convenience, install a step at an altitude of about 25 cm under the bottom bench.

The door, as already noted, is best installed glass. With such a door, visitors to the wage will be more comfortable to feel in a closed room. It is desirable that the glass is tinted.
Do not install any "serious" latches and locks on the door. Permissible maximum - simple magnetic or roller latches.
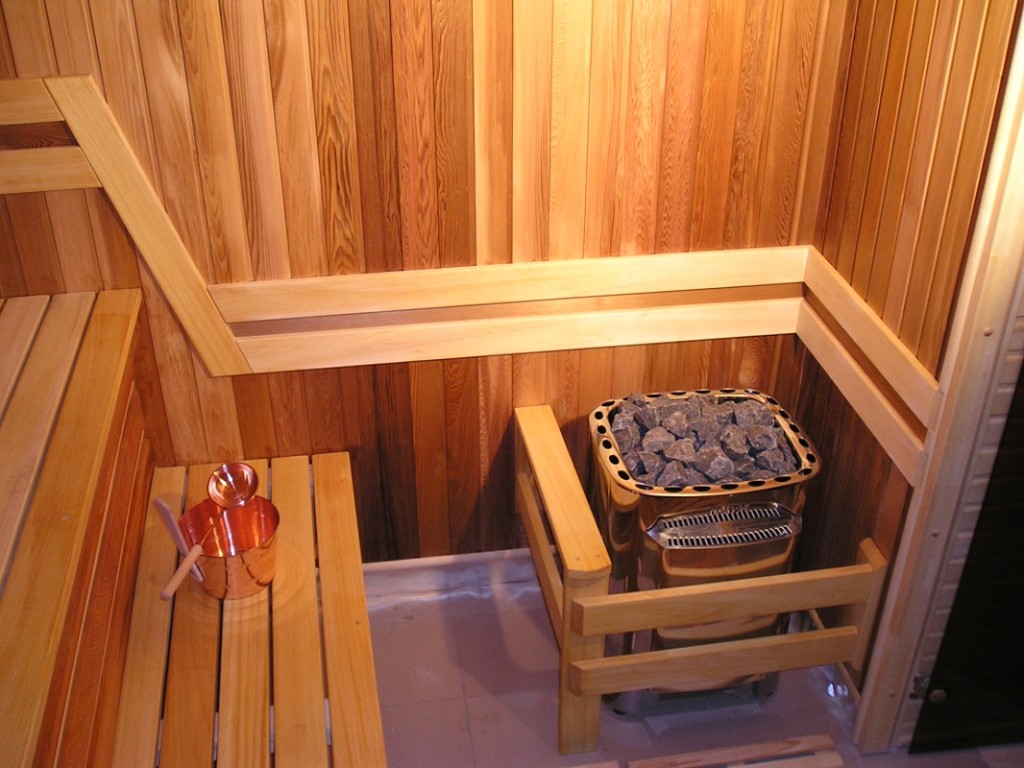
Eighth Step - Equipment
![]()
![]()
At the end, install the electrocamenake and decorative accessories. The wood chain is better not to build, especially if we are talking about the sauna in the apartment - such an aggregate will create very high load on overlapping.
With the installation of the electrocamenik, there will be no problems. Complete with the device are special fastening screws. You only will only secure the heater on the wall, retreating about 20 cm from the floor surface. Around the Kamenka to build a small fencing of wood trimming. Fencing can have any shape. The main requirement - wood should be not closer than 50 mm to the heating element and not rise by more than 50 mm above the Tanes.
Install the socket, switch and lamps. Put the wiring through a metal sleeve.
Clean the benches of sandpaper and thoroughly wash them with clean water and a little wet sponge.
Ninth Step - Stones
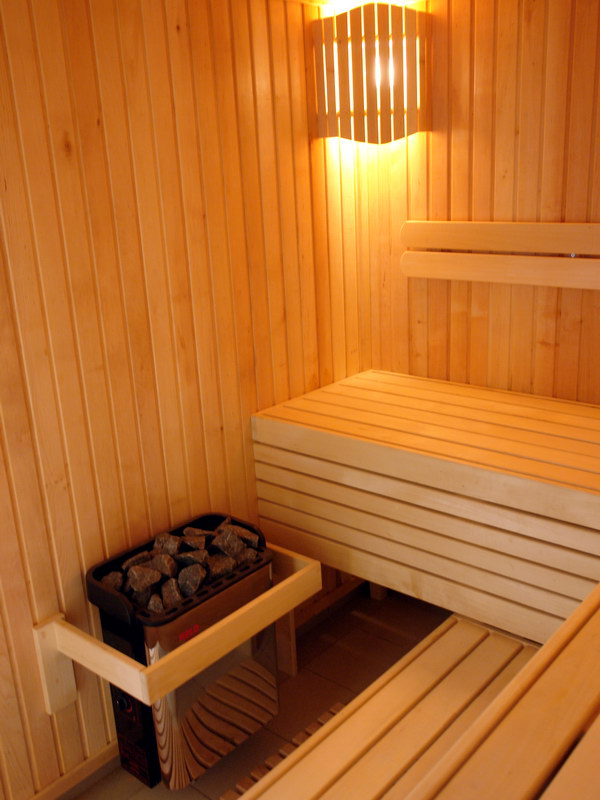
Stones Place between heating elements with minimal lumens. If possible, use round smooth elements without defects. Large stones lay down, small placed on top.
Before laying on the heater thoroughly wash the stones. Every 3-6 months re-wash the stones and check their integrity. Clean the damaged elements and lay new instead.
Sauna in the apartment
Good job!
Video - Sauna at home with their own hands