Step number 2. Diagnosis and treatment.
1. Big gaps
an explicit sign that your boards have long been dried and ready for the right use or under flooring the technology of work is violated.
Just the onset of the boards, tightly configuring them to each other. Canon technology Next:
- Keep the first board with a spike to the wall at a distance of 1 cm from the wall of two nails on the lag.
- Put the second board on the lags, tightly drive the spike of the second board in the groove first. To do this, metal brackets are clogged into lags, and wedges are clogged between the brackets and the board.
- All boards to nourish 2 nails on the lag.
- Last board, if necessary, trim in width.
I use similar technology:
- Screw the first board with a spike to the wall at a distance of 1 cm from the wall of two screws on a lag 75-100 mm long depending on the thickness of the genderboard
- Put the second board on the lags, tightly drive the spike of the second board in the groove first. For this, the lags are screwed with 2 high-power screws wooden bars, and wedges are clogged between the bars and the board.
- All boards are screwed to 2 nails on the lag.
After you run the floor, you will have a 5-15 cm width. This gap can be closed:
- new Fireboard
- ordinary cutting board
- wooden bars of appropriate height
- several layers of plywood. Plywood layers are preferably glued.
2. Some boards broke
perhaps these boards rotted or the distance between the lags is too large.
- Throw off the unsustent boards.
- Check for ventilation on the walls.
- Perform additional waterproofing: Machine between lags and floor bases, several layers of rubberoid or at least polyethylene film.
- If the distance between lags is greater than 1 m, and the height of the board is less than 30 mm, add lags.
- First, the floor is on the remaining boards, and the new ones are laid at the end (closer to the wall).
3. Cold floors
Logs between lags layer of foam or mineral wool, so that the space between the base of the floor and the geepboard turned out to be filled. The gaps between lags and foam smelting in acrylic sealant
4. Floors creak
- Check, do not "play" whether lags, go through them, lagows must lie motionless. Lagi curves are desirable to replace.
- If possible, secure lags in places of support on the base of the floor (screw with powerful screws).
- When assembling floors, drive acrylic sealant in the seams, it will create additional insulation and significantly reduce the area of \u200b\u200bfriction of wooden surfaces.
5. Floors greatly bend
- Check out the presence of leveling linings under lags in places of support on the base of the floor.
- Replaced or shocking lining and strengthen.
- If the distance between the supports is greater than 1 m, and the lug cross section is less than 100x50 mm, add the lags of the support.
- Perform additional waterproofing
6. Uneven floors
Place lags horizontally.
To do this, you will need:
- "Shabashiki" - small pieces of boards or plywood with a thickness of 2 to 25 mm thick. If you are an esthete and want to put lags with an accuracy of 0.5 mm, use pieces of toli or any other tight paper impregnated with waterproofing compositions.
- level
- water level
- long twine.
Technology performance:
- First, with the help of the level, put the extreme lag (near the wall) to the height. To do this, laying between the lag and the base of the floor "Shabashiki". If you use plywood slices 3, 5, 8, 20 mm thick, then you will pick up almost any height, in other cases add 1-3 layers of Toli. If you do not have "sabasters" of the desired height, you can make them from cropping boards with an ax or a wide chisel.
- Secure a lag to the base of the floor
- With the help of a water or regular level, determine the height on which the lag has the opposite wall. If you have a level, then it's time and place to use it.
- Place the far lag at a certain height.
- Drive nails along the edges of the lag (near the walls) and tension between the lags of the twine
- Stay the remaining lags.
- If possible, replace curves and cracked lags.
How nice to walk barefoot on warm wooden semi! But what to do if the floor is no longer so smooth if it is already covered with a thick layer of paint if there is a unpleasant draft through the cracks in it, and the floorboards themselves will creak and begged under your weight? You can answer this question in different ways. And these answers depend on several conditions - the knowledge and skills of the owner, its financial capabilities and its desires and fantasies. You understand yourself, with such a variety you can do anything - from the coating of the floors by another layer of paint to the complete replacement of the old wooden floor on one of the modern flooring. Therefore, now we will talk about the repair of a wooden floor - from the simplest to the capital.
What repair is required by your wooden floor
It is intended to put the floors in order, you should define accurately, what exactly needs to be your floor at the moment - the coating update, normal repair, capital or full replacement Flooring. Let's go on each of the options:
- the coating update must be carried out every 2-5 years, depending on the coating itself and on the state of the floor under it - is usually carried out or planned (as follows according to the instructions), or as the previous layer is abrasioning in places under the greatest load.
- normal repair is done in the case when the floor begins to fuse slightly and creak under his feet when the slots are formed between the floorboards and the boards begin to "decide" edges
- overhaul is required in two cases - if you decide for the full repair of the apartment or your floor begins to make sure and deform to complete disgrace
- full replacement of the flooring is performed with the global repair of the entire dwelling with the replacement of "outdated" finishing options for more modern
Regarding the durability of floors from massive wooden boards, only one thing is to be said - if high-quality material was used (properly dried boards without rotten and excessive bumps treated with protected impregnations), and they were normally worked out for it, then such floors can last up to 150 years without a complete replacement. Therefore, we will consider only repairs - you can hardly live in a house where wooden floors were laid over 100 years ago.

Repair of old wooden floor
Any business consists of three stages - preparation, actually business and final finish. Will not be an exception to the rule and repair wooden floors. Simply in each particular case of repairing the steps will be slightly different. And let's start with the most laborious.
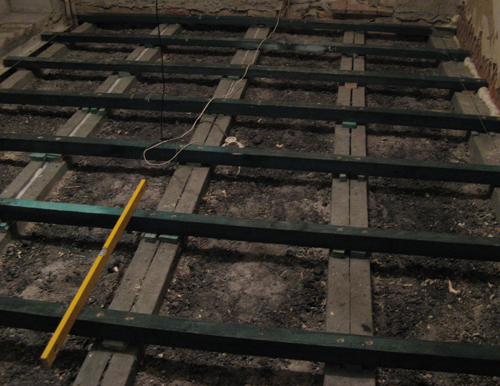
Overhaul of wooden floor with their own hands
Usually, with major repairs, the floor is carried out a partial replacement of flooring (fallen, cracking or broken) and work on insulation, vaporizolation, or even laying system " warm floors"(You can read about them in other articles - the entire process is specified in detail for different types of warm floors - electric, water and film). And the scheme of the overhaul of wooden floors looks like:
- Prepare floors to repair:
- remove the plinth
- if the boards are painted with oil paint, it must be removed to clean wood
- floor boards are numbered so that later it was convenient to lay them back
- carefully remove the floorboard, determining their suitability for further operation (spoiled boards must be replaced with new ones, and it is not necessary to throw out the entire board, if you have fallen only some part - in this case, you can remove a poor piece of piece and put a more durable piece in its place)
- floor boards with inner (turning down) Parties should be treated with a special impregnation that protects against mold and rotting - so they will serve much longer
- from the "Sample" we remove all the garbage until the concrete base (or slab plate) will appear
- lags can be removed, or at least carefully examine them on the subject of the integrity of the material - the bars who came into disrepair need to be replaced.
- We carry out everything necessary work By improving our floors:
- we deploy the insulation between lags, you can use as insulation various materials - from clamzit to mineral wool and foam
- stele vaporizolation - stripes of the film are placed in a mustache (somewhere on 20 centimeters) and fix each other with foil scotch (the simplest variant of vapor barrier - plastic film, but you can use more expensive and reliable materials, such as foam)
- we put floor boards - by numbers applied during the removal process
- boards fix to lags with self-tapping screws - it is more reliable than the use of nails (self-tapping screws deepen into the surface of the tree by 3-5 mm)

- checking the horizon of the floor by Waterpas (level), and where the edges of the boards protrude with a noticeable discrepancy in height, we pass by the plane
- non-aligned float floors to make the surface of smooth (permissible differences in height in a couple of millimeters on the temporon meter)
- split the gaps (if they are) and the deepening places of the self-tapping screws, the prospatel places are shlifuy again
- we remove the whole garbage - brush, vacuum cleaner, damp cloth
- clean and flat wood of our renewed floor process protective impregnations (if the floor is going to paint with ordinary oil paint, then ordinary olifa can serve as an impregnation)

- put the plinth
- Our floors are almost ready for operation, it remains only to apply the finish protective covering, eg:
- varnish - Today it is the most popular coating, because in addition to the beautiful protective properties, the lacquer allows you to fully enjoy the beauty of the tree itself
- paint - special sex paints allow for a long time to save our gender strong and give it any color
- oil - Modern oils for floors made of wood penetrate deep into wood, making it more wear-resistant and durable, but still it is better to use them as impregnation
- wax - the excellent effect of waxing wood is known from the long time, however, requires constant and rather expensive maintenance
Not much effort, however? Of course, it takes plenty of time, but the result is worth it - almost new floors for quite modest rates. For those who are interested in the opportunity to independently make the overhaul of the wooden floor - video, where all the work is made by the hosts of the hosts under the persistent leadership of the specialist.
Return the wooden floor of the second youth - a simple repair
Not always for flooring of wooden floors, high-quality material is used, especially this is noticeable if the floors are not the owner, but builders (although during the Soviet Union state structures Still more honestly treated their duties). If you are lucky, and your floors still do not fall under your feet, but just creak and slightly "playing", then only a small repair is needed - and they will even rejoice you with their strength for a long time. But no matter how simple was the repair, it is worth it to it with full responsibility. Therefore, the scheme of action will be like this:
- As a preliminary training, you should completely get rid of the words of the old paint or varnish, opening clean wood (because in this form it is much easier to notice any shortcomings)
- Repair itself is as follows:
- check all the floorboards on the absence of rot, mold, drunk plots (if such sites still found, then it is necessary to cut the affected place, and put new boards in their place)
- improve the fixation of the boards to lags - to score nails deeper or even change them on the self-tapping screws, the hats must be deepened in the wood somewhere on a half-meter
- in wide gaps on a putty (or carpentry glue) to plant a chipper (wooden bar), narrow just to smear the same putty
- batch the floor to a flat smooth surface
- clean floor boards to breach with oils or impregnation, improving the operational quality of wood
- The floors are repaired, the little things remain: painting or lacquer coating
Even with such a relatively simple repair, the floors acquire a view of almost new ones. This is especially strongly becoming noticeable if the floors were covered with a solid layer of paint, and after repairing from under the varnish shone with solar shades, clean wood. That is why the phase of the cycloying of the floor is so important. Carefully look at the video - the rules of cyclishing are sufficiently detailed and available.
Periodic Cosmetic Repair - Pledge of Long Wood Floor Service
At one time, making floors repair, you probably chose the most suitable protective coating for the floor, which reliably stores wood from rot, mold, deformation and too strong mechanical damage, that is, retains the beauty and strength of your floors. However, such a means that would operate once and for all were not invented to the great unfortunately, therefore all the protective properties of coatings must be updated periodically. Thank God, it does not take so much strength, time and money, how many other types of repair. In this case, the process is simplified to the impossibility, and you need to do anything:
- Clear the surface of the floor from dirt, dust, fat - all that can negatively affect the coating
- Apply a new layer (or several layers - this applies mainly places with the highest load on the surface) of the protective coating
- Celebrate the end of the repair
The only thing you can add here is the possibility of decorative change of your floors. It is worth a slightly change color or apply an interesting pattern - and your floors will be transformed by making a refreshment note in the design of your apartment. Here, by the way, this video shows one of the ways to obtain the maximum effect with minimal efforts.
All information in your hands, so the choice is yours. Of course, everyone understands that even with the real need to repair the wooden floor, the price is of the greatest value. If it is impossible to allocate a rather large amount to repair, you will have to do with minimal options. However, even in this case, you can achieve an excellent result if you apply skillful hands and a little fantasy. And let your floors deliver you joy!
Wood floor - optimal option for constructing a country bath. It is suitable on the basis of economic, aesthetic and environmental considerations. However, the organic material gradually loses the height of technical priorities from uneven loads, moisture drops, fluctuations in the temperature background. To extend the life of the structure, the owner needs to regularly repair the wooden floor with their own hands in a cosmetic volume. For launched, pretty spoiled, partially rotting floors will require global recovery activities. Consider how to identify the reasons how to prevent the brewing problems and how to eliminate small and significant defects.
Video example: Repair of floor with the preservation of floorings
Signals to the beginning of the repair + diagnostics
In the list of reasons that cause the need to restore, not only the well-known sensitivity of wood to temperature fluctuations and moisture. Periodically scratching and swelling, the material looses fasteners. The foci of rotting appear, if during the construction period, antiseptic treatment was not carried out or if antifungal protection was not resumed through the standards of 2 years.
It often happens that after a long-term operation of the floor boards, they begin threateningly staggering and fuse when moving along them, and even grindly creak, meeting with the feet of the owners. Often, there are cracks or chips between them between them, conducive to the resettlement of bacteria and dispute rotes. Any of these signals notify the owner of the need for repair work, a significant part of which he can do it yourself.

Before repair, you need to examine and assess the condition of the sexes, then based on the audit, draw conclusions about the volume of the coming work:
- If only the surface is damaged and the movement on the floor does not cause concerns, it will be necessary to tighten or change fasteners, jog and close the small slots;
- If the flooring hammers respond to a deaf sound, you will have to delete and change the rotten parts of the floor. It is possible that these will not only boards or their fragments, but also lags, and mortgage beams. It all depends on the area of \u200b\u200bdamage to rot or damage to the core. It was recommended to disassemble the floor in such situations and shift, which is much cheaper than the loss of a fully rotted structure;
Note. The presence of damage and development of rotes will also help determine the rust of the wood and "blue" board of the nail.
- If the boards creak, it means that the wooden structural elements are not uncomfortable in the dusting area of \u200b\u200bthe floorboards with each other or in the pairing zone with lags. Those who will not be able to eliminate the cause of the sample from the side of the scented or from the surface, you will have to disassemble the floor, repair or improve the lag system;
- If in the bath it is a disgusting smell of rot, piston, roughing, lags, beams, and often mortgage crowns need to be immediately changed. It is better to hire a team of carpenters to work if you need to remove the lower part of the cut in parts, lifting the entire floor of the jack, then change the mortgage beams to new sawn timber;
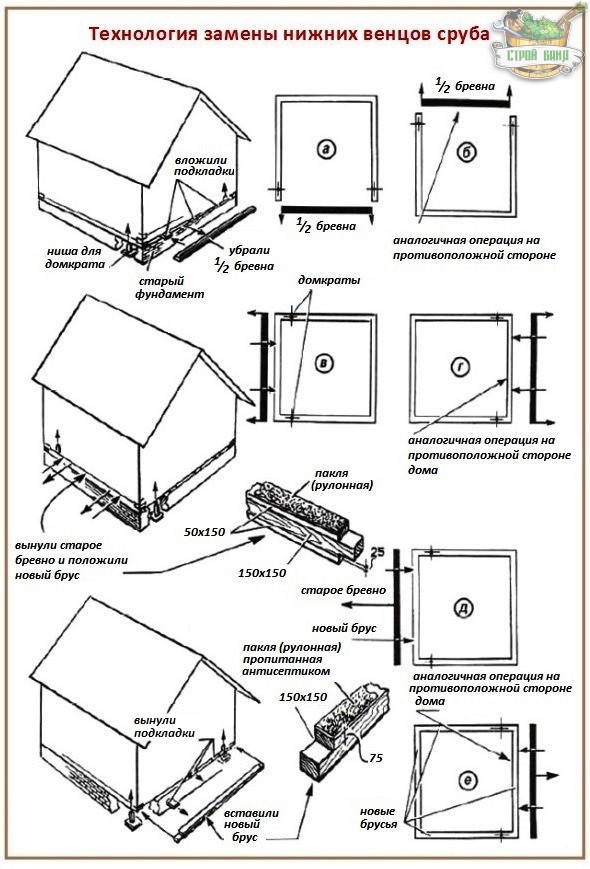
Council. Digitory Lag sites can be cut off on their own and build a bar on both sides by boards.
- If the seed floor is coming, serious restoration work is coming with a mandatory analysis of the design and with the replacement of rotten elements. If the cause of sagging in the deformation of intact rotting and the core lag or beams, the supports are installed under it.

Support can serve:
- special metal device with a developing adjustment system;
- steel tube with cement filled into its cavity,
- foam concrete blocks;
- wooden beams;
- brick columns.
Any of these options requires the fill of a small local foundation 0.5 × 0.5 m and the presence of a rubberoid layer and a wooden element. The lack of the height of the reference post is covered by the cutting board. The direction of the upper row brick masonry Supports should be perpendicular to the direction of the lag.
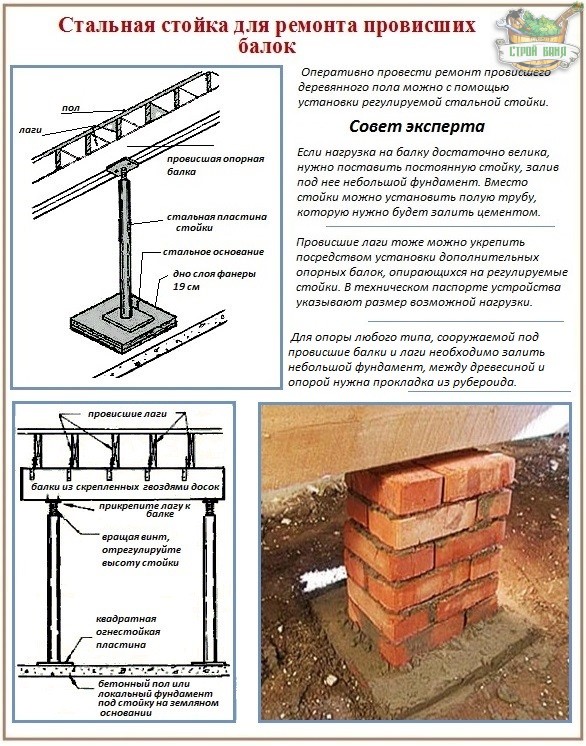
Another of the reasons for the oscillation of the flooring is the insufficient frequency of the lag mounting. So, we need a headache and upgrades by installing an additional bar.
Visually it is difficult to determine the cosmetic or overhaul of wooden floors at the moment you need to spend. It is necessary to check the condition and inside, and outside the structure, and from the side of the sample.
Attention. Be sure to carefully inspect the ends of the lag. Wood unprotected in this place very quickly infects the rot from the mortgage bar and transfers the "infection" by the rest of the wooden elements.
For a survey in the twilight, the underground do not forget to stocklight and the assistant, which during the diagnostic period will be moved along the floor. It will still need a sewer that will need to periodically try to pierce a mortgage bar or logs. "Crims" do even in those places that optically do not doubt in suitability. If the rod sewed passed into the wood freely, we study the size of the spoiled area, cut out and replacing, substituting the jack for insurance under the "cropted" section.
Analysis of the 3rd most frequent problems and their solution
Replacing the crowns and mortgage beams by inexperienced in the field wood construction The owner does not work. However, information about probable reasons, he will help to control the work of the brigade. But to fulfill simple work, it is not necessary to part with personal accumulations. What and how can you repair yourself?
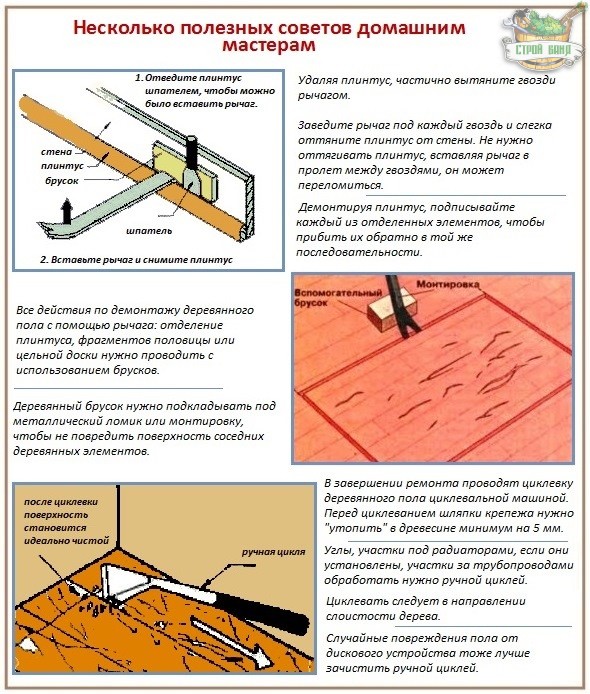
Get rid of the "senile" screenshot
Explore the "volatile" section of the floor. It was found out that harsh jerseys are distributed due to surrendered fasteners, then we will conveal, let and supplement the fastening with galvanized self-testers designed to work with the wood.
With more complex "creaky" problems by combining other methods:
- The common cause of the violin is a fragile combing comb split. To eliminate the floor, we first carefully dismantle the plinth, then remove the extreme board, and after it everyone else is up to the field of the screens. We use a spatula, lever and linings from rack trimming. Nails from dismantled boards and plinths are dying away with a hammer or an ax, hitting the side of the fastener, after which we pull it out with a nail. We check the lags, we produce a complete or partial replacement for damaged components, if necessary, and put it back. Fresh self-pressing, retreating from the "old" point of fixation 3 cm.
Council. The head of the floor is intelligent to take off blocks, especially if they were attached through 4 boards. The block is easier to disassemble without damage to the lock system. In order not to be difficult when collecting boards in the reverse order, numbering the floor and plinth.
- The creaking of the floor, which is loosely adjacent to the lag, eliminate by lining the wedge, a piece of rubberoid or cardboard, headed under the side of the sample. Perhaps it will be enough to simply screw two additional screws, sitting inside the room. Holes for screws in a creaking board drill at an angle and to the floor and to each other. The heads, recessed by about 0.5 cm, are covered, the plot of repair after hardening the putty is grinding.
- The easiest method of getting rid of the screenshot is a frustration in the problem gap between the rams of graphite powder or talc.
We remove the gap big and small
Large gaps finish with wedges. For their manufacture, use cropping of rails or boards. Fucking wedge-shaped side with carbon black glue and score into a longitudinal hole. We are waiting when the glue will freeze, and we can cut over the surface of the floor over the plane.

The gap can be filled with a rope or twine glue. Waving the place of repair. It is necessary to sharpen the self-made composition of the linoleum softened in the acetone, which did not have a substrate.
Repair of small cracks can be held:
- putty for wood;
- mounting foam;
- a mixture of small sifted sawdust and joinery or casein glue taken in equivalent proportions;
- softened B. hot water a newspaper mixed with a hubber and joinery glue;
Recipe. Crumpled to pieces, filled with boiling water Mass from old newspapers should have a day. Then you need to weld the liquid celaser, cool it and add joinery glue. This solution must be entered into a strongly pressed newspaper mass and mix until a domestic spacade with a consistency resembling a window dressing is made.
Cracks and fine gaps are embarrassed after the floor cycle. By the way, during this period, a sufficient amount of sawdust used for sealing appears. The repair of cracks is completed by the shtlock.

Replacing entire unpleasant flooring
The board without lock connections or part of it can be removed without a complete pace pars, because it is not in the "hard bundle" with adjacent elements. To replace the entire flooring, the plinth will still need to be removed, for partial repair, it will be necessary to accurately find out the location of the lag and underground communications.
Fully the board is removed as follows:
- i fell with a fear of the edge with the edge and, laying a wooden bar under the lever, gently raise;
- under the raised board we will lay wooden trimming to fix the gap, and unscrew the unnecessary segment;
- similarly, we move to the opposite edge of the floorboard.
Those who intend to lay anew half, turning it down slightly by the exterior party, should be valid according to the described algorithm, but no need to cut off the segments from the board.

Important. Do not forget to handle wood with antiseptic impregnations before the inverse laying of the wooden floor.
To replace the board fragment, you will need to cut over only the damaged area. When cutting should not suffer network engineering and lags. If presumably the cut line will cross them, you need to increase the dimensions of the part being repaired. The replaceable area should be relying at least two lags, the line of dusting "patch" and the old board should be located above the lag.
According to the filled segment-template, we make a new detail, put it in place and creature to lags. You can add fasteners to the adjacent boards of nails at an angle of 45º.
Over time, the condition of the house makes the owners think about its overhaul so that the interior and design fully meets them. And if everything is clear with the ceiling and with the walls, then how to repair the floor in the house, not everyone knows. In order for the dwelling is not just beautiful, but also safe, all repair work must be performed particularly responsible. Also repairing floors is a wonderful reason to insulate them.
How to repair the floor in a wooden house
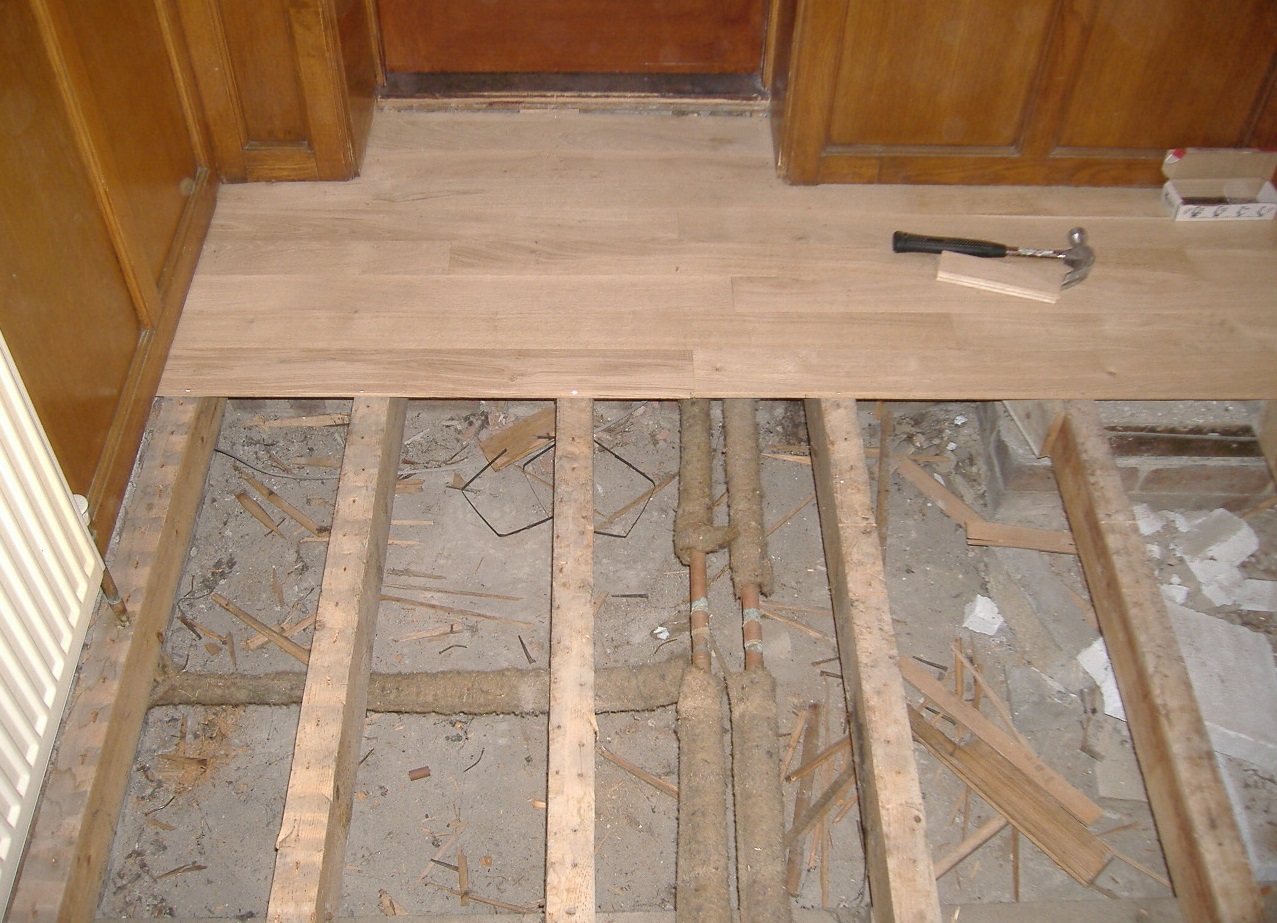
First of all, the repair of the floor should be started with the removal of an old coating. Parquet, linoleum and other views of the sexes will have to disrupt and complete the inspection of the genital boards. Usually, if the house is old, they imply a complete replacement, which means they should also be dismantled.
After performing all the work on the dismantling of old building materials and cleaning rooms from the garbage, you can proceed to dismantling the new floor.
In the event that the foundation of the house came into disrepair from damp, going from the basement, before starting work on the floor laying, it must be carefully placed and lead to normal. The main materials that are required when repairing the floor in wooden house:
- thermal insulation material, roller or sheet;

- dry bar 200х200 mm;
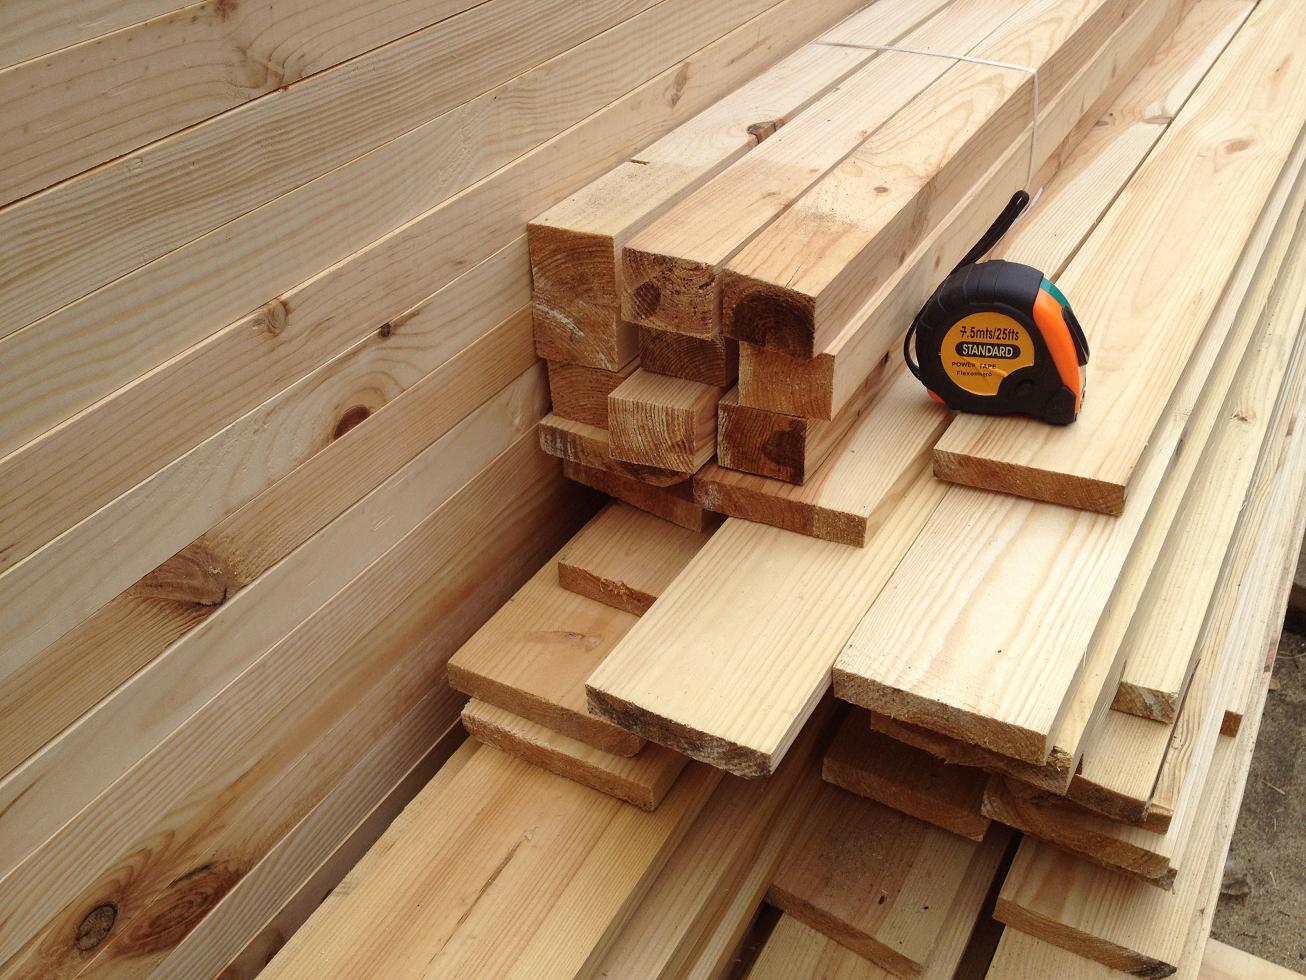
- floorboard;

- different fasteners, including mounting foam and self-tapping screw;
- antiseptic impregnation.
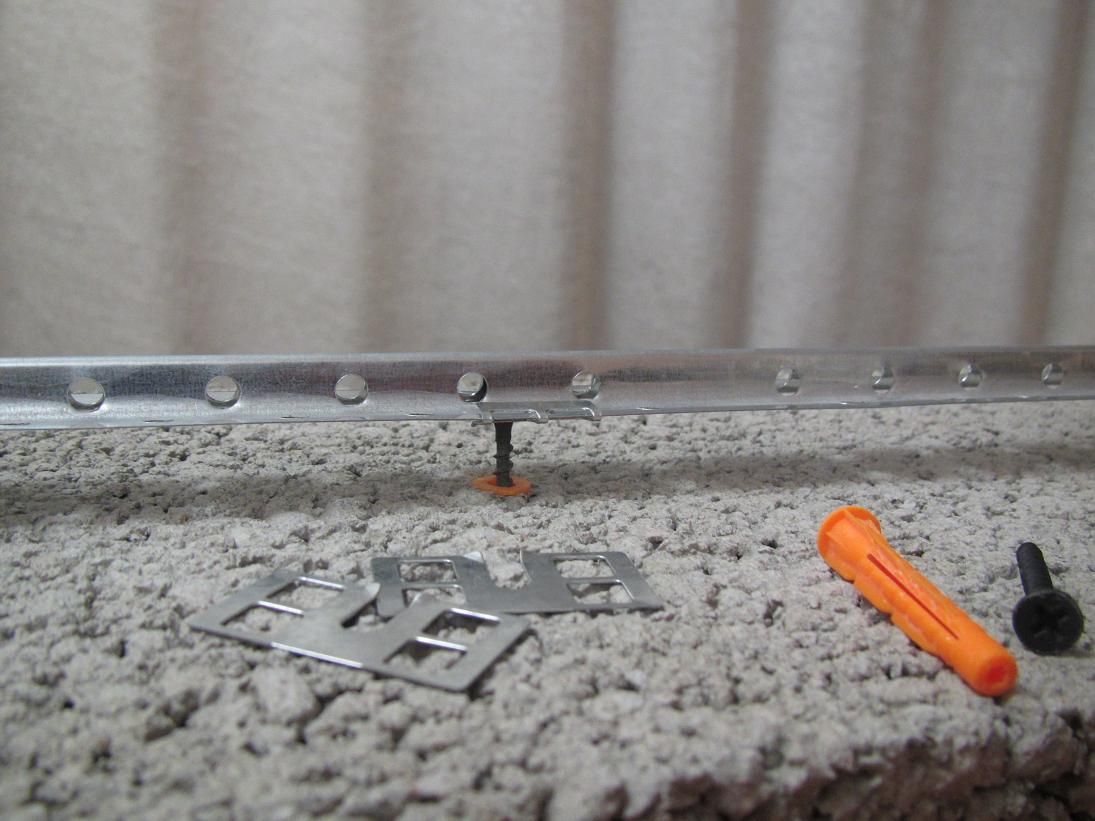
Deciding with the location of the boards, you can proceed to the installation of a bar pre-impregnated with an antiseptic, which will act as the basis for the new floor. At the same time, the lag laying step directly depends on the thickness of the boards: if the board is 40 mm thick, then the overlap must be installed in a step of no more than 850 mm. Applying thicker boards, the step increases to 1 m and, respectively, decreases if the board has a thickness less than 35 mm.
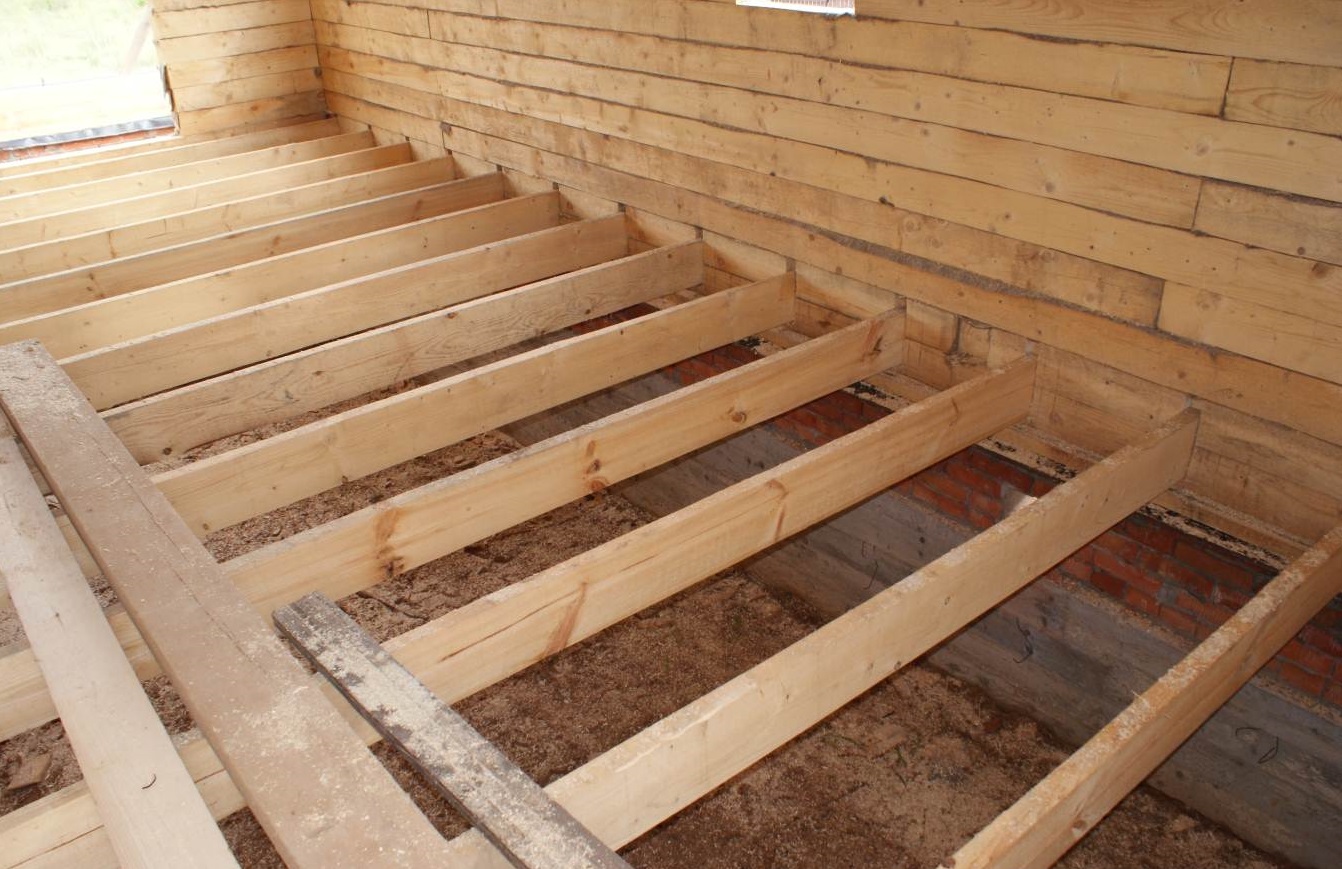
Lags are set exactly in terms of level. In places where it is necessary to raise a bar, it is worth using paddle gaskets that are impregnated with hot oil - it works great and does not allow shrinkage. Such gaskets are screwed to lags to avoid their fallout and subsequent floor drawdown. Instead of pads, it is impossible to use struts and wedges - they can decrease and fall out of the seats, which will lead to the screen and floor drawdown.
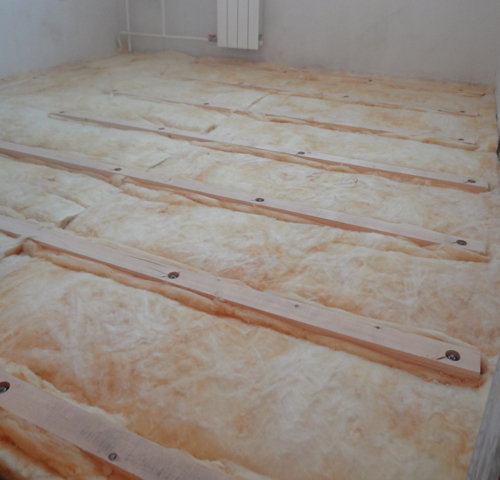
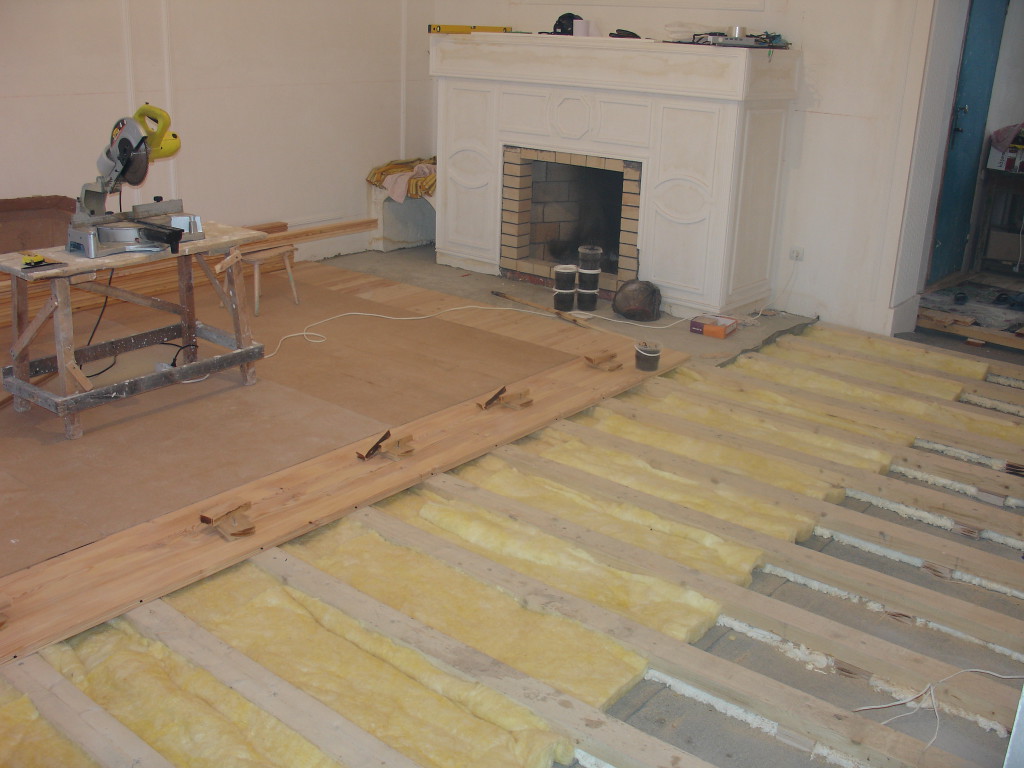
If the floor is repaired on the first floor or in a private house, and under the room there is a basement, then before installing lags, it must be considered. Therefore, to put thermal insulation material between lags. Securing all the components of the base of the floor, proceed to laying the insulation.
![]()
Heat insulation
You need to choose the insulation, pushing out the climatic conditions in which the apartment or house is located. If the floor is repaired in a private house or the apartment is located on the 1st floor, it is worth treating this issue even more responsibly. From the quality of the insulation directly depends on the comfortable stay of the owners in the dwelling in winter.
To choose a material that would be perfect for your living conditions, it is recommended to consult from specialists working in construction stores and buy the appropriate insulation. It can be mineral wool, polystyrene foam, foamizol, eco-art and others.
Between lags is stacked by a sheet or rolled material. At the same time, it is impossible to leave emptiness and cracks to eliminate the passage of cold air basement. If you use lags with a 200 mm high, it is recommended to use a stone wool leaf insulation, if the height is less - it is better to consider the option with a rolled insulation laid in one or more layers.
When installing thermal insulation, the floor must be guided by one rule - so that the top board does not touch this material, leave a small air layer between them. In case of constant damp in the basement penetrating through concrete plates, Before laying the insulation, it is worthwhile. This is a necessary measure, since all heat insulating materials are poorly tolerated high humidity, accumulate moisture in themselves, thereby increasing the likelihood of tree rotting and destroying.

Naturally, it does not concern polystyrene foam and certain types of synthetic insulation, but in most cases, waterproofing is not required.
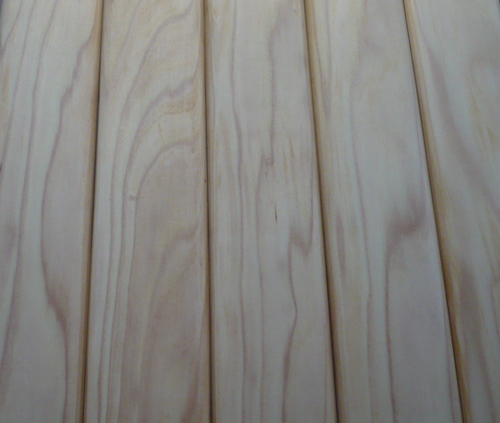
Installation of wooden floor
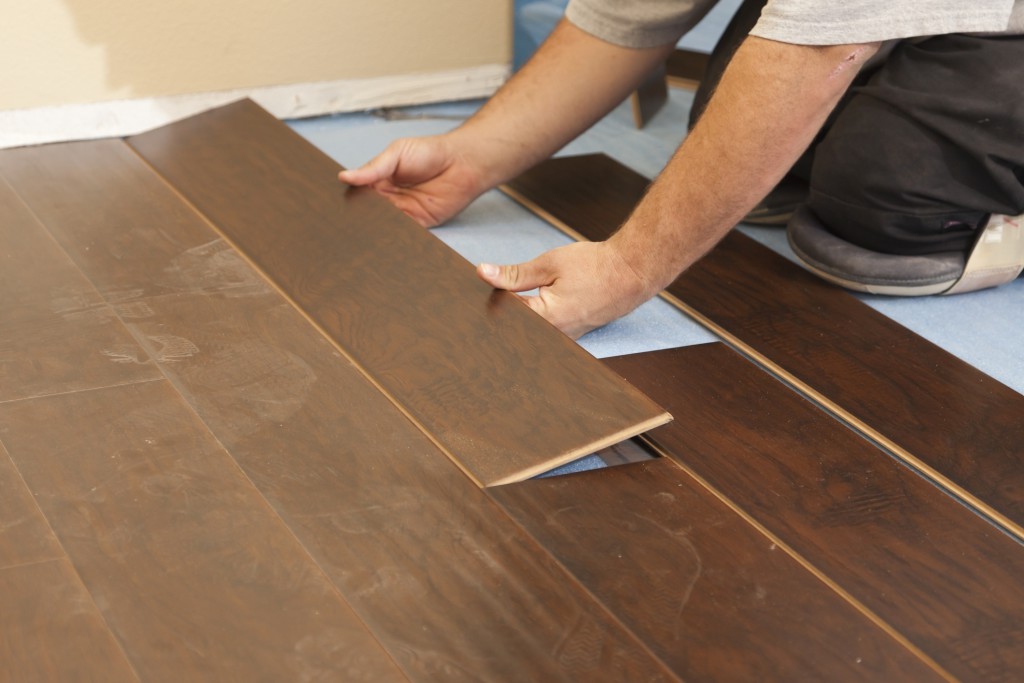
After laying the insulation, the installation of a wooden floor. Today, this material as lining has been proven perfectly. Thanks to special grooves and spikes, the installation of a wooden floor will be rapid. Plus, at the bottom of the board there is a ventilation groove that allows you to "breathe".
The board is fixed to lags with self-tapping screws, but it is necessary to control the gaps between the joints. There should be no cracks in a qualitatively mounted floor. Self-tapping screws so that they are not visible, and their heads are not displayed on the appearance of the floor.
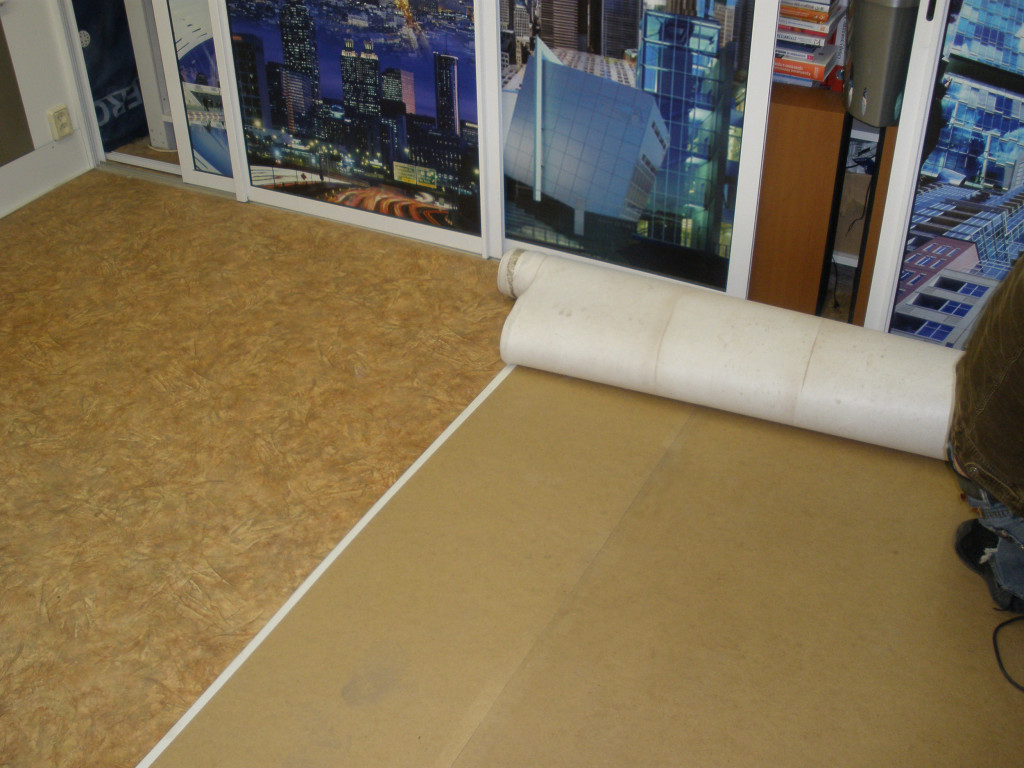
After fixing the last board, it is necessary to start a further operation, based on the preferences of the owners. For example, if apartment owners prefer laminate or parquet boardThe floor is fixed with a special waterproof plywood (10-15 mm in thickness), screwing it to the boards. It is worth remembering that there should be small gaps between sheets, otherwise trading and creaking friction arise. Then the parquet or laminate is placed on the plywood.
Laminate is characterized by an ideal smooth surface and does not need further processing, and in the case of laying parquet or laminate, it is necessary to resort to several repair activities.
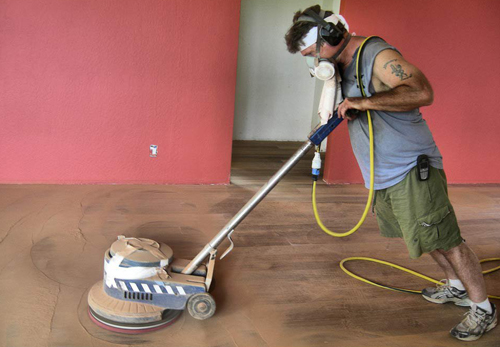
Cycle floor in the house
In order to remove all the differences in the height of the parquet or boards and ideally align the floor, use a squash machine that allows you to remove the top layer of wood, considering irregularities formed when installing the floor and possible dirt. If there are deep dents and scratches on the boards, it is worth performing a coarse cycle, using sandpaper with a large grain, after which a more fine-grained, in order to achieve an ideally smooth floor surface.
After the flooring and cleaning of dust and garbage, it is possible to cover a tree with a special varnish, which will not just give the mirror glitter of the surface, but also be able to protect the floor from small damage and contamination.

How to repair the floor in the panel house
It is no secret that the wooden floor provides a perfectly flat surface of housing, providing a comfortable stay of households. However, a tree is not always on the floor. Modern builders and architects, removing new homes, are little think about the health issues of future owners and aesthetics of the interior.
Therefore, most often in panel houses The floor is concrete, covered with vinyl tiles or linoleum. And when the owners of the apartment are going to make the apartment repairs, they think about repairing the floor.
The peeling tile or wear linoleum must be removed, and the concrete floor is cleaned from the former glue. Then the repair of the floor in such a house can be held in several ways.
Floor screed - base for modern flooring
If the drops of the floor make you think about to produce floor alignment, then you should take care of the screed. This method of alignment can be wet, dry or semi-dry (everything directly depends on the material you plan to use). With a dry screed, a claymzite covered with hydro fiber plates is used. The main advantage is the ease of construction, the rapid deadlines and parallel insulation of the floor.

In the case of a semi-dry screed, you need to mix the solution so that there is little water in it. Such a screed dries much faster than wet, and the execution process is not so time-consuming.
Sometimes the basis for the wet screed is cement and sand with the addition of plasticizer. For insulation, the floor must be added to the mixture of clay. This method is one of the most arrogant, but it is categorical not suitable when the slabs of the overlap cannot withstand additional loads, and such a screed dries up to 30 days.

Bulk floors are new material in the field of floor coatings. Polymer mixtures are quite easy to prepare, and the installation requires less effort and time than any band screed.
It is necessary to properly prepare the basis, to project it, strictly observing the mixing technology of the mixture and the parameters for temperature and humidity in the room. Often, polymer mixtures are called self-confined. This solution is enough to pour into the floor, focusing on the beacons located on the floor.
At the same time, it is worth aligning the floor, which is then covered with tiles, linoleum or any other material. It is also possible to use polymers and after the starting coating will also make the finish. Thanks to the bulk sex, you can drastically change the interior of the housing. You can do not just do one-color floors, as well as floors with a pattern (3D floors).
Such gender itself provides a work of art, and in terms of practicality he is generally indispensable. However, there is one drawback: high cost. Although they can be poured only in a small area - in the bathroom, in the kitchen or on the balcony.
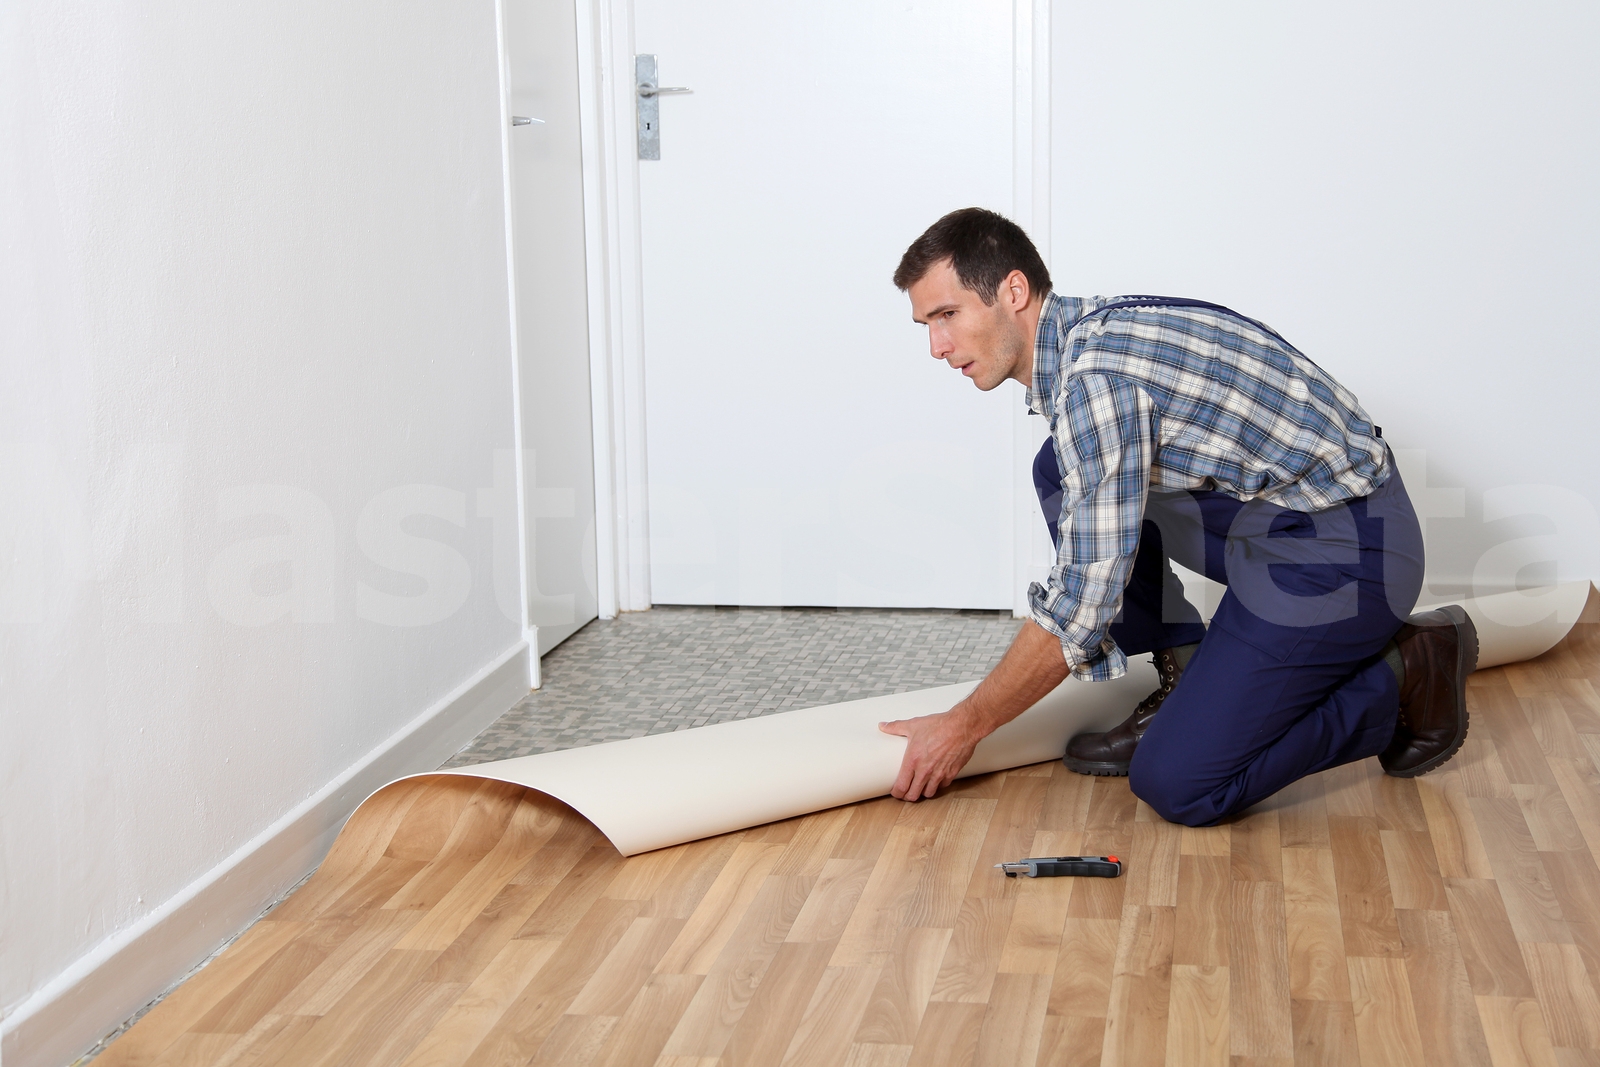
Linoleum is cheap, simple and fast
One of the most simple and economical flooring - linoleum. And really, can there be something easier than laying linoleum? Mastic or glue is applied to the washed floor, after which the linoleum is stacked. The principle of laying resembles pasting with wallpaper, but the workflow can be held in another plane.
It is important to follow the density of its gluing and prevent the formation of air bubbles, otherwise the hole can break through the root of the root of the table or the chair.
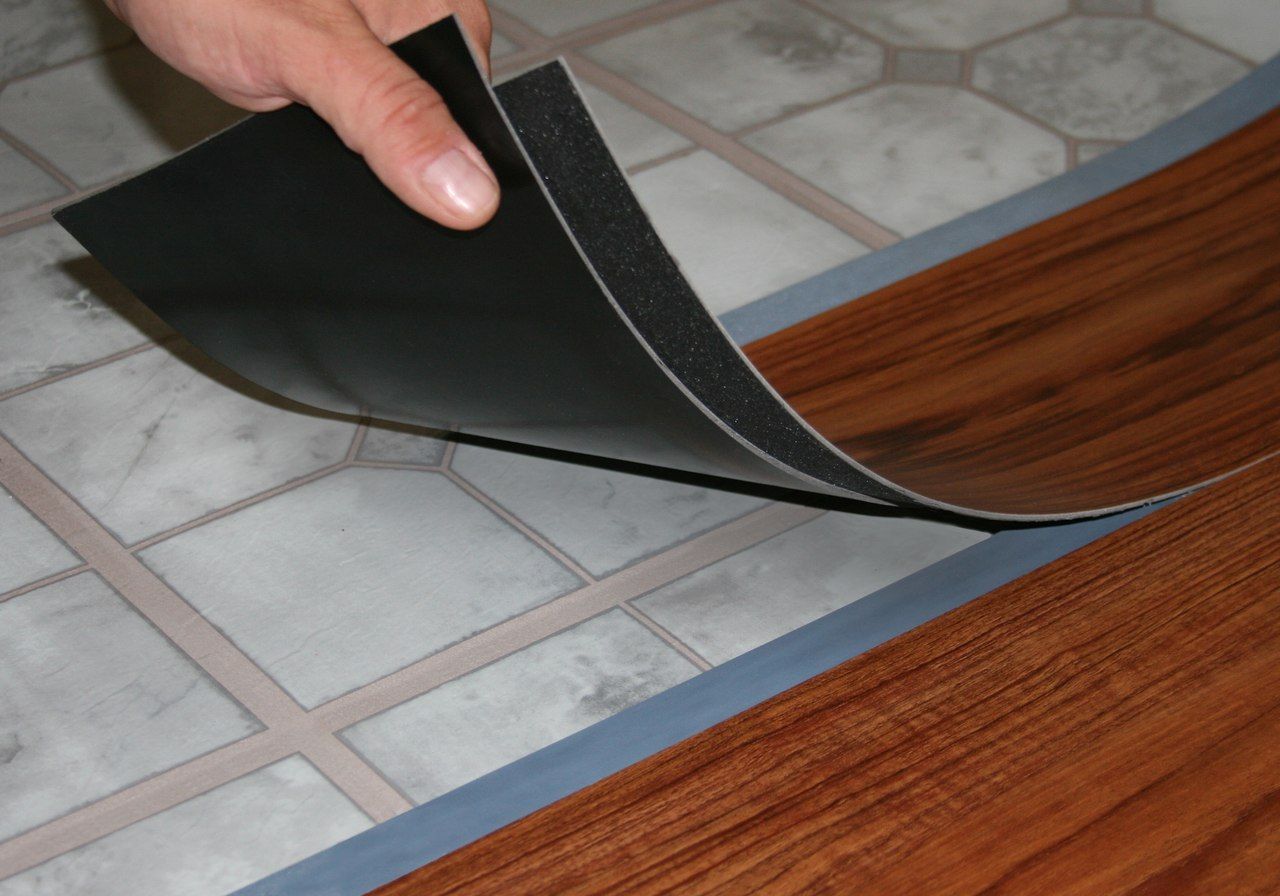
Vinyl tile - not deliver any problems
One of the easiest in laying and dismantling and budget ways to make the repair of the old floor in the house is vinyl tile. Thanks to the variety of her design, you can create a stylish coating with a minimum of effort. However, the tile, like laminate, linoleum and parquet, should be laid on a flat surface.
Tile - Beauty and durability
Such material is effectively looking at the kitchen or in the hallway, besides, it is easily cleaned from different contaminants. The tile is placed on a concrete floor, purified from fat spots and dust using a adhesive solution. To respected symmetry, it is better to perform a preliminary markup of the area before laying the tile, reveaning its center.
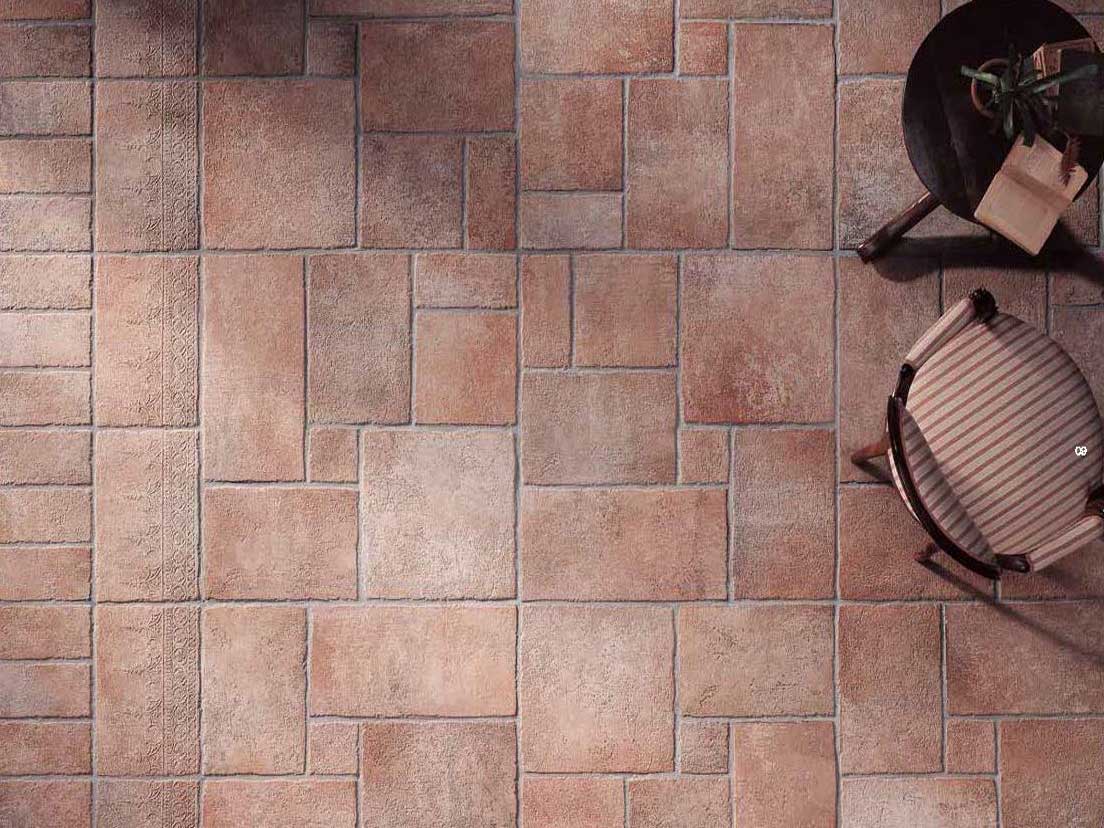
In this case, the picture on the floor will perfectly fit into the interior, thereby not disturbing harmony in the design of the apartment. As soon as the glue dries, the seams are made using solutions that can either merge with the color of the tile, or sharply contrast with it.
Partial repair of the floor
It often happens that on the overhaul of the floor in the old house there is not enough money, and repair is needed now? Then extend the life of the wear floor by partial repair, which will cost cheaper and does not take much time.
The resulting gaps between the boards can be close using a wood powder. After it completely dry her needs to be carefully cleaned. Large gaps need to be embedded with wooden slats, lubricated PVA glue, after which it gently score them with a hammer.
Rotten or broken hand board You need to cut down and replace the new, suitable for the size of the formed opening. Do not forget that both ends of the boards must go to the lags to which they actually attach.
If the tile dug up, it must be carefully removed, as it can burst. If this happened, you will have to improvise with the cafeter, which remained from past repairs, or buy similar tiles in building stores. Once you get rid of old tileIt is worth carefully removing the frozen solution without damaging another tile.
Then, the resulting recesses should be filled with glue and lay the tile, removing the excess solution (when tile pressing it will be squeezed out through the gaps). When the solution freezes, it is possible to grip seams, and after 24 hours the floor will look like a new one.

Parquet floors are fairly easy to renovating on its own. Usually, very damaged components are replaced with new, and planks with small irregularities and scratches are processed with a putty on a tree. However, before pressing cracks, you need to clean the areas from varnish, otherwise the repair mix will not be well held. When the putty dried can be grinding the repaired areas and coat them with varnish.
In order to make the old floors do not creak, you need to strengthen them:
- using the perforator, make holes in them;
- insert the screws of the corresponding length;
- drive them with a hammer;
- tighten the screwdriver.

The process itself can be seen on our video.
Now you know how to repair the floor in the house, and how painstaking work, requiring certain construction skills. However, for a home master who is familiar with a plumbing and carpentry tool, such work will not be difficult, and the repair will be perfectly!
Wooden floors are considered sufficiently durable and reliable coating. However, due to their hygroscopicity, the tree is exposed to moisture. In summer, at elevated temperature and humidity, it swells. And in winter he dries. This leads to the formation of cracks between the floorboards. Over time, the boards are increasing. Due to the furniture on the surface of the wooden floor, dents and scratches are formed. Paint is eliminated. Spilled chemicals leave a trail. Therefore, the coating has to be restored periodically. And what to say about old houses, in which the repair of wooden floors has not been carried out over a long time. Where to start this process and what is needed for this? Here are the first two questions standing in front of a person who decided to update the wooden flooring.
Where to start repairing the floor from the tree?
If you repair the wooden floor with your own hands do not rush right away to start work. Perhaps other than those sites with damage that are well noticeable, there are hidden defects. They must be detected and eliminated. Otherwise, with time, the repair will have to be reinstalled. Therefore, the first to do a comprehensive inspection of the flooring and its components. Having made a thorough inspection, you can decide whether the floors are repaired or the full replacement is required.
To detect rotten boards, you need to walk the hammer all over the floor. Only so you can detect a hidden defect. The deaf sound testifies to the presence of rot. The rusty nails in the flooring will also receive. The amount of work depends on the size of damage. It is easiest to replace the upper floorboards. Black floor boards replace harder, but not as hard as lags. To repair the rotten lags, you will need to disassemble the floor above them and cut a defective piece. After that replace it with a new one.
It is much more difficult to repair the floor in a wooden house. Here, in addition to a thorough check of the upper floorings, rough floors and lag, you will have to explore the beams and mortgage crowns. It is necessary to inspect the inspection from all sides: from the inside, outside, from the sample. Inspection must be made with good lighting, so as not to miss the starting rot. When checking underground, it is desirable to use a powerful lamp.
Sometimes small defects of mortgage beams are not visible on the eye. To detect them use a sequel or knitted needles with an acute end. Spinning movements pass through the entire beam, checking the presence of rotten areas. At the same time, punctures are made as often as possible. Finding a damaged beam, it is replaced by a new one. Sometimes to replace the beams in a wooden house you have to raise the structure of the jack.
Analysis of private situations
In old apartment buildings still preserved wooden floors. Their device is slightly different from floors in private houses. If in the private structure of the lags fit into the ground, then the apartment is produced on concrete. Therefore, the repair of the wooden floor in the apartment is different from repair in a private house. After removing the lag for replacement you need to clean and check concrete base For cracks.
If a complete floor replacement is performed, after dismantling and cleaning it is necessary to perform. You can apply. After that, the primer is carried out and laying the waterproofing material. Thermal and sound insulation material is placed on top, and then the floor boards.
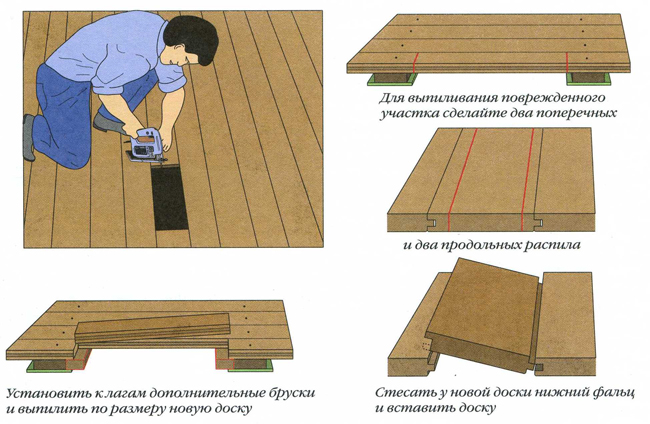
Replacement of Halp
Consider the situation when it is necessary to replace only one or several half a row. Having found a damaged section of the floor, removing the rotten floor. By sizes, drink a new board. Having finished it with an antiseptic, without affecting the ends, we put in place of an old fragment.

Tip! It is impossible to process the ends of the boards by an antiseptic. Otherwise, through time, the board will start rot.
With the help of self-tapping screws, fasten the board on the place of the old, screwing to the lags. This is the replacement of each rotten flooring. If a small plot of rotes are discovered on the board, you can not change the entire floor. It is enough to cut only a selected area. Using it as a template cut from new wood replacement. Fasten it to lags using selflessness. In this case, the ends of the new site must reach the middle of the lag.
Sealing slots between the floor
Before proceeding with cleaning the coating. Remove excess furniture so that it does not interfere. For more thorough cleaners, use a brush with a rigid bristle. To miss anything after inspection, mark all the areas that require repair. Prepare the composition for work. There are special smeasters for wood. But you can make the composition yourself. If you mix the glue PVA with sawdusts to the depletion of the sour cream, it will be excellent putty.

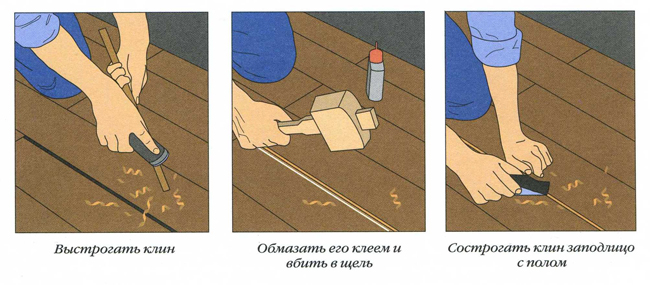
Carefully processing all the slots, leave them for complete drying. After that, clean the skin. This repair method is suitable for small cracks. Wide and deep gaps eliminate otherwise - for them we prepare wooden bars. In length, they must correspond to the length of the gap, and in the diameter, have a cone type.
Putting on glue with sawdust, the workpiece is clogged into the slot with a sharp edge down. Excellent is cleaned by the plane and grind. At the end of the repair, the wooden floor is covered with varnish or paint.

Seeling a wide slit with a wooden billet
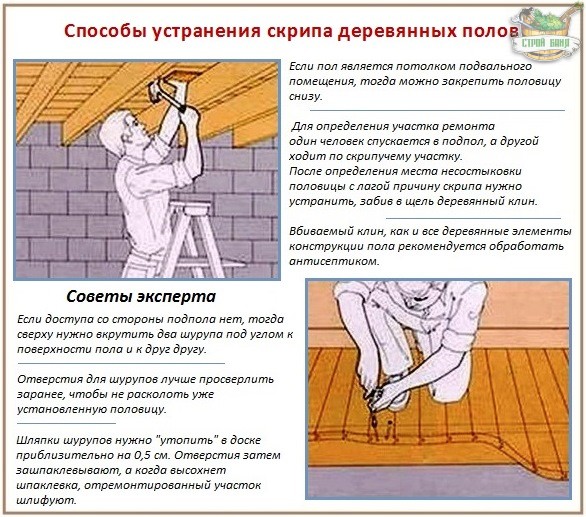
Sometimes flooring in a private house comes down to eliminating small defects, such as. After time, any wooden coating begins to creak. The main cause of the screenshot is weakening the attachment. If there is a basement in the house, the cause of unpleasant sounds can be easily eliminated. To discover which floorboards will fasten, find a partner. While it will be fired by the floor, you will need to determine which places there is a defect.
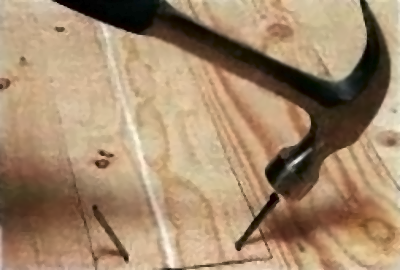
Elimination of the violep of flooring climbing nails
Calculating a violent floorboard, drive into the gap between the beam and this board wooden wedge. Do not overdo the board not raised above the base. If it is impossible to get underground repair is made from above. Drill holes in creaking flooring over beams. Secure the screws into the beams at a low angle, changing the direction of the angle. You can fix the board with nails.
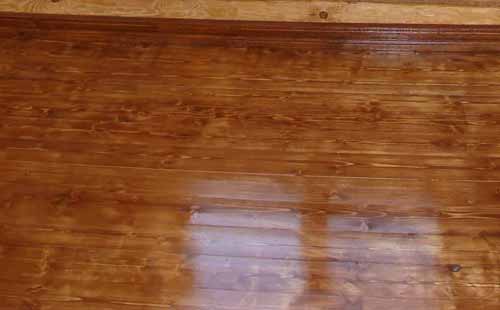
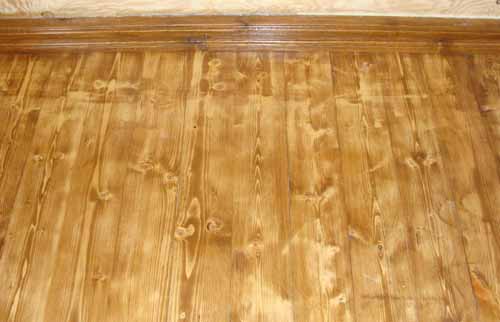
Updating unsightly species
It happens that B. outdoor coating No problem listed. The only drawback is reduced to its unsight. Or after eliminating the remaining defects, it is necessary to bring the basis for the proper form. Any repair of old wooden floors end with it or varnishing. But before you do it, you need to prepare the basis. Old paint, which does not hold, remove the spatula. Wash the floor using the detergent to degrease the surface.


