Even electric-novice will be able to install the socket and the connection. The event does not represent special difficulties, and besides, it will save from 500 to 700 rubles (the average price for the work of the wizard). To date, it is customary to use the fastening of sockets outdoor and hidden way. Next, we will look at how to install and connect both options.
Outdoor method used with (on top decorative finish walls). In this case, the housing is fixed to the wall with a dowel.
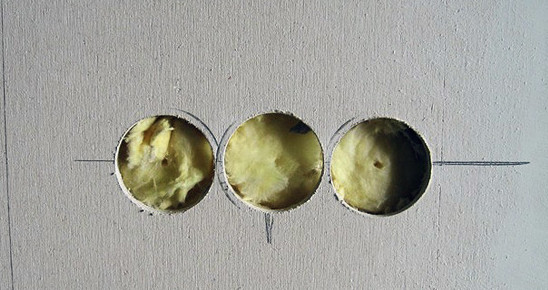
Installing the inner socket is used if the line is paved in special shifts (for example, during the installation of wiring in the apartment). In this case, you first need, after which go to connect the socket itself.
![]()
Now we will consider in detail each of the ways.
We draw your attention to the fact that the entry with a grounding circuit is currently used, so this article will consider the connection technology with a grounding socket!
Installation options
Inside the wall
Installing the socket inside the wall is carried out more often, because In this case, the plugged body is not striking and does not spoil the interior of the whole room.
Before starting work, we will need the following materials and tools:
- plastic converter - 1 pc.;
- internal socket - 1 pc.;
- alabaster;
- screwdrivers (figured, straight and indicator);
- sharp knife;
- pliers.
We draw your attention to the fact that the laying of the wires in this article is not considered. Connecting an electrical outlet is carried out in ready-made strokes with suburban veins! You can learn more about the wire laying in the article :!
So that information is perceived easier, we provide to your attention step-by-step instructions By installing a socket in a concrete wall:
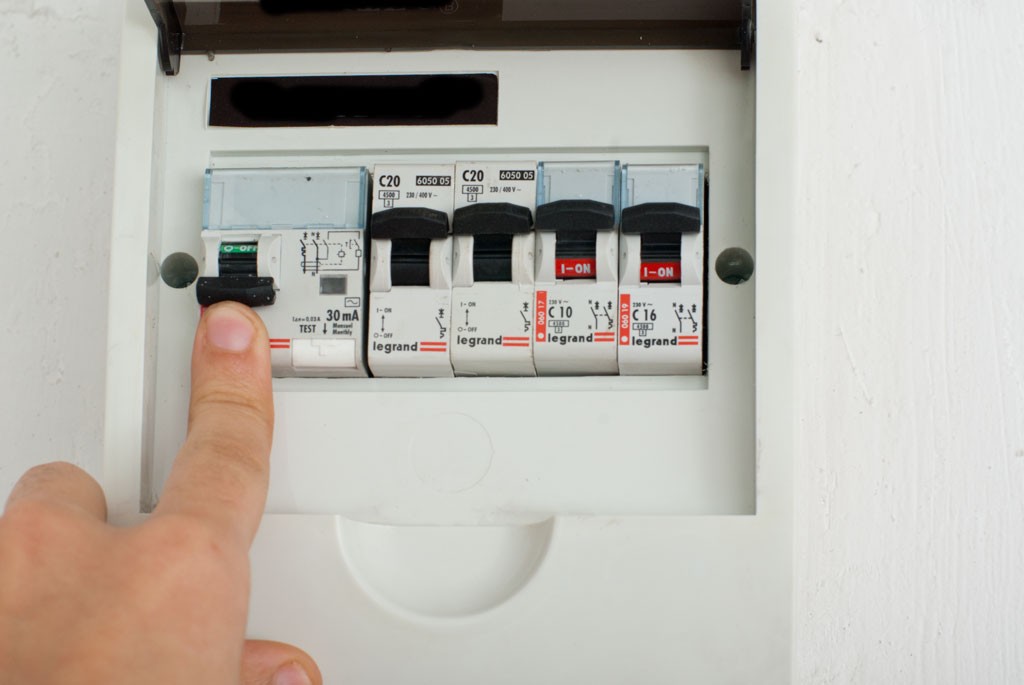
Step 1 - Disable electricity
It is very important to turn off the electricity in the room before starting electrical installation. To do this, it is necessary to turn off the appropriate automatic in the camshaft in the distribution panel, after which it is necessary to check the availability of the current at the installation site using an indicator screwdriver. We were told in a separate article.
Step 2 - Installation of Outcome
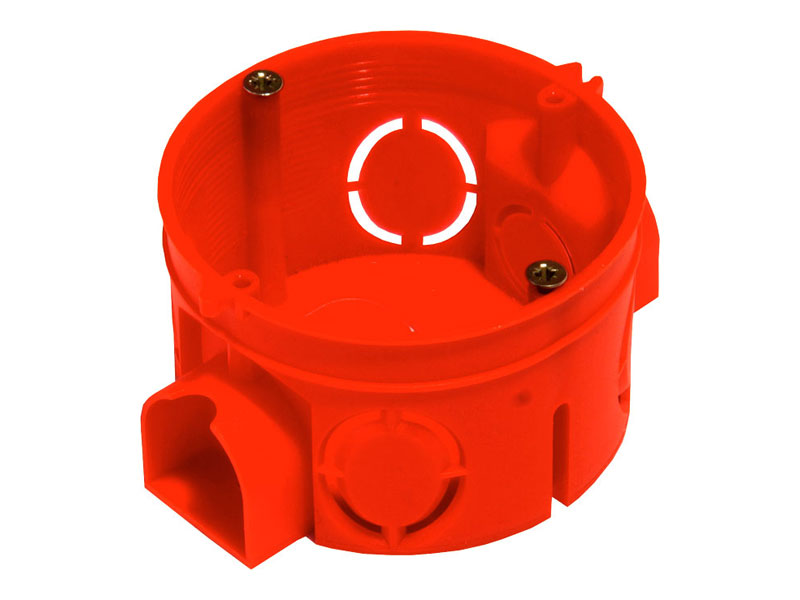
To date, there are metal and plastic submersors. It is necessary to give preference to the latter. They have low cost and sizes corresponding to new standards. If you decide to install a rosette into a metal peauretler, fix the core with cutting paws is unlikely to succeed, as a result of which the housing will hang out and eventually fails.
To install plastic pickle in the bearing wall, it is recommended to use alabaster. The stroke must be slightly moiste with water, then impose 2-3 mm solution and quickly consolidate the product.
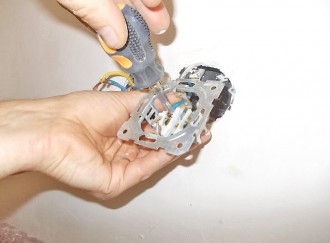
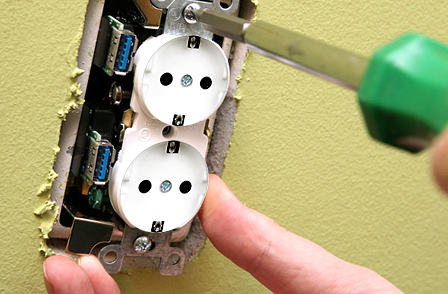
You can also make a mount using self-tapping screws, but in this case the reliability of the installation will not be so high. After that, wire conductors are inserted into special holes, as shown in the photo.
Step 3 - Case Fastening
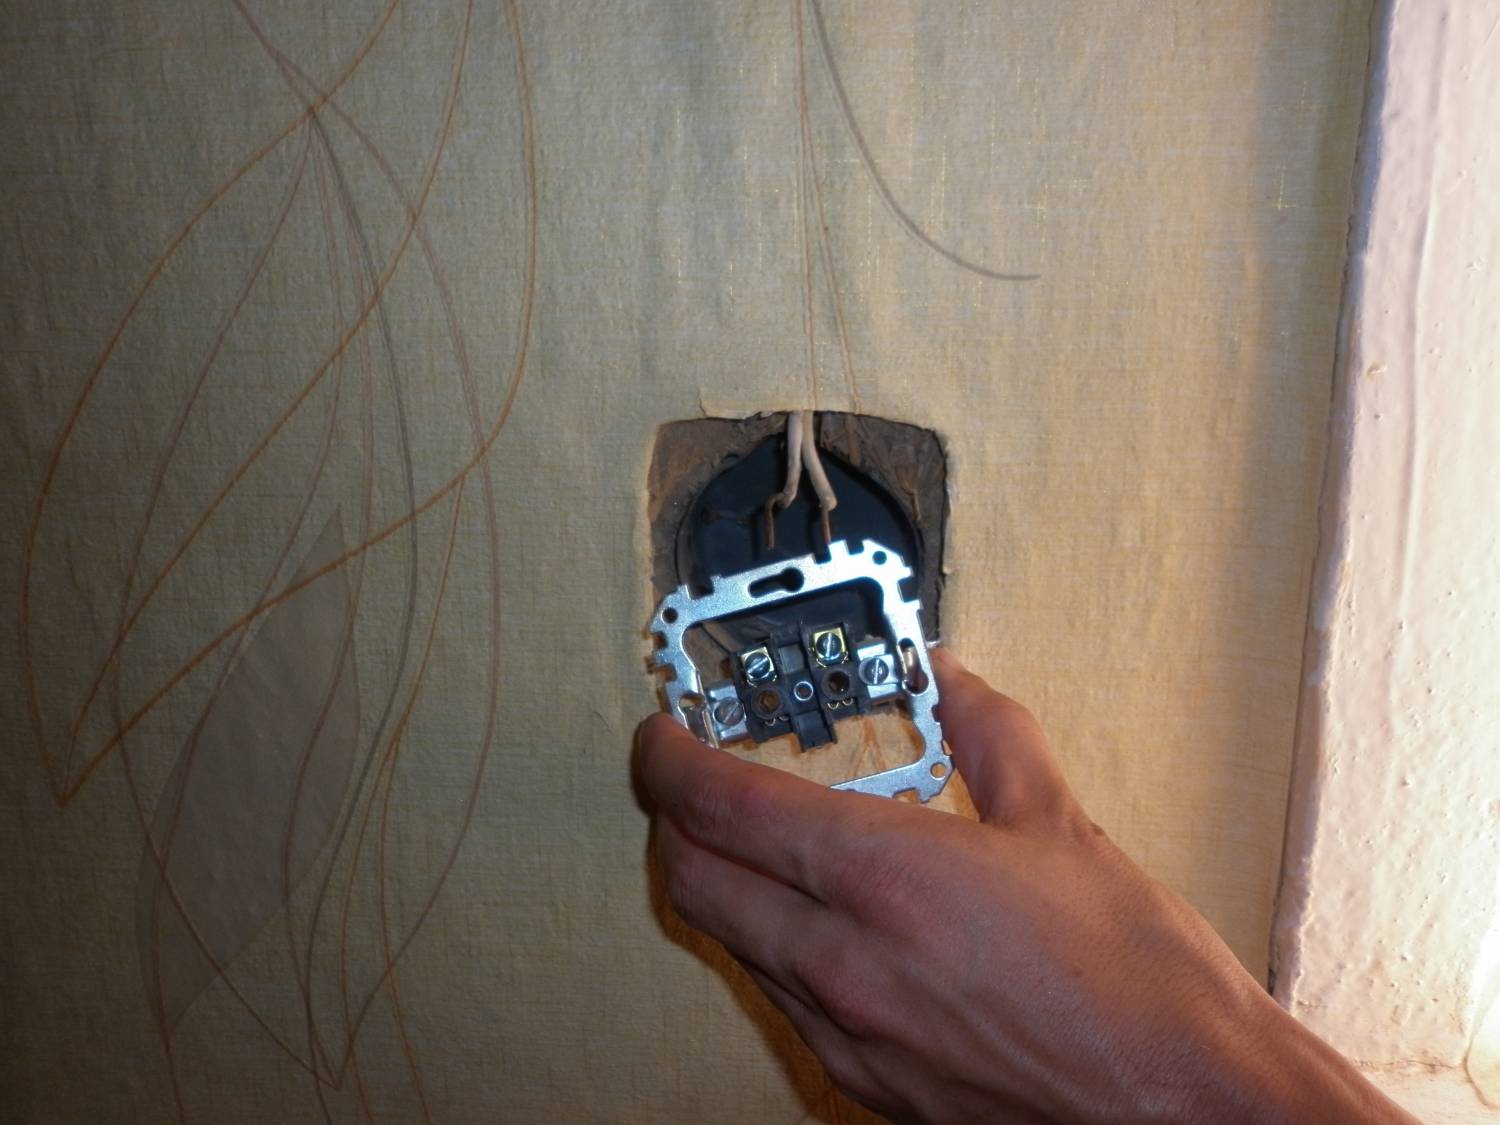
Now you need to install the housing itself - the place where contacts will be connected. For starters, all 3 veins (land, zero and phase) must be cleared with a knife from isolation. Stripping length should be at least 7 mm (better than 10 mm). In order not to damage the current veins, we recommend reading that. Further all contacts must be fixed in the case. The design of the mechanism includes 5 screws: 2 side for retaining paws, 1 for grounding (centered) and 2 for phase / zero (right and left from the center). All you need is to loosen 3 central screws, insert bare cores and thoroughly tighten them with a screwdriver.
An important rule setting rule - a phase must be connected to the left hole (if you look at the housing recorded in the wall), and zero to the right. Such a custom is used by electricians for a long time and allows you to quickly find each of the conductors, if not.
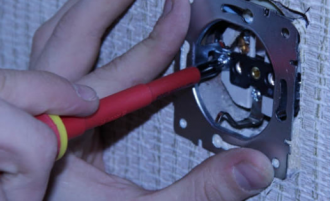
After that, it is necessary to fix the housing in the opposite. To do this, it should be further set it in the wall (so that after the installation is the socket, the socket has not been penetrated) and with the help of side screws spread the legs so that they are securely crashed into the walls.
Instead of paws, an overhead case can be used (provided in the photo below). In this case, the fastening is carried out by self-drawing on both sides of the rim.

Step 4 - Installation Installation
Now that all coins are securely tightened, you need to hide the case behind the decorative edging. It is also fixed with the central screw. There is nothing complicated, just pull up the screws until it stops.
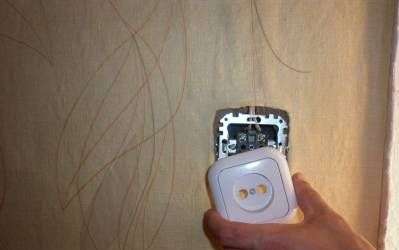
That's all the installation technology and connecting the inner socket with your own hands. Be sure to make sure that all the veins are securely tightened. If the connection points will be weakened, after a while the housing will start melting due to heating, which will soon lead to the self-burning of the wiring and!
Open method
The outer version of the electrical outlet is used with and garage.
The advantage of this design is as follows:
- more simple replacement, repair and installation;
- you can quickly determine the problems of product appearance.
Disadvantages:
- increased cost of the product;
- open wiring can worsen the interior of the room.
So, consider how to install the outer outlet yourself, as well as connect it to the 220 volt network. As in the previous case, you first need to de-energize the room and make sure that there is no electricity using an indicator screwdriver. Next, it is necessary to disassemble the case, which consists of a rear cover from the core and front cover.
First affect the back cover to the wall. To do this, we lean it, put it up in the level (so that there is no distortion) and mark the place of fastening holes with a simple pencil. After that, the marked places are driving a drill and drive a dowel in them. Now you can fix the lid with self-draws and proceed to connect the wires.
We draw your attention to the fact that between the back cover and the wall (which, as a rule, wooden), it is recommended to put a paronite. This material Prevents self-burning walls when the isolation is ignited.
When all three contacts are tightened by cogs, you can install the front cover, on which the process of connecting an overhead of the electropurting and ends. It remains only to provide for you several useful Sovietsthat will allow you to connect the power outlet with your own hands!
Experienced electricians advise to take into account the following recommendations when installing a socket in the house:
Video instruction
Visual video lesson
Like( 0 ) I do not like( 0 )
Content:Electrical outlets are part of the general electrical circuit Apartments or private house. Sometimes these products require transfer to another place or replacement due to failure. Since this operation does not represent a special complexity, each owner must imagine how to install a socket of any design into the walls from various materials.
How to install a power outlet
Before performing installation, you must prepare everything in advance necessary materials and tool. The instruments will need screwdrivers, cross and flat, booths or mounting knife, indicator screwdriver or multimeter. Before starting work, you need to de-energize electric network And make sure there is no voltage.
The penetper is displayed wires, about 10 cm long. These ends are quite enough to connect. Too big stock will be difficult to place inside the opposition.
In the bathrooms connect the socket is carried out on minimum distance 50 cm from water sources, at an altitude of at least 1.1 m. The bedrooms can use sockets combined with switches installed at an altitude of 70 cm from the floor level.
Simultaneously with the compliance with the established norms and rules, it should be remembered about the convenience and practicality of the mounted products. That is, if certain technical considerations occur or real needs, some deviation is quite possible from the above distances. However, in all cases, electrical safety should stand in the first place, and all the amenities are to be created by the most acceptable ways.
How to connect a socket
Many of us have to do simple work At home: to prevail something, put the wallpaper, etc. Often there is a need to install an electrical outlet. This work is not difficult, you can do everything yourself, but first it is necessary to study the basic rules so that the device worked without failures.
- External.
- Internal.
The power grids are connected equally, only there are some features: so, the inner socket must be placed in a special box, which is drowning in the wall, and the outer is installed on the wall itself. The inner socket is not visible, and the outer bulges from the wall.
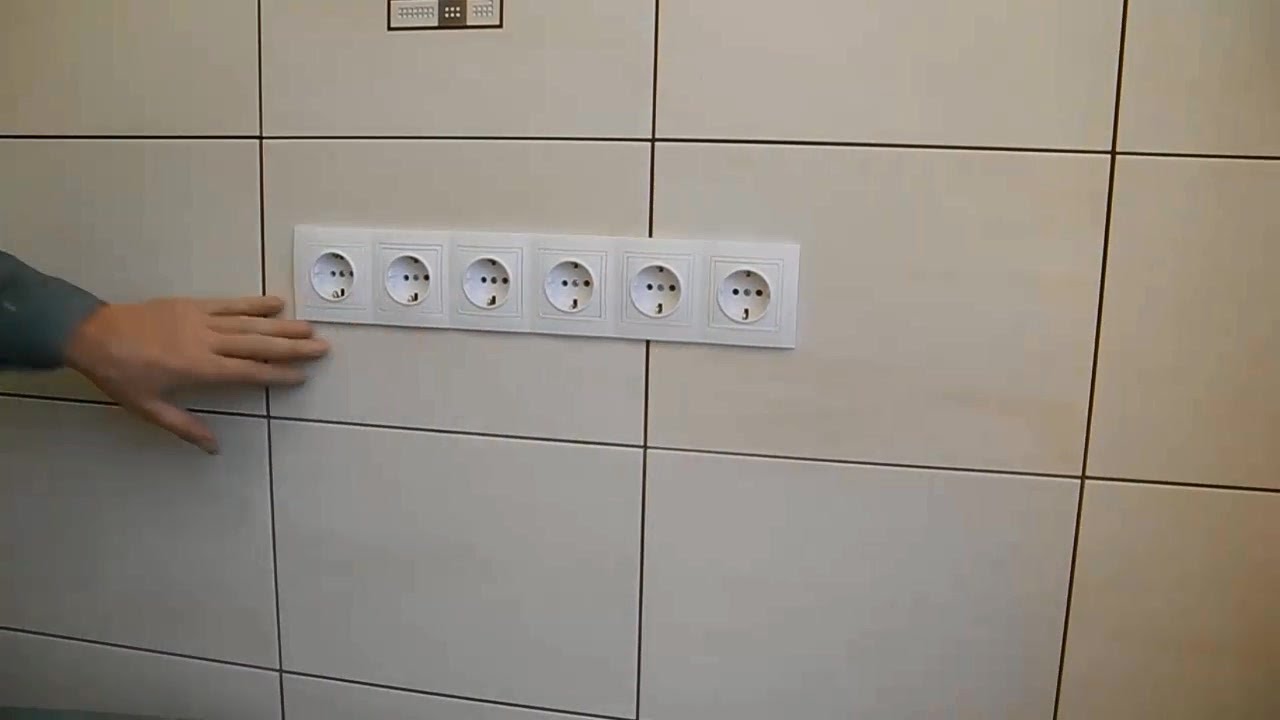
Sockets can still be both single and paired, with a lid and without. You can also purchase and install a socket with a module - this is 2 or more sockets located in one line. Such an outlet group is conveniently installed in the kitchen and in those rooms where you need to connect several household appliances simultaneously.
More serious devices are socket modules. A few ordinary outlets are combined into one line, switch and signal sockets - to connect the Internet, telephone and television. You can also choose a module with a timer and protection.

To deal with the boxes and connection of electrically conductive modules is possible, but for this you first need to have an idea how to set a conventional outlet into the wall or overhead.
The overhead socket is currently popular, as it is easy enough and easy to install on your own, even if the box or the opposition does not want to change, so as not to spoil the plaster or new wallpaper.
What are the advantages of an overhead outlet:
- the ability to quickly replace without disrupting the decorative wall decoration;
- the socket cover overlaps the fastening lining;
- it is possible to change the old outlet and install a new "euro" of the sample, in the former conversion;
- it is allowed to install a socket directly on the crate, drywall, walls, covered with wooden boards, because such devices are equipped with protection.
What instruments need
Each electrician has a standard set of tools with which it uses when installing switches and sockets.
You will also have to purchase the following tools to cope with the setting of the socket yourself:
- screwdriver - 2 pcs. (one with a width of "sting" 4 cm, the second - 2 mm);
- cross screwdriver - 2 pcs. (diameter 2 and 3 mm);
- indicator definition of the chain rupture, as well as the "phases" and "zero";
- nippers and booths;
- passatia;
- a hammer;
- isolent;
- rule and pencil.
Choose a tool with soft handles crazy in an insulating material. You may also need a special "ticks" tool, in order to quickly clean the ends of the wires from the insulating material, and small rounds.
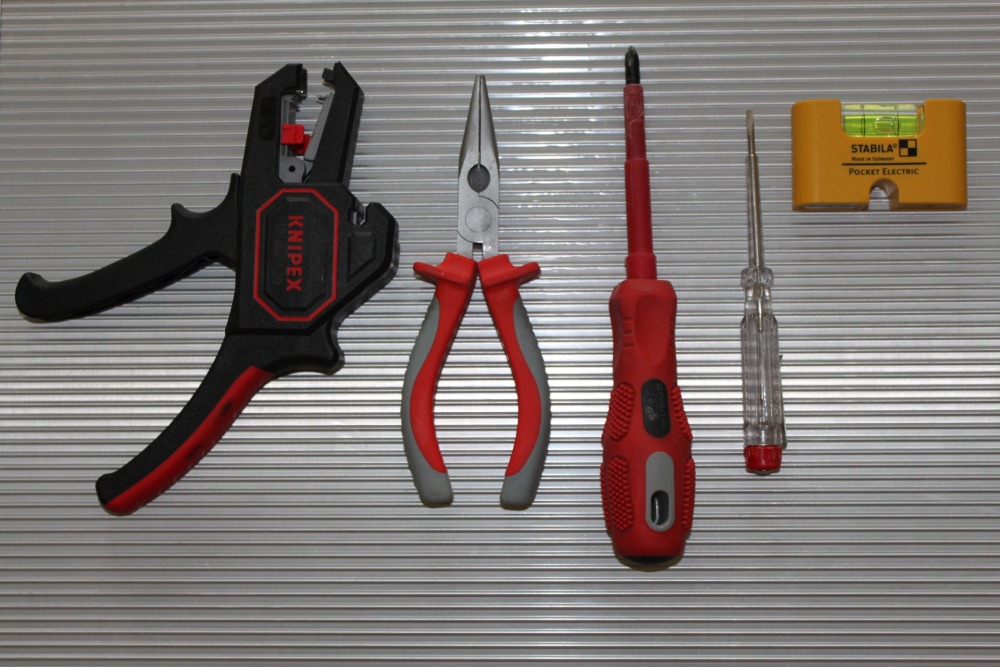
All tools can be purchased in building supermarkets. We advise not save and buy a high-quality tool.
Observe the security technique
Because it is impossible to joke with electricity, then for your own safety purposes, never work with wires under voltage. Do not be lazy and disconnect the voltage. Well, if this for some reason does not work, then it is worth using protective rubber gloves (special electrical), as well as to purchase safety glasses. But it is better not to risk and still turn off the voltage.
Generally accepted rules and standards for setting outlets
Currently there are no clear rules, at what height install sockets in residential and household premises (distance from the floor). But there are approximate standards that preferably stick to. So, if the switch is preferably set at an altitude of no lower than 1 m 60 cm from the floor, then for mounting the socket, it is recommended to retreat 80 cm - this is the maximum and only 25 cm from the floor - at a minimum.
It is now customary to install sockets at a distance of 30-35 cm from the floor to use the electrical devices in the rooms as convenient as possible (for example, turn on the vacuum cleaner, connect the TV, refrigerator, etc.).
Less than 25 cm from the floor to retreat during installation of the power outlet should not be, as the risk arises short circuit (for example, with wet cleaning). If the room (residential or domestic) is equipped with a protective shutdown device (UZO), then you can put a rosette at a distance less than 30 cm from the floor.
How many outlets can be installed? The number of outlets in each room may vary, there are no clear restrictions. The only thing that is worth paying attention to the installation of the socket in the children's room is that in this room you need to install special socket modules equipped with protection against contact. The distance from the floor is 1 m 50 or 1 m 70 cm. Kids will not reach outlets and switches, and older children already know how to use electrical appliances.
There are some other nuances of installation of electrical outlets in residential premises (not only in the children's room), which are held electricians - this is laying an electrical cable into a socket. The wire itself when connected to the terminals should not be too short, the phase contact is desirable to place closer to the window (or on the left side, standing face to the wall where the socket is installed).
Depending on what kind of outlet will have to be installed, consider connectivity options.
How to install an outdoor outlet yourself
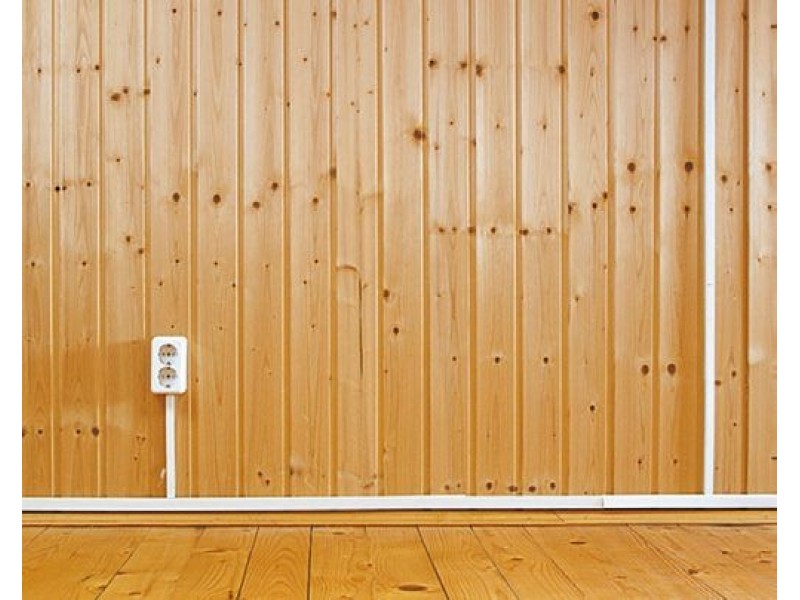
Install yourself the outer outlet is simple enough, especially if the wiring indoors is external, and the wall decoration is made of wood. This option is the setting of the outlet, though fast, but appearance The premises of many do not suit, as the wires are visible and the socket "sticks out" from the wall. But here you need to understand what is more important - aesthetics or safety. For most of us, security always prevails, so it is better that the wires are in sight. This will allow you to notice bad contact in time to exclude fire.
How to install an outdoor outlet in the wall:
- first, disassemble the case of the socket: you need to unscrew the fastening bolts and remove the lid;
- now you need to fasten the design to the wall screws. If you install a rosette on a wooden or other flammable surface, then put a piece non-combustible material Under the base of the socket. It can be plaster or paronite. This material protects against fire;
- the overlap socket has a plank for fastening with screw holes. It is necessary to first attach a socket to the wall, outline this place with a pencil;
- with the help of electric drills, drill in the wall wall and insert the dowels;
- to fix the socket, screw 2 screws (length 2.5 cm) and 2 plugs (diameter 5 mm);
- next, you need to connect the electrical wires to the network - this part of the work is the most responsible. In the ordinary outlet of the clamp terminals, so the wire simply clamp between them. You must insert the wires in the terminals with the hole and tighten. But first it is necessary to clean the wire (remove the 5 mm insulating layer), and only after that you can delay the bolts. Or the second option: Clean the wires up to 15 mm and make a ring from a bare wire to insert a bolt with a washer into a homemade ring and screw right on the spot. Thus, it is possible to firmly clamp the wires;
- it remains only to fasten the lid to completely collect a socket.

How to install sockets and ground switches
It is often necessary to face the fact that the contacts when connecting the socket is not 2, and 3 - this means that you install a ground that protects your dwelling from electric shock. If you use high power devices, you can not do without grounding. This wire is closed in the yellow-green color of the insulating material.
What if there is no grounding wires in your house? Then you can make zeroing and attach to the free contact (third) zero wire. If you are a novice in this matter, then to check where the "zero" wire, and where the "phase" must be used by a special device - this is a screwdriver with an indicator. As soon as you touch the "phase" wire, the light bulb on the device lights up.
The principle of installing a socket with ground is not significantly different from the above method, only you need to reveal the "zero" wire in advance and it is good to hold all the contacts that the design is not only durable, but the socket has kept the load.
How to install a socket. Video:
How to install a double outlet
Installing a double outlet allows not only to save time, but also means. Why buy 2 single outlets and install them in a small room, if you can install 2 outlet at once in one conversion.
Materials and tools for mounting Sockets Standard may need another electrical cable and perforator if you install a socket in a new place.
So, before proceeding with the work, it is necessary to decide on the installation site of the outlet (if it is not a replacement for the old one), pave an electrical cable in the wall to this place, to purchase outlets and set the opposite.
Some information about the choice of conversion: they are divided into 2 types:
- Glass for concrete, brick, ceramzitoblocks. You can fix the power outlet with alabaster or gypsum solution.
- Outlook for installation in the wall of plasterboard, plywood, chipboard. Such a box is attached to spacer foot.
Installation Options Outlet Box:
- The wall is marked in the wall (this is the permissible distance of the floor outlet). If you want to install sockets near the door, then you need to take into account the width of the door frame.
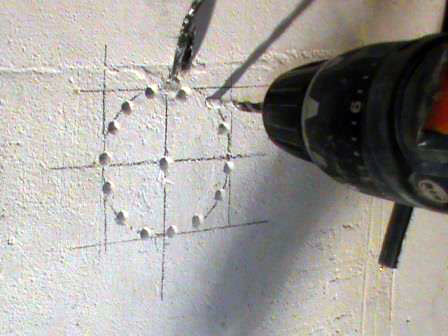
- We plan a pencil line of the arrangement of the opposition and proceed to the preparation of the hole. If the wall is concrete, then in order to answer the question: "How to install a power outlet in a concrete wall", you must first fix the conversion. To do this, we use a special nozzle for the perforator - this is a concrete crown (brick, diameter 70 mm).
- The wire in the wall should be left to the side so that during the drilling hole to install the box it is not damaged.
- It is possible to use the electric drill, but this method of installation of the pickling is considered to be the most dusty.
- The hole in the wall is ready, insert the box and check the depth, if it is suitable, then you can begin to the next step - to fix the peaver in the wall. The depth of the opening should be with a small margin (up to 5 mm) to lay a little solution in the middle and carry out an electrical wire.
- To get rid of a small gap between the box to install the socket and the wall, it is necessary to cut the edge of the opposite with a sharp knife. Then you can "drown" it in the hole in order to install a socket on the same level with a wall without gaps.
- Gently start the wire in the box if the concrete is supportive, then this can be done using a screwdriver or use the perforator.
- Now you need to start the wire in the opposite from the opposite side (bend a small hole in the bottom).
- Insert the wire into the box, set it into the hole. We remind you that the clearance of 2-3 mm is necessary in order to fix the box with a solution.
- The solution can be prepared from alabaster or plaster (construction or medical). We knead the solution from the powder and water (density - medium).
- A narrow spatula lay a gypsum solution into a hole and side gaps, set the box. Fix the box from the outdoor side, well-facing mortar.
- We are waiting for the solution to dry and you can start the installation of the rosette itself.

How to install an internal outlet
- Installation work The outlet begins with the fact that it is necessary to turn off the voltage. To do this, in the electrical panel you need to lower down "off". If the levers are not signed, then check the voltage in the outgoing wires to set the outlet with a screwdriver indicator. If it is too difficult for you, it is better to turn off all the levers to be sure that there are no voltages in the network.
- A screwdriver in the outlet will unscrew the fasteners to remove the top front panel from the outlet.
- Crouching the wires. You can do this with the help of booths or a special tool. The length of each wire is at least 10 cm.
- Remove the isolate from the ends of the wire (up to 10 mm) and clamp the wires in this way:
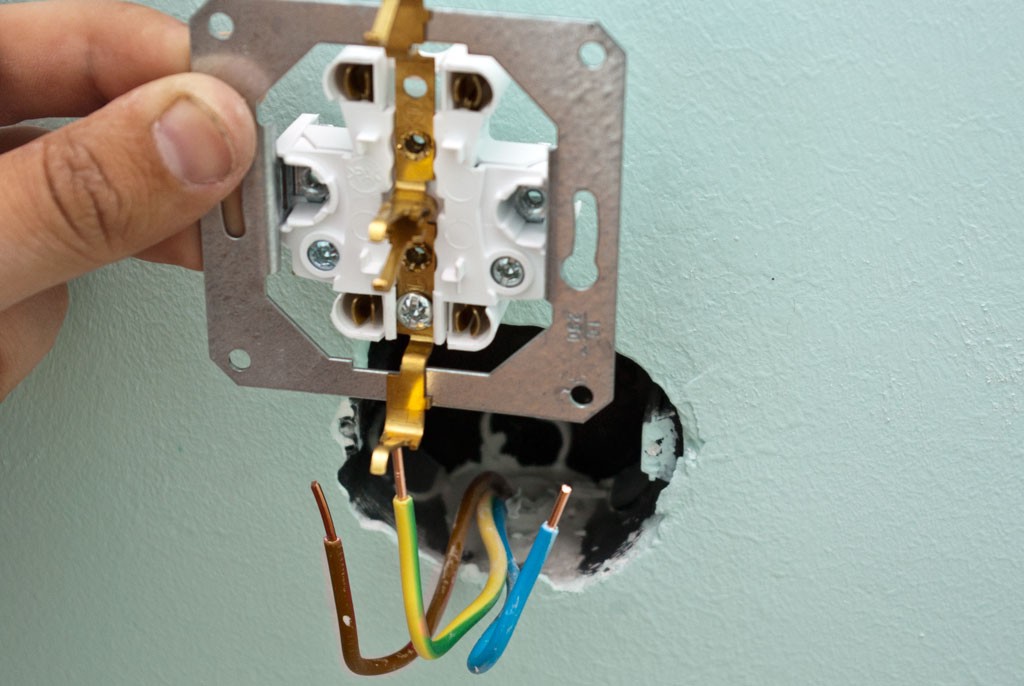
- Wires need to be placed in the terminals of the socket so that they are located in different terminals (the "Phase" wire - brown, "zero" - green with yellow, working - blue color). Fasteners can be tightened.
- Test a power outlet and screw the panel. Be careful not to tighten the bolts too much so as not to damage the front panel of the socket.
![]()
After completed installation, you can turn on the voltage in the shield and check the outlet in operation.
How to install an additional outlet:
Have you ever had to change the outlet, switch or wiring, tightly stitched into the wall? After all, there was no big difference before building materials, Therefore, this method of installation was considered normal. Maximum that could be found - it is tiny boxes from which there was no particular sense. The modern industry has facilitated so easier for the installation of electrical appliances, which even a conventional man can replace the outlet or switch. Especially if he will know in advance how the pickling is made in the concrete wall with their own hands.
- What is this device
- How to choose correctly
- What to make a niche for socket
- Fashion first
- Method of the second
- Method Third
- Installation in a hollow wall
- Mounting socket
- Useful advice
What is this device
Podrottor is a plastic niche with a landing place inside. It is designed to quickly and convenient fixation of sockets or switches, for this its body is equipped with threaded holes under the screws. It also provides several places to enter power wires. To open them enough to remove small plugs.
When the devices mounted in it are securely attached to the walls of the housing. If earlier, installed on a naked concrete of sockets, over time, loosened, now it is completely excluded. We dealt with the destination, it's time to get acquainted with the varieties of peasants.
How to choose correctly
![]() Before purchasing one or another model, you need to decide on some features. First, in which wall it is planned to install it:
Before purchasing one or another model, you need to decide on some features. First, in which wall it is planned to install it:
- Forty walls (concrete, brick, gas, foam blocks). For such floors, the most common conversion under the concrete is suitable, without any additions.
- Hollow walls (drywall, chipboard, plywood, etc.). For them, submersed with special clamping legs will be required.
There are still universal modelswhich can be used for any walls if necessary.
Thirdly, choose the desired shape and size. The standard is considered a round form, but there are also squares. About the dimensions you need to know the following:
- The diameter of the outer part. There are 60 and 68 mm.
- Installation depth. Also two types - 40 and 45 mm.
The most running dimensions are 68 × 45. Most of the rosettes and switches are placed in them.
List of necessary tools
For your convenience, it is better to prepare all inventory in advance:
- Drill, perforator or Bulgarian.
- Drills, nozzles.
- Building level.
- Screwdriver Set.
- Roulette, pencil, knife.
Preparation and marking of the surface
![]()
First of all, you need to get rid of all foreign objects (wallpaper, dowel, etc.). Ensure that the surface is smooth, if necessary, eliminate flaws.
Next, you can start a markup. First decide, at what distance from the floor you need a socket. There are no special restrictions here, so everyone chooses the most convenient place for itself. Some put closer to the floor, others choose a standard location. The only nuance is not recommended to have a socket near the window, door openings, as well as next door to gas and heat and highways.
So, we decided with the distance, now we make markup:
- We celebrate the central point of the future niche.
- With the help of the level, draw a crosspiece at this point.
- Depending on the chosen diameter, we mark on the lines this distance.
- We apply the conversion to the outlined boundaries and supply the circle (square).
Well, your markup is ready, it's time to start creating a hole.
What to make a niche for socket
There are three ways to launch a large hole in the wall and each of them requires a detailed consideration.
To save money for electricity payments, our readers advise "Energy Economy Electricity Saving Box". Monthly payments will become 30-50% less than before the use of the economy. It removes the reactive component from the network, as a result of which the load is reduced and, as a result, consumption current. Electrical appliances consume less electricity, the costs of its payment are reduced.
Fashion first
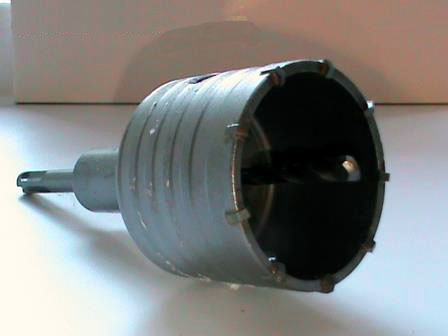
The most common is a special nozzle-crown on the perforator. Its cutting part is a diamond spraying or a winning insert. It is easily "brazening" into any solid surface, making smooth, round cut. Inside the nozzle is reduced to concrete, which is needed to center the cutting part.
As you understood, you will need a perforator with a nozzle, a diameter of more than conversion. It is necessary in order to fix its body in a niche, with a sticky construction solution, but this is later.
Now aiming the drill in the planned point and begin to deepen until the crown dive. After a successful cut, you need to extend the remaining part of the concrete. You can use the chisel and the hammer to carefully remove the extra parts of the wall.
Phased process of manufacture of penetrate with a perforator
Tip: Periodically, remove the cutting parts for their cooling or splash on the wall with water. This will avoid overheating nozzles and reduce the amount of dust.
Method of the second
In the absence of a crown, you can do the usual winning drill. We use the perforator again if it is not, the usual shock drill is suitable, however, it will have to mess around.
You need to drill the drawn circle at the edges, with a minimum step. The depth of dive can be marked with a tape directly on the drill. Then, again, with the help of a chisel, we refine a niche.
Method Third
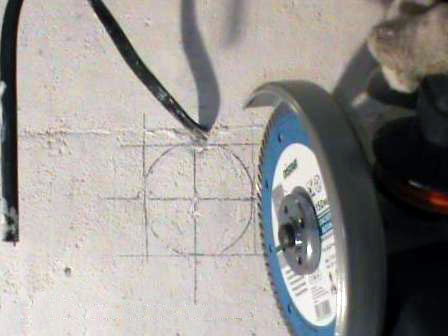
If you have a Bulgarian available in stock, you can use it. For cutting concrete, you will need an appropriate disk. True, this option is more suitable for square holes, but in the extreme case will go.
Previously from crossroads, instead of a circle, make a square. Our task is to drench in the wall of 4 recesses on the outlined lines, to the depth, a little more of the opposition. And then, all the same tool remove the remnants of the material.
At this stage, Niche is already ready. When complying with all sizes, the case of the peavercraft must be perfectly placed in the opening, if it still hits something, then you need to expand a little. Next, we act according to the following instructions:
When the mixture dries, you can start setting the socket.
Installation in a hollow wall
This kind of overlap is found quite often and in them it is also easy to install the peavern. But how, after all, in such walls, it is not for what to cling to the adhesive solution? The answer is simple - the manufacturers have placed special clamps on the housing, which cling to the inner surface of the wall.
We establish the conversion for hollow walls as follows:
- Location the surface by analogy with the concrete wall.
- For cutting of plasterboard, we use a perforator or drill with a crown along concrete, a wooden surface must be cut into a cutter with a cutter, corresponding diameter.
- Then we fit the case of the peavern to the hole and fix the clamps with two screws.
In this case, you do not need to wait, you can go to the next stage.
Mounting socket
Before installing the conversion, it is strongly recommended to lay wiring, otherwise it will be quite problematic. Calculate the length of the wires so that the cable stock remains, about 20 cm. It is necessary for convenient mounting of the socket, as well as in case of its replacement.
By connecting the wires to the corresponding contacts, make a loop from the remaining part of the cable, do not allow fractures. Now neatly climb the outlet in the niche and fix it with its screws. It remains only to consolidate the facing and enjoy the result of its work.
- If in the future the tile or another coating will be laid on the wall, then when installing the conversion, do not blend it until it stops. And it is better to cut a niche after installing facing materials.
- Do not remove all the plugs from the housing at once. Through unused openings will flow a mortar.
- So that the pickle tightly entered the hollow wall, you can remove a small chamfer from her edges.
- By purchasing the peavern, do not hesitate to try on your outlet. And better buy them immediately together.
Now you know that the installation of conversion, with due skill and the availability of the tool, can be performed independently. So, you will save a significant amount on the service of the wizard. But do not worry if something suddenly goes not so just reread our recommendations again and everything will fall into place.
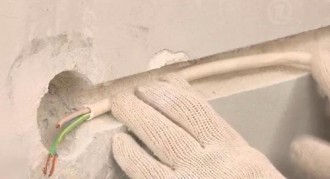
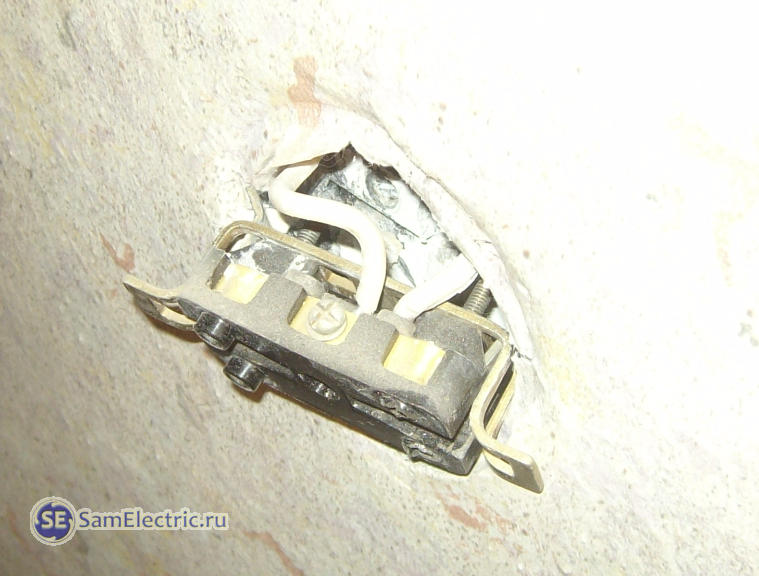
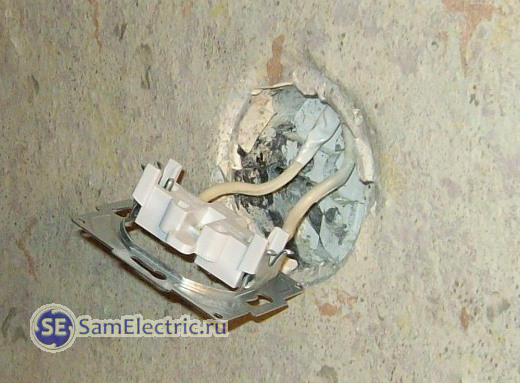
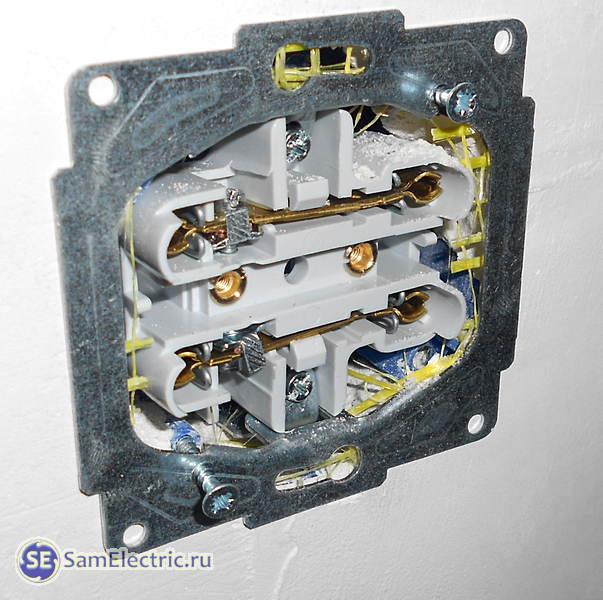
Is it not true, everyone had to see such a sad picture as the left? In the old residential foundation set sockets Not only physically obsolete (contacts are burning, the wires are melted), but are often poorly fixed - fall out of their places (boxes).
Therefore, an acute is the question - how to secure the outlet in the wall reliably (more precisely, in the opposite or a box) back. After all, even if you put a new outlet, without changing the box, the socket may begin to hang out again and eventually fall out "with losses."
By the way, the electrician often causes the electrician in small orders because of problems with sockets - they are not tritely held in the wall, begin to spoke, do not contacate, sneak.
Today's my article will be just how reliably install the outlet in the opposition so that it never fell out.
Installation Box for Mounting Outlet (Podlet)
Installation box (Podlet) is needed for two simple purposes - to provide electrical safety and strength of mechanical mounting. If everything is clear with safety (insulation, so that there is no short circuit and does not beat the current), then mechanical strength (so that the socket does not fall out from its place) is a problem that few people say.
I have already partially talked about this in the article about.
Another article on this topic is to the new opposition.
The problem is the socket does not hold, dangles and falls out of the wall
The installation boxes that were used earlier (conventionally speaking, Soviet) are not suitable for all new outlets. First of all because of the attachment. In the outlet there are paws with sharp taps, which are moved to the sides. As a result, these spacer paws must continue to the edges of the box, and the socket will be fixed.
But this is definitely not enough, since the freshly changed socket will come out with all the insides after a few inclusions of the Iron off.
This is unworthy of the electrician, as if the professional photographer would lose a flash drive with paid wedding photos, as if the external split-system unit fell off from the wall after the maintenance of the installer, or as an extrasence could not determine the photo - alive or dead. If you do it - be a professional! And the professional such annoying shoals are unforgivable. Unfortunately, we have a lot of amateurs ...
There are advice that for more reliable installation you need to break the leg more, or to put something under them. For example, pieces of sandwich, rubber, etc. But this is only a temporary measure, and with such an additional fastener with time, the design is all the same, and the socket can escape from the subgene.
Of course, you need to follow a simple rule on removing the fork from the socket - the second hand must hold the housing of the socket. But it's worth it once this rule is not followed (for example, if this is a child), and everything is - see the first photo, the socket does not hold in the box.
For switches, the situation is much easier, there will be enough and spacer feet. After all, the effort of pulling into them is not applied.
And further. Some new sockets are not included in the old approach in depth. Even if you use a socket without grounding.
The difference between new peasants from old
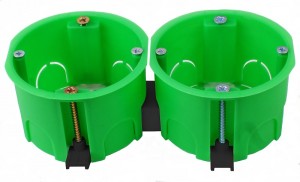
In new installation boxes (for example, GUSI, blue) there are no problems with reliable installation - it is enough to pull the outlet with self-draws into special holes.
Now all installation boxes are equipped with holes for the self-tapping screw, the self-tapping screws are usually already included. The main thing is not to forget to use them, and the spacer paws can be used as an additional fastener or completely throw out.
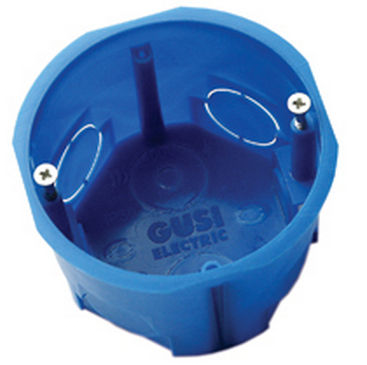
Gusi pickle with a diameter of 68 mm. The photo shows the tapping screws for mounting the socket.
Dismantling of an old outlet
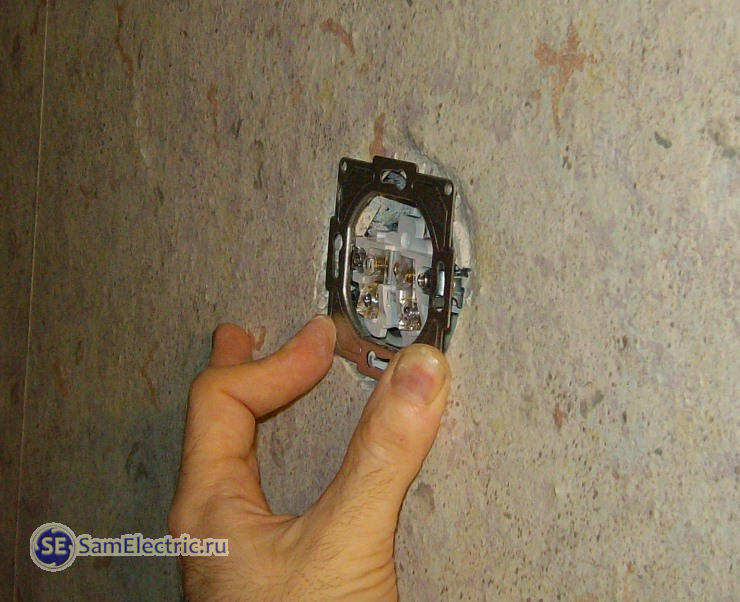
So, remove the lid of the old outlet. Before that, we definitely turn off the power.
The socket in this case is double. And that same as the previous electrician just put the socket on the paws and retired.
It is important to check if there is a phase on the contact socket. For security.
Change the power outlet - the highest pilot and adrenaline. I go to it only when there is no additional lighting, or something important is incorporated in parallel.
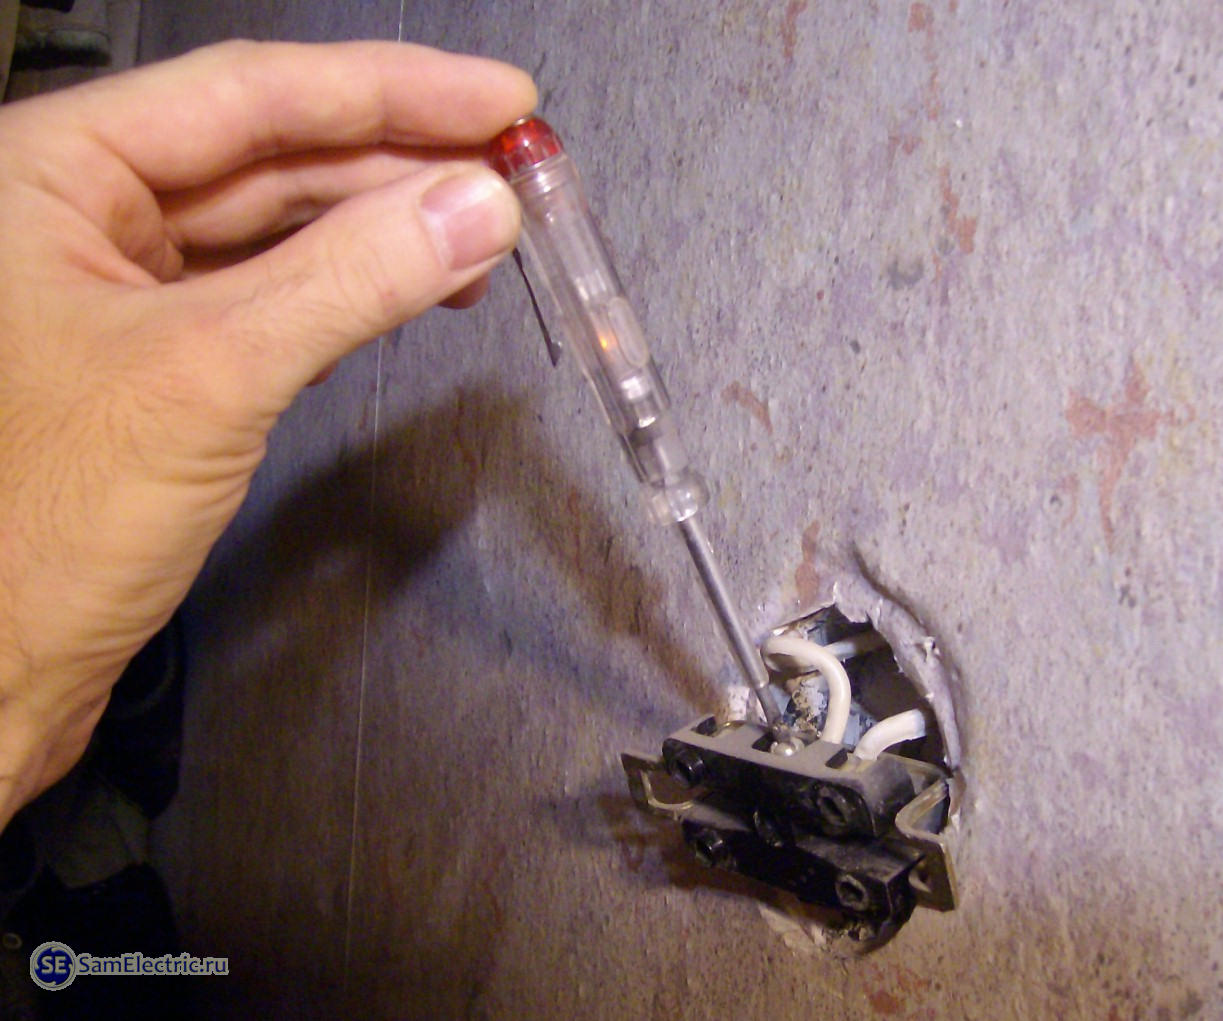
2_1 Check the presence of a phase. Phase in this case is.
Gently unscrew the wire with terminals. Once again, the old aluminum is not recommended.
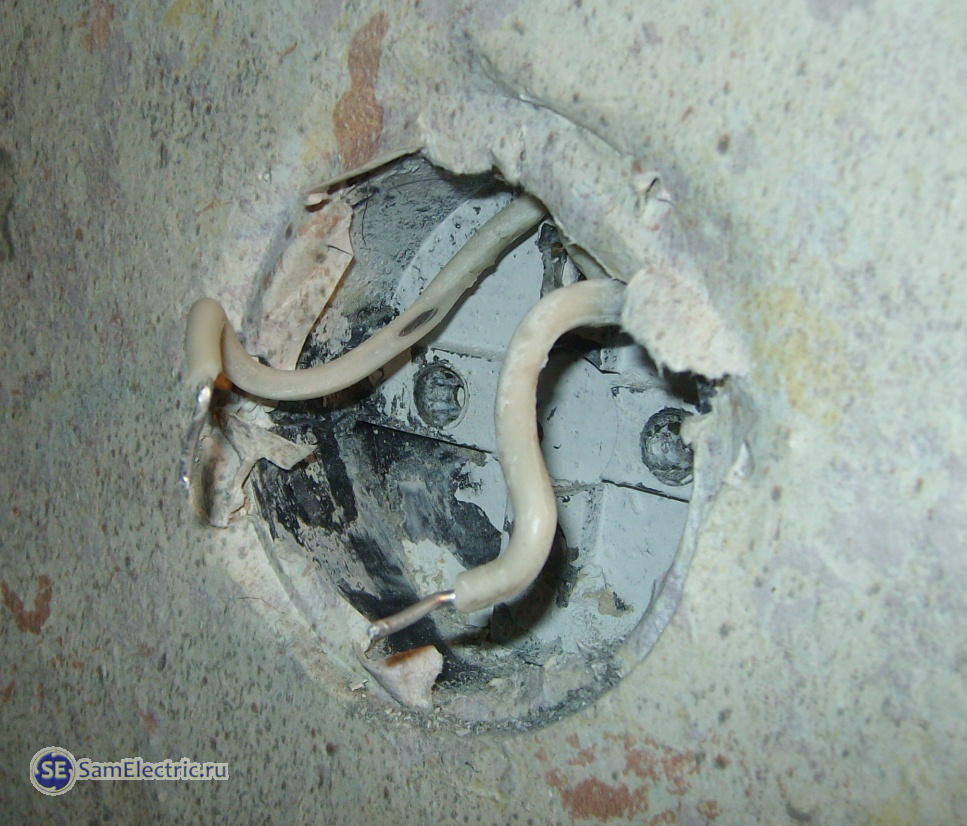
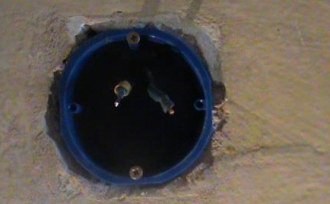
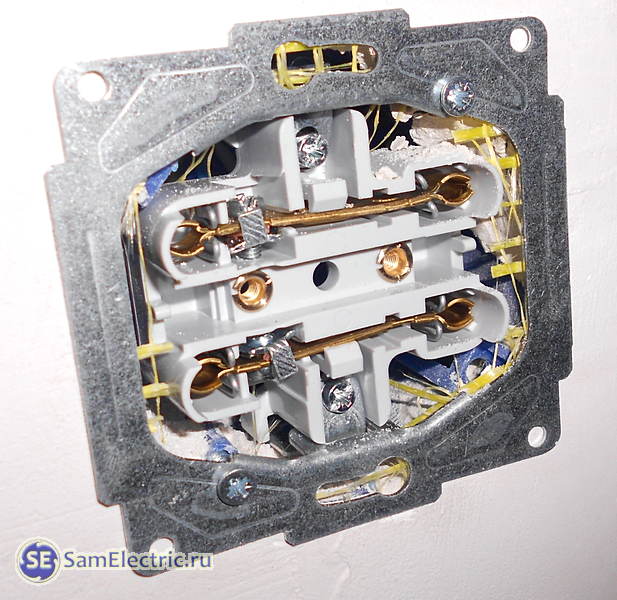
3 Installation box and wires of an old outlet. Phase wire (at the top of the left) - with damaged insulation.
See the installation box (convergent)? Such such put before in Soviet homes. There were even more ancient - from tin cans.
When replacing the old outlet to a new one, as a rule, the old peavern is still normal, and put a new one - increasing the installation time of the socket several times.
Of course, you can, of course, hollow out the old subtle, put a new one with holes for the tapping screw, and securely secure a new outlet. But it's just only in words. Here are some pitfalls can expect on this "right" path:
- Occasion of peasant - the work is dirty and dusty, requires a perforator or chisel with a hammer.
- Installing a new box - the work is dirty and long, it is necessary to breed alabaster or putty, wait until it all grabs enough, and only then install a new outlet.
- Wire breakdown. This is the worst thing that could be. The wire will have to splicer, the place is carefully isolate, then to contact the contact ...
- New peasants deeper than old, and interroom walls in our apartments are thin - and you can easily stay a hole from the bedroom or vice versa)
It is much easier and faster to use the old box, how to do it reliably - I write further.
Installing a new outlet in old peaver
Wiring two-wire (, that is, there is no grounding at all), so we install a socket without grounding contact, this is what:
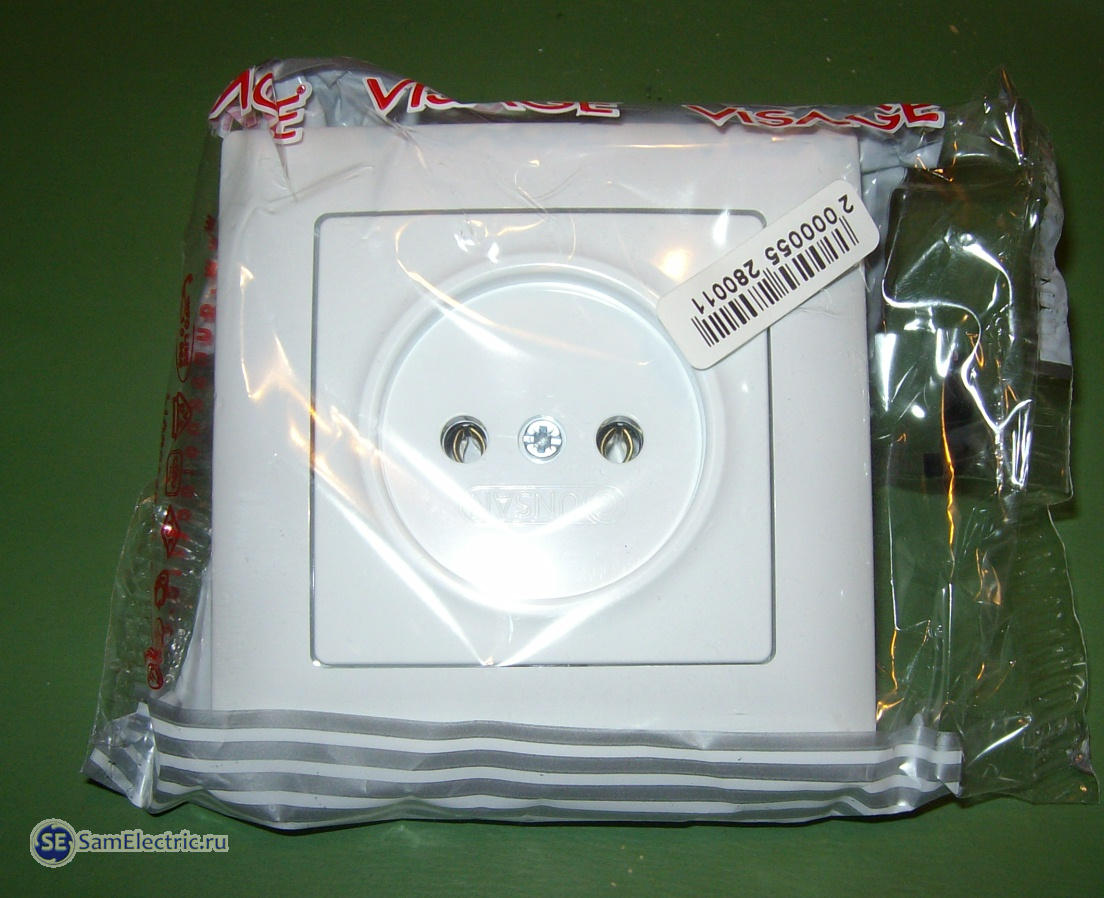
Turkish Gunsan Visage, the best of budget.
Generally recommended Turkish wiring products, there are more or less high-quality plastic and ceramics (of course, if there is no money on Legrand or ABB). And I do not recommend that Russia, China and Belarus (with all respect, because my wife from Belarus).
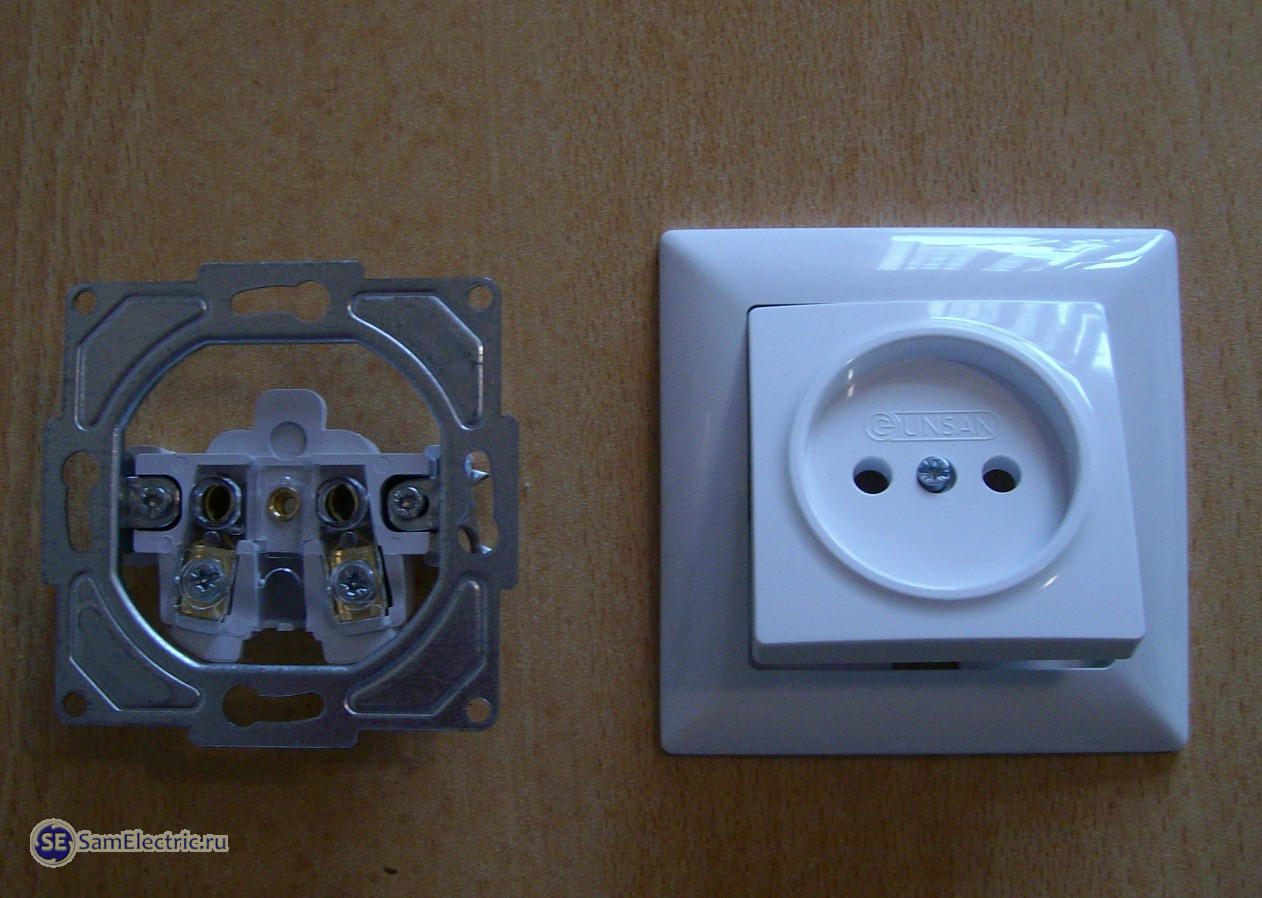
5 new socket. We disassemble. Vido in front.
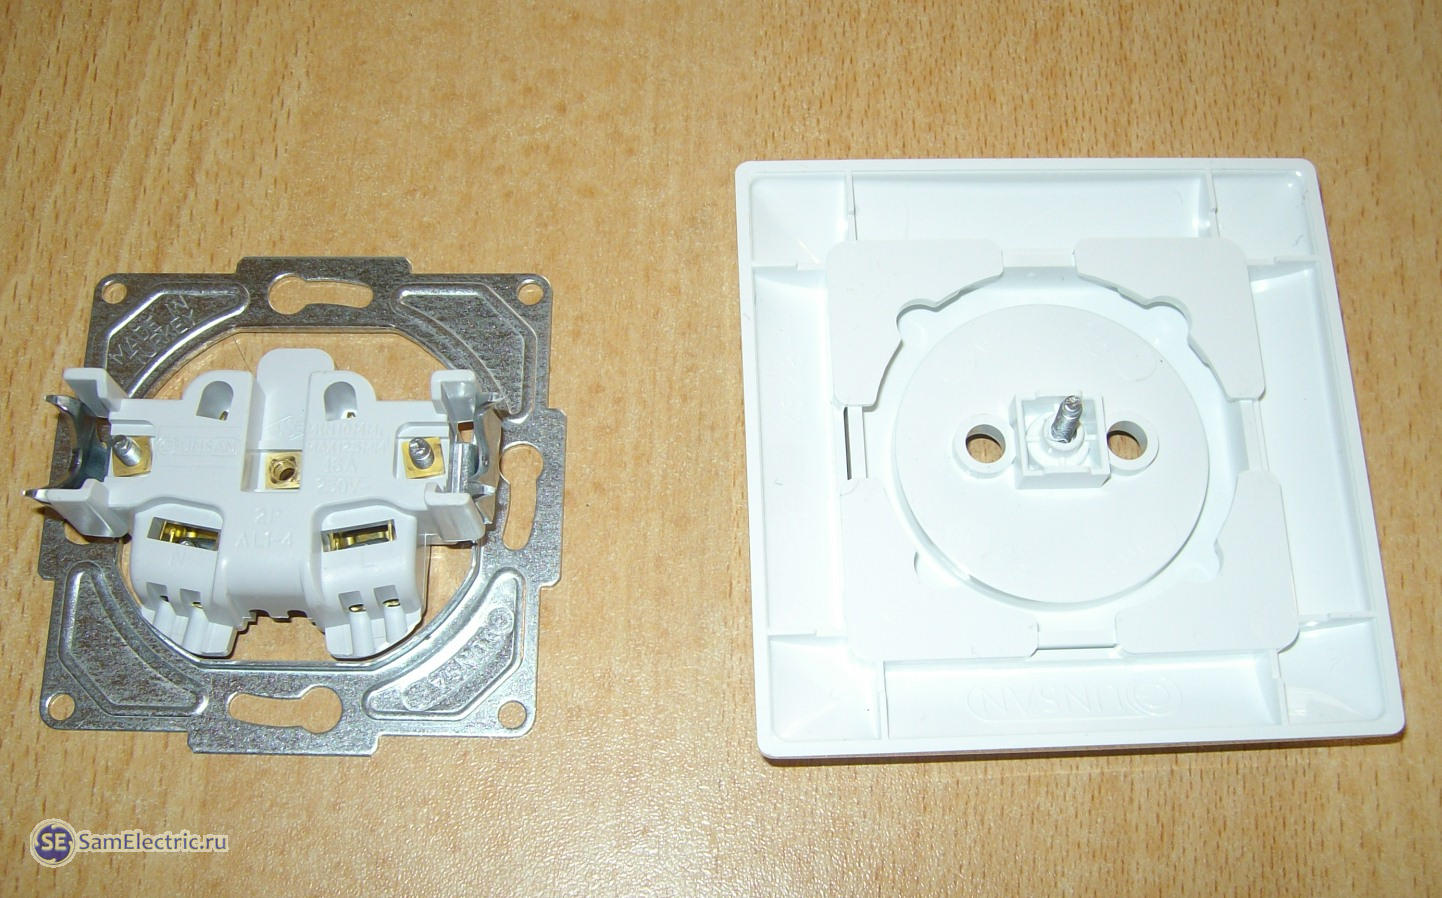
We screw the screwdriver, trying to bend them minimally.
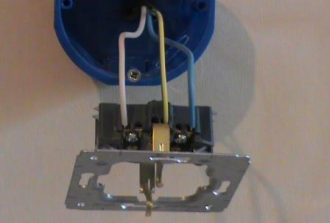
7 Support the wires to the terminals of the socket
Gently fold the wires in the box, and pre-apply the outlet in its place. We are convinced that nothing bothers insert a socket into the wall.
8 Socket almost installed
Now we need a screwdriver. Or electric screwdriver. We screw the screws into the plaster behind the outside of the opposition. There will have to pick up the self-diameter and length of self-diameter, which will be said below.
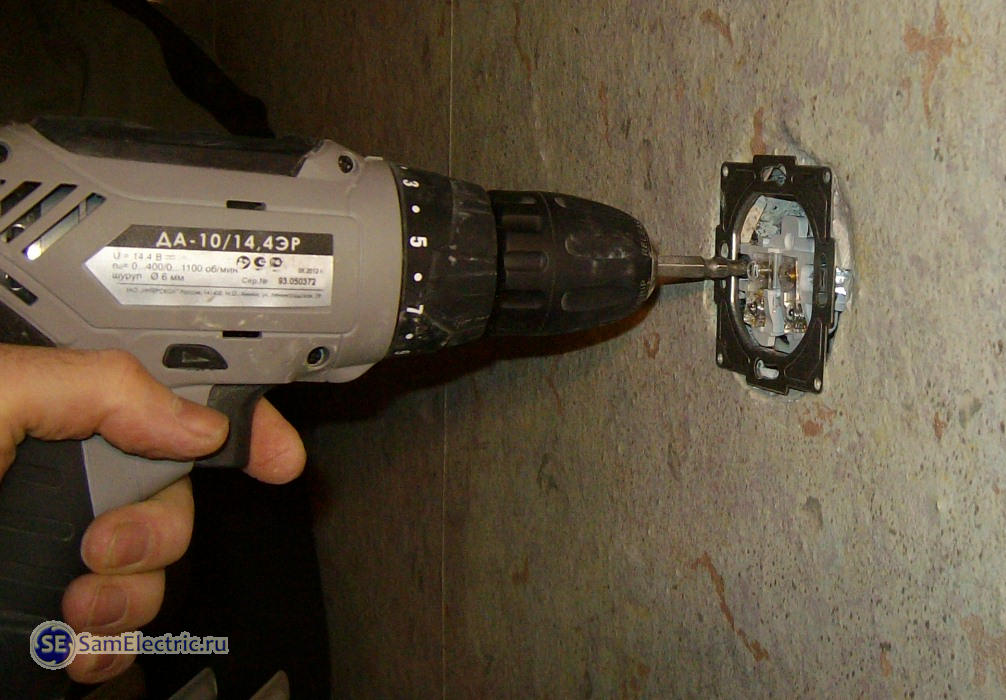
9 How to fix the outlet in the wall
Without an electric tool, do not do here. The fact is that if you screw the hand yourself, it will "walk" from side to side, and reliable fasteners will be difficult to achieve. In addition, the employer may not be for the wearformers, and strengthen the outlet in the wall simply will not work ...
We twist the screws into the holes and cutouts of the outlet flange, as shown in the figure below.

11 In which places you can edit the socket with self-draws so that it never falls out of the wall.
Explanation of the picture on the installation places of the socket.
- These regular places are used when installing in new submersors. In older submersors in these holes, you can insert the screws with a length of more than 35 mm and screw them into the bottom of the opposite.
- In these places there are lengths from 10 to 30 mm, depending on the strength of the stackets (or alabaster, to which the box is fixed)
- It becomes more interesting (creative). This is an option, if the fastenings are bad in places 2.
- Old paws can be completely thrown out, and in the released holes to drive long (30 - 40 mm) self-tapping screws.
- The most extreme case.
In options 4 and 5, the installation of the socket is not for the flange, as in the previous cases, and for the housing of the socket. These methods (4, 5) are applied in cases when the hole for the installation of the socket is narrow and the material is solid (for example, tile).
If none of the options 1 - 5 approached, you can fly under seats 1 or 2 couple of dowels by 5 or 6 mm.
Saws for mounting sockets
Here are such self-tapping screws for high-quality installation of sockets. Diameter - 3,0mm, Length is different - 16, 20, 25, 35 mm. For comparison, the photo shows all the well-known self-known screws with a diameter of 3.5 (black) and 4.2 mm (white, with pressshaba).
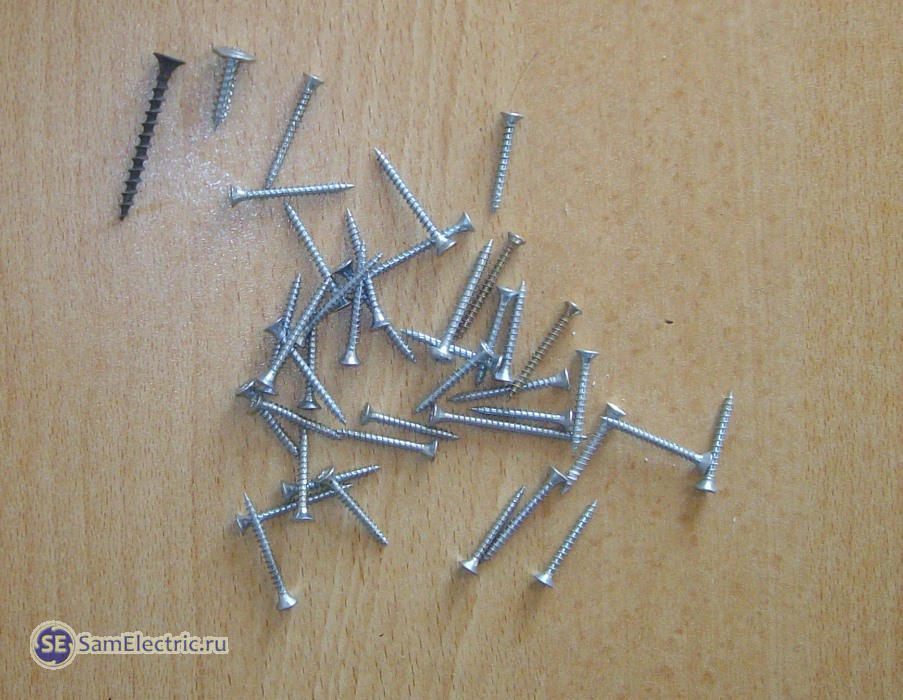
Long screws can also be used in return for regular in new boxes. This should be done in the case when the box is strongly recessed with respect to the wall plane. Or, for example, a tile is laid. Gusevsky fastener Self 12 or 16 mm long will no longer help.
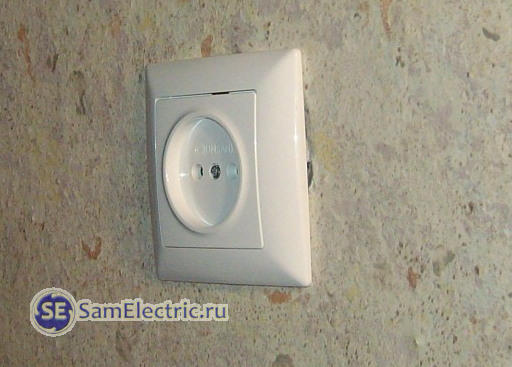
We set the outlet, turn on the power. Now I recommend checking it as described in the mentioned article. We try to pull out the socket - you need to spend the most severe tests.

I want to boast a little - recently I also got a screwdriver to myself (before that I used the electricium). Interskol, lithium-ion. The thing is indispensable in the farm. It can only be a perforator 🙂. I have a 1400 W specialties.
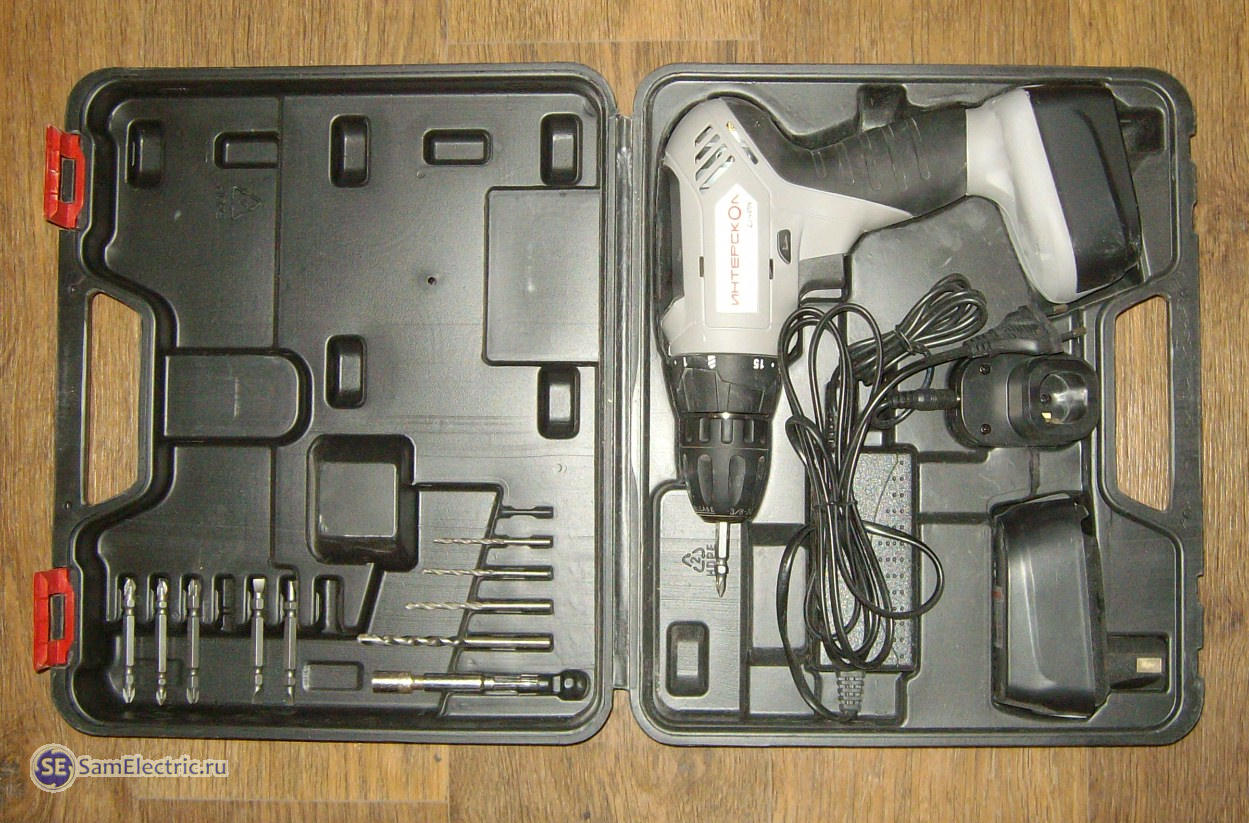
15 screwdriver - an indispensable tool
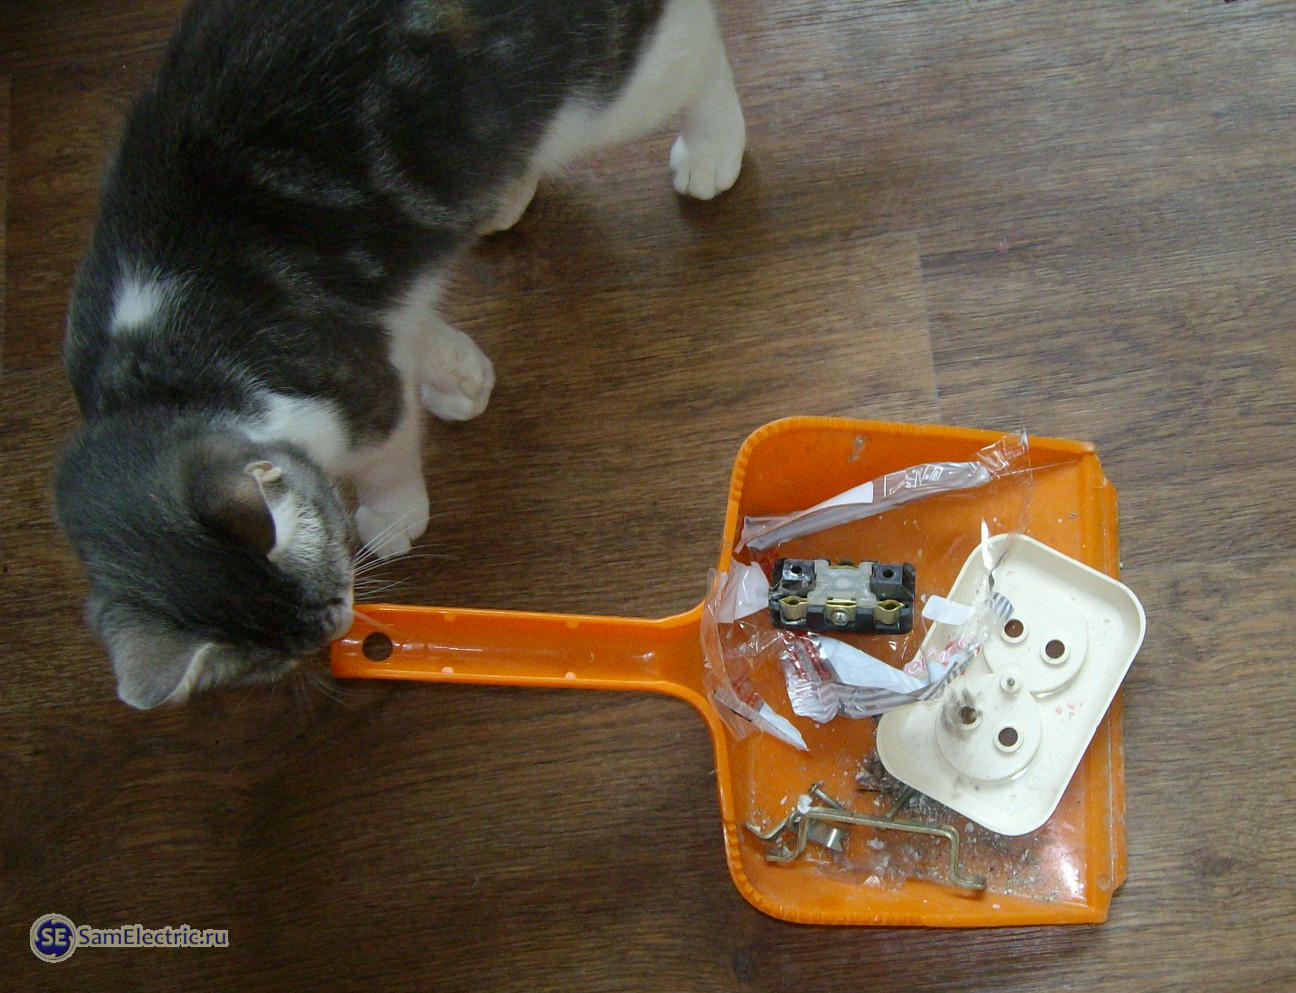
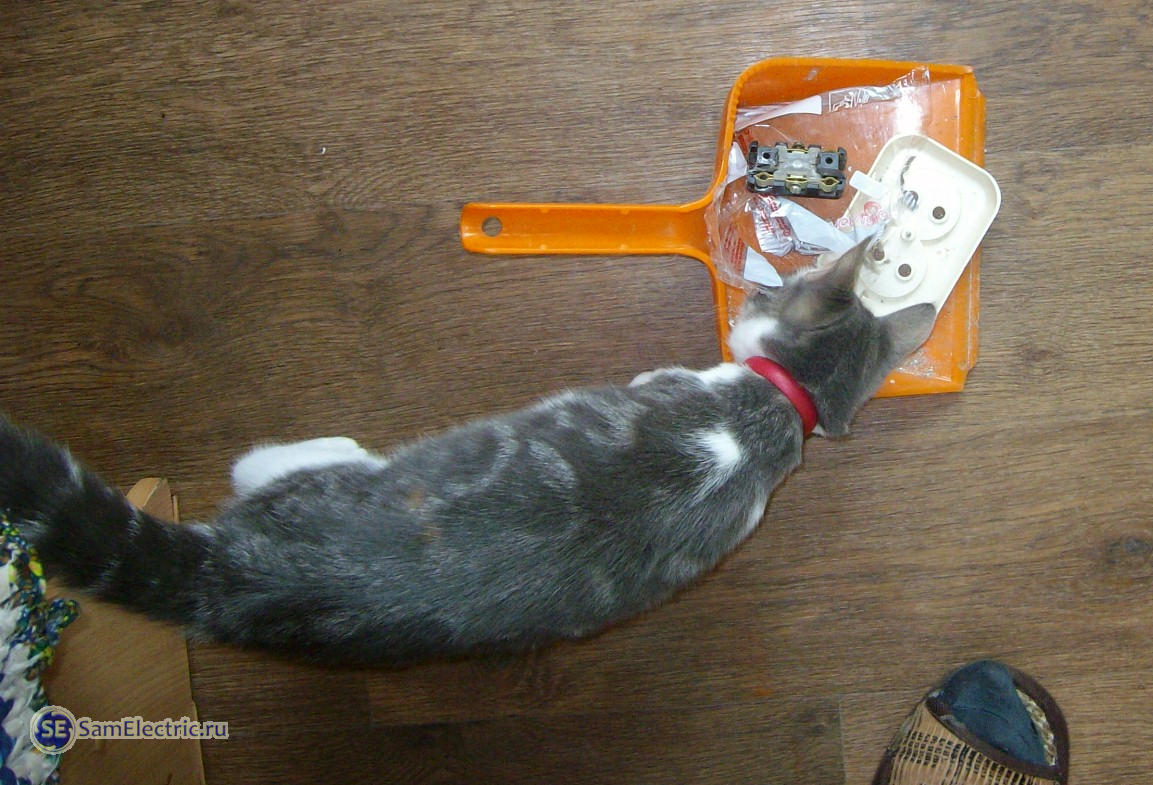
And another bonus. Cats - Electrician friends, always love different wiring. And this time too ...
Good luck in affairs, and do not redo your work!
Update from May 2, 2014:
How to firmly set the outlet. More way.
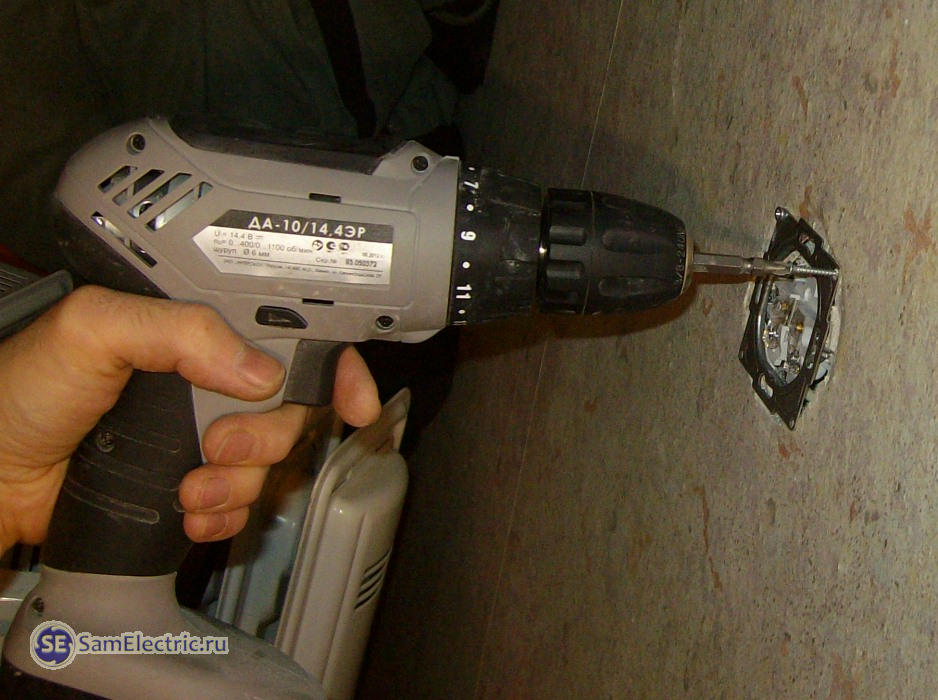
Recently there was a case - the subseeter put the finishes crookedly, and the wall was insulated by foam blocks. In short, it's nowhere to mount a socket, but the peavern is firmly converted to the wall. And good - at hand drill, drilled a hole hole in the housing of a hole with a diameter of about 3.5mm, and screwed firmly fastened the socket into regular places of peavercraft.
non-standard fasteners sockets - 3mm tamper sticks
In conclusion, I want to say that a new outlet, as shown in the article, not necessarily put. It is enough to fix the outlet in the wall, as shown on a schematic figure!
And remember two things:
1. The ideal is unattainable, but it is necessary to strive for him!
2. A good electrician is the one that you never remember!


