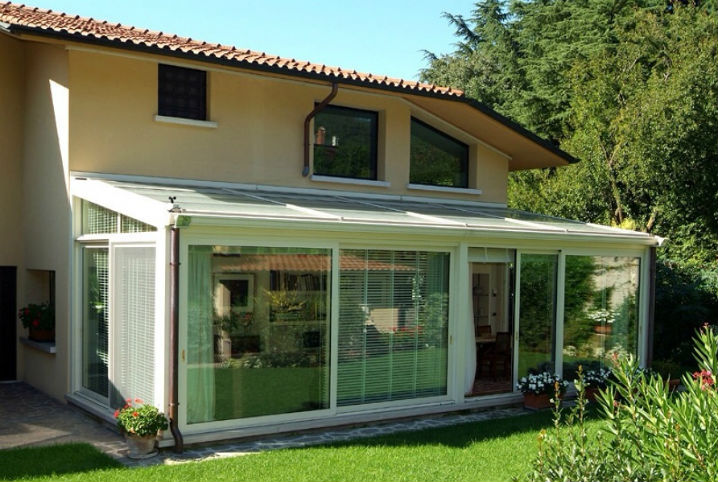
The veranda to the house is one of the main components of a cozy home, which has long ceased to play the role of a small room at the entrance to the house, but has turned into its full-fledged part - a favorite place for a pleasant pastime for the whole family.
Modern achievements in the construction business have expanded the functionality of the veranda, so if you decide to make an extension, you first need to designate the purposes for which you will use it.
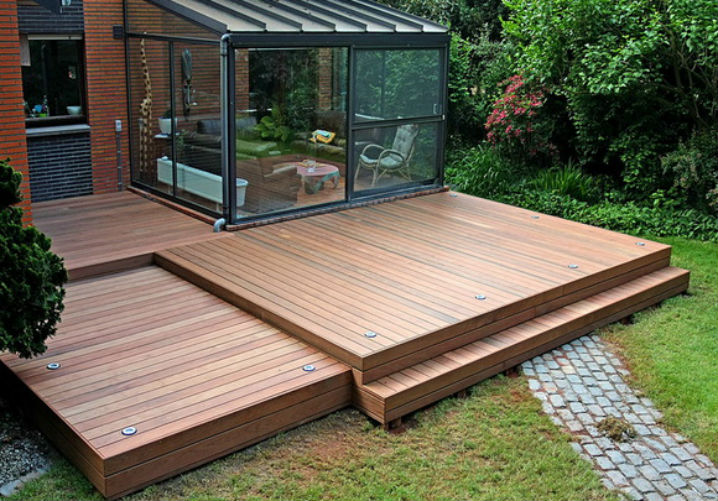
What to look for when building a terrace? If the terrace is to be used successfully for many years, it is important to remember the rules and the materials used. It is imperative to form a slope from the walls of the building to the edge of the terrace to prevent rainwater from accumulating on the slab.
The terrace should always have a slope of 1.5-2% to the edge parallel to the wall of the house, so that water flows freely from its surface. Typically, such a fall occurs when a decking plate is poured using auxiliary patches located at different heights and at a given interval.
It can act as an entrance hall, winter garden, living room, or you can arrange it exclusively, in which you will relax during the hot season.
Types of verandas
There are several generally accepted classifications of verandas. The traditional classification system divides verandas into:
- open - when the roof is supported by thick beams or is not there at all, because top part no walls
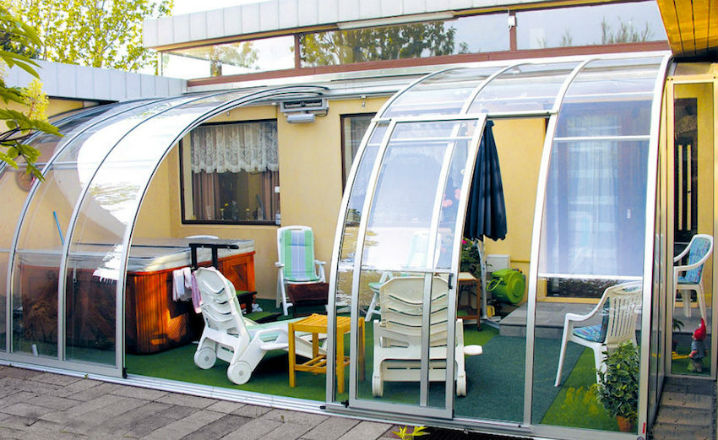
- closed verandas - consist of walls and a glazed space that can be easily moved apart or removed.
Patches are removed before the concrete has hardened and the entire surface is smoothly cemented. If the fall appears to require expansion, this must be done with a compensation solution. On the wall and indirect expansion joints, it is necessary for the floor to expand and contract freely, which prevents the tiles from breaking or falling.
The outer wall should be separated by a gap of approximately 1 cm, and in the case of a large terrace area, intermediate expansion joints should be made every 3 m parallel to the shorter edges. Also, be sure to expand the tiles into tiles and in the same places that the spout will not crack.
Depending on the type of construction of the veranda in relation to the house, there are:
- attached, that is, erected after the construction of a house on its own foundation;
- built-in - those that were planned with and built together with the house on the same foundation.
It should be noted that the problems of cracking and falling tiles also occur with the use of unstable temperature changes. mortars and adhesives, as well as for laying tiles. Moisture insulation is needed and is directed towards the building wall to prevent dirt or fading on the walls.
The insulation can be made from shrink film, foil or waterproof material. The most traditional method is to use two layers of membrane, but they cannot be glued together. Therefore talc or fine sand is dispersed at the bottom, attached to the substrate.
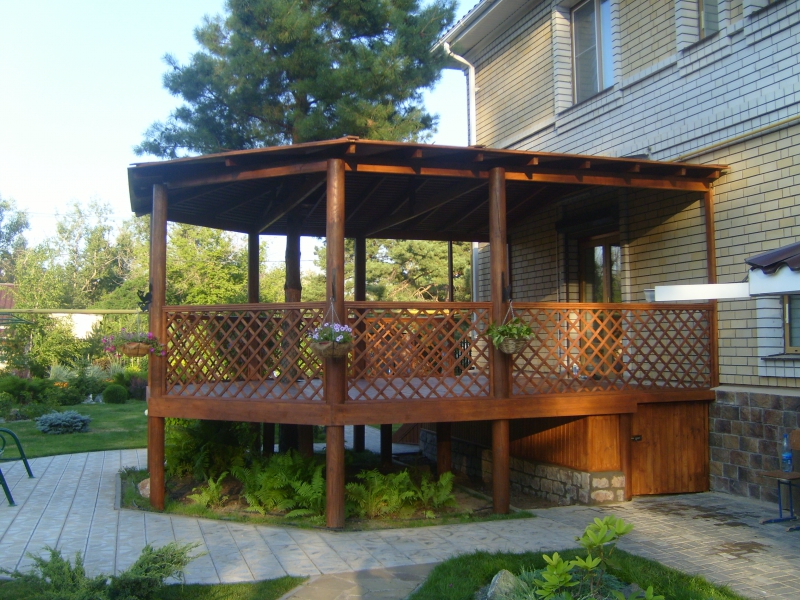
Verandas also differ in shape. In this case, there is no limit to human imagination, they can be completely different configurations: round, rectangular, semicircular, pentagonal, l-shaped, etc.
It also differs depending on the material used to build the veranda. Most often they are:
Walls in the country
Sometimes the top layer of the paper is replaced with an extruded film, that is, a bucket. In turn, HDPE flat insulation is very flexible and there is no problem with two layers. In this case, the bottom layer also adheres to the substrate.
When using a waterproof material, the insulating layer is highly elastic and tight, while it is seamless and has little scratches. With such insulation, there is no need to do concrete screedand right away you can make a finish such as ceramic tile.
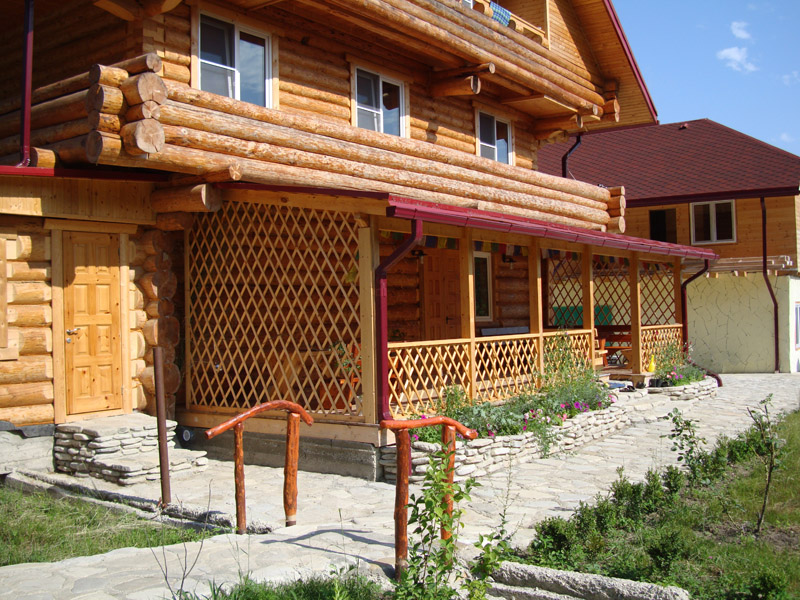
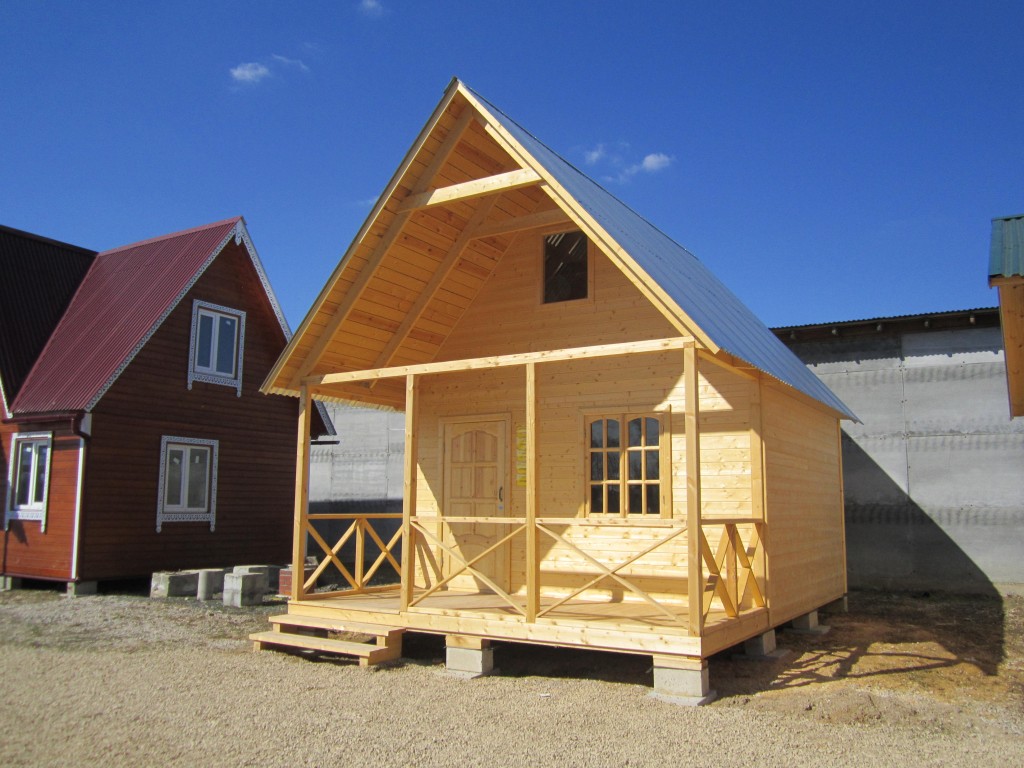
- wooden. The most popular material that has been used for many years and does not lose its relevance. The advantages of a wooden building are its environmental safety, efficiency, lightness and ease of installation. The disadvantages of a veranda made of wood are flammability, as well as the need for high-quality and thorough anti-corrosion treatment.
- brick verandas. It is a good building material that keeps it cool in summer and warm in winter. The brick veranda does not need additional care and its service life is quite long. A clear disadvantage of the extension is the need to build a strong veranda due to the very large weight.
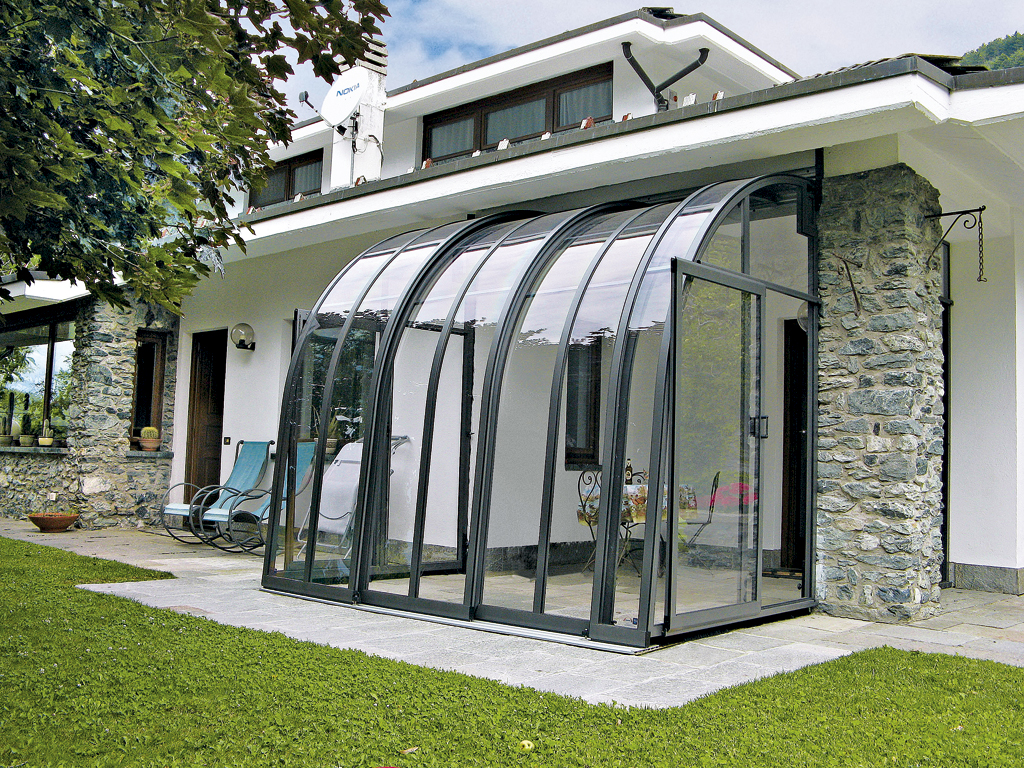
- polycarbonate verandas. A modern material that is used relatively recently, but is already very popular around the world. Polycarbonate is transparent and flexible, which allows the construction of verandas of the most varied shapes. It has good thermal insulation and also looks very nice near the house. A polycarbonate veranda must be equipped with a good ventilation system and choose a place in the shade for its construction, because in the heat it heats up very much. This is its main disadvantage.
Advantages of a veranda attached to the house
Regardless of the type and building material, the veranda has a number of advantages for home owners, which are:
The mass is laid in two layers with a total thickness of 2-4 mm, while the first is strictly insulating and the second is adhesive for tiles. The sock not only provides adequate pressure on the insulation, but also serves as a support for the terrace deck. The screed uses dry mortar and water.
Ensure proper plastic consistency of the entire mass, as too little will delaminate the components and thus reduce the strength of the spout. If you are interested in timing, you must use a special fixing solution. When designing your terrace, you should consider drawing in electricity to make the terrace even more functional.
- additional useful multifunctional space;
- insulation of the walls of the house;
- creating better sound insulation;
- decorating the exterior of the house.
If you want to save money on the services of master builders, because you know, making a veranda to the house with your own hands will not be difficult for you.
Preparing for the construction of a veranda with your own hands
Building a terrace near the house: foundation
Properly positioned lighting allows you to organize parties on warm evenings or read a book for free. Plus, you can easily connect an electric mower or other electrical appliances. 
Until recently, one of the most popular ways to build a terrace was to generate the entire structure with a concrete slab and then complete it with a frost-resistant slab.
If the key is to be fast and not too expensive, then the land-based method should be considered. It all depends on financial capabilities, as well as on the choice finishing material... Thus, terraces are built that are finished with concrete, stone or paving stones.
Before starting work, there are several important points.
Initially, you need to decide what building materials you want to make your veranda from. It is advisable to make a choice based on the material of the house so that the veranda fits into the overall look.
After that, you need to choose the location of the veranda and determine its size.
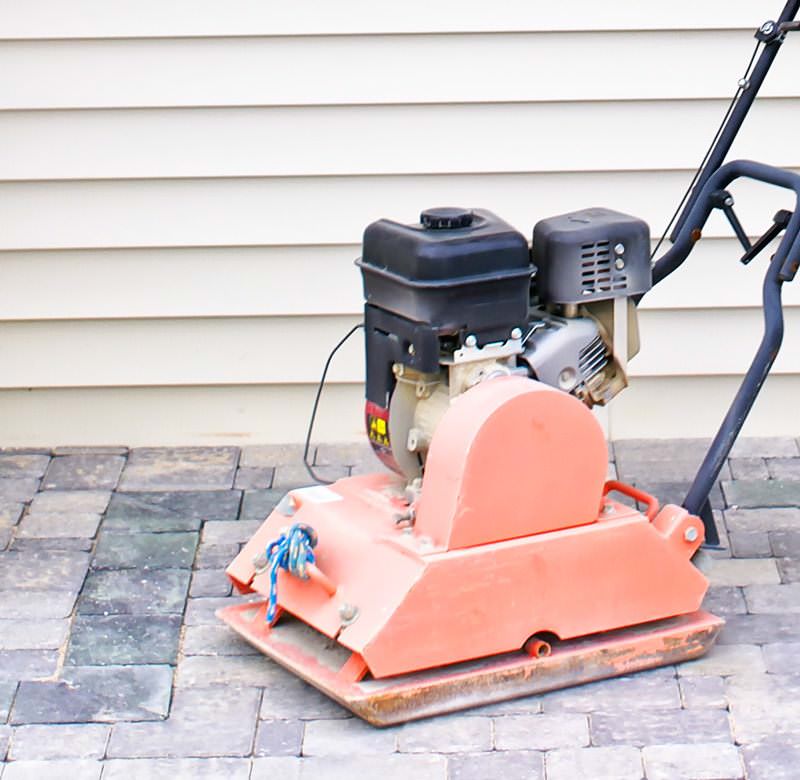
Where the terrace is located, a fertile layer of humus should be collected, followed by leveling sand and gravel or rubble. The entire layer should be about 20 cm thick and must be hammered very carefully. To prevent the spread of sidewalk elements, a border should be placed along the edge of a deck made of concrete curbs or cubes and anchored to concrete.
After the concrete has been tied, a layer of sand or cement-sand layer 5-10 cm thick is located directly on the gravel layer. The next step is to accurately align the substrate and the position of the finishing material, that is, cobblestones, concrete or stone slabs.
The size of the veranda depends on the footage of the house and the wishes of the homeowners. The main thing, again, is that the extension should look harmoniously together with the architectural ensemble of the house.
For the extension to be legal, you must first order a veranda project in an organization that designs buildings.
After that, you need to certify the project in the architectural department of the city, which will issue a special permit to conduct construction works and will make changes to the original design of the house.
Placing a terrace on a concrete slab
Keep in mind that the surface is level and level. ![]()
In this case, also remove the humus layer, make a sanding baluster, and then lay the aggregate foundation, that is, fine gravel or compacted rubble. This base should be 20 cm thick after thorough blowing, preferably with a special combustion chamber.
Decorating options for the extension
A thick plastic film has been applied to the base and reinforcement is required with a surface exceeding 4 m2. For this purpose, steel rods with a diameter of 10 mm and spacers are used. Planks or planks of wood are also made around the terrace. The next step is concreting, but you cannot forget about the expansion joint between the concrete slab and the building, and therefore, before pulling out the concrete, you must place a strip of polystyrene along the wall next to the terrace.
How to attach a veranda to the house with your own hands
The construction of the veranda begins with the foundation.
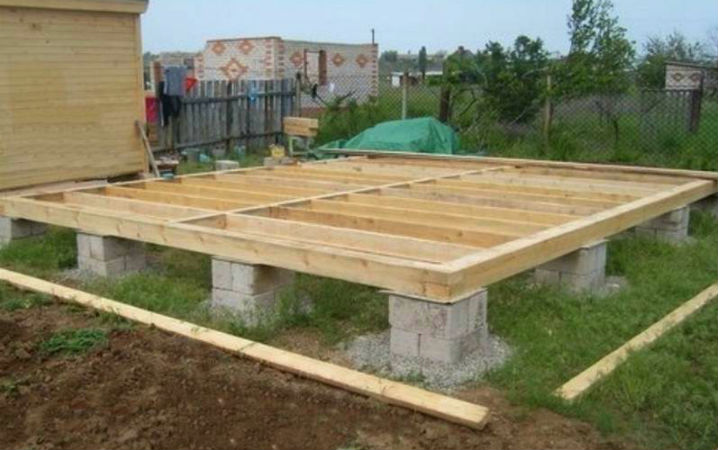
The best option is considered columnar foundation.
Installation of the foundation consists of several mandatory steps:
- along the perimeter of the future building, pits are dug under each support and corner post, about a meter deep;
- the bottom of the pits is covered with thick layers of sand and gravel;
- after that concrete is poured, about 15 cm thick;
- when the concrete hardens a little, you can build brick pillars that need to be lubricated with hot bitumen;
- if there are any blank spaces left, they are covered with sand, rubble, broken brick, etc. material.
If you plan to build a veranda with bricks or cover with a heavy roof, it is better to build strip foundation made of concrete.
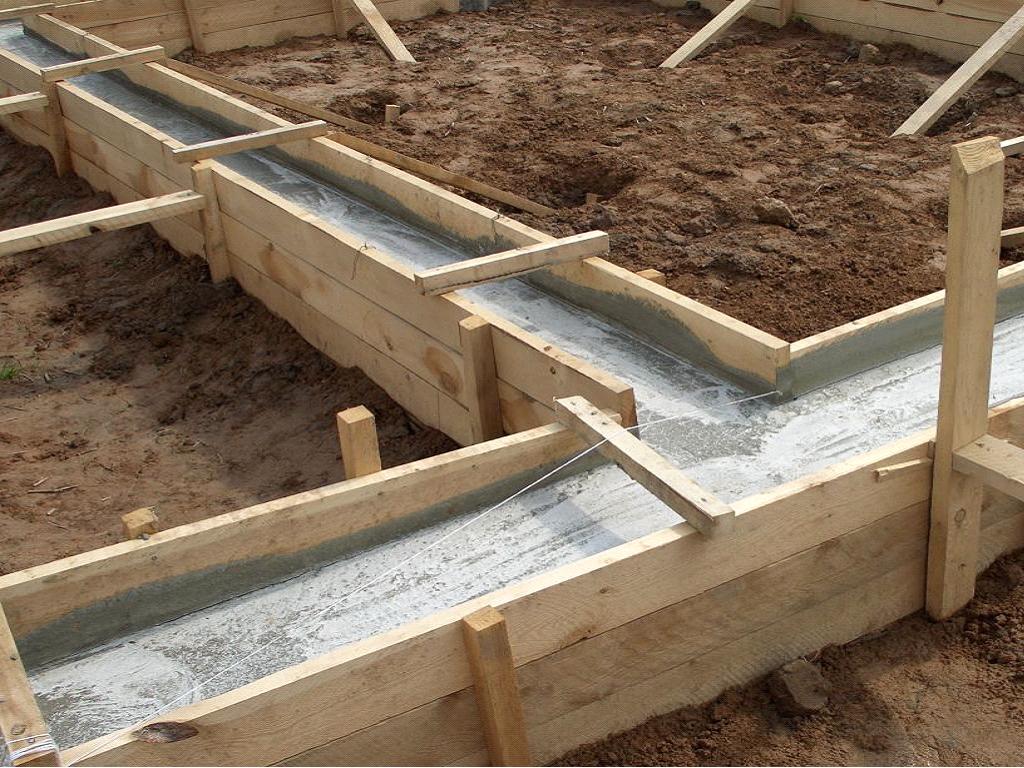
Rules for pouring a columnar foundation
Large surfaces will also require indirect expansion joints. Of course, it should have a 1.5-2% drop in the direction opposite to the wall of the house. The concrete is thirsty for about four weeks, and it's nice to spray the surface with water every few days so that the process doesn't go too fast.
Placing a terrace when constructing beams
Waterproofing must still be done before laying the finishing layer. This terrace is often covered with ceramics or wood. Remember that wood cannot come into contact with concrete. The work begins with digging and building the formwork for the foundation legs.
To do this, you need to dig a trench and fill it with concrete, which consists of sand and gravel.
Installing the floor on the veranda
It consists of edged wooden boards that are laid on top of antiseptic-treated logs.
![]()
Before the concrete starts to bond, it is important to place steel beams for support wooden beams... Between the levers are tufts, that is, hooks connected by screws or screws. A body with planks on the sides of the terrace is also needed, which masks the entire structure.
How to build a terrace and how much does it cost?
When making a decision, you must consider all aspects, not just costs. The first question is related to the technological possibilities for building a terrace. You can also skip the terrace style up to the house. Consider the durability of the materials and the comfort.
If necessary, the space between the foundation and the floor is insulated or a waterproofing layer is given.
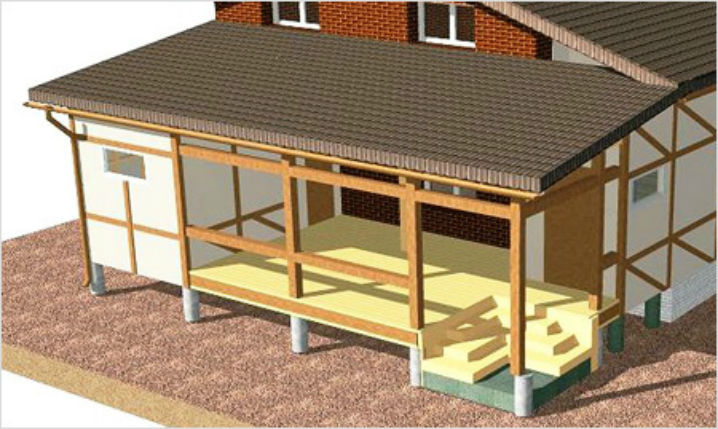
Diy veranda frame
The construction of the frame begins with the installation of the lower strapping made of beams, which are connected by a "straight lock", after which vertical posts are erected, at the top of which one more strapping is made of beams.
Concrete pavements are extremely durable, but more difficult to maintain than clinker or gravel. Wooden panels differ in their aesthetics, however, some are discolored by exposure to sunlight, and composite panels are easy to install but scratch easily.
Terrace construction of concrete blocks and granite cubes
There are several options, anyway. 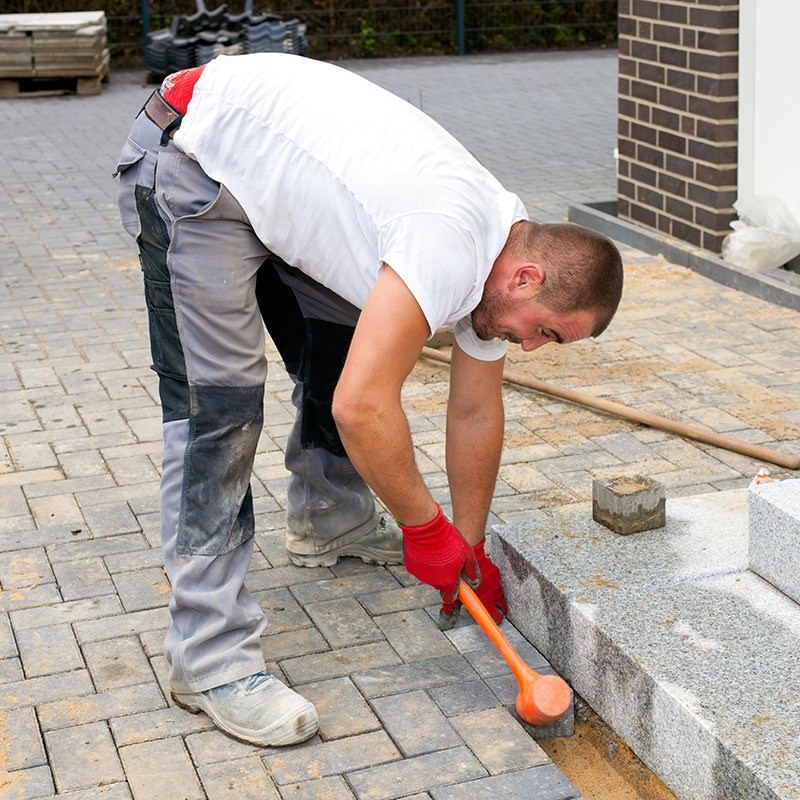
It is by far one of the most popular materials on the terrace due to the variety of shapes and colors available, which gives you the freedom to arrange surfaces in a completely arbitrary manner, including atypical shapes.

All materials are fastened together with nails, screws or staples. All parts must be carefully processed in special protective equipment.
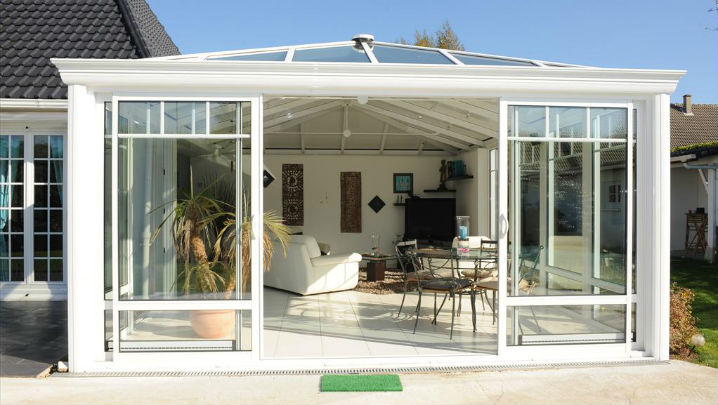
If you planned closed veranda, then the frame is sheathed building material: wood, polycarbonate, clapboard or double-glazed windows.
Cubes also have many structures because they are quite smooth, but also with an interesting texture, with rounded edges, rounded or mechanically aged. The concrete block is usually laid on the ground, and the mortar is filled with special, for example, basalt or sand.
The concrete block is very durable, resistant to temperature changes, and the surface is comfortable to use because it does not threaten to slip. One of the problems can only be cleaning the terrace on the terrace and proper maintenance. Deck terraces are also often chosen for their simplicity and speed and relatively low cost.
The brick veranda construction system is slightly different. The thickness is chosen depending on the type of veranda. Waterproofing between the walls and the foundation is required in this case.
Installing a roof for a veranda
It is better to choose the same roofing material that covers the house.
Veranda frame
This solution works great in a minimalist style. Simple concrete plates fit perfectly into modern architecture and you can also choose from a variety of shapes and colors, although shades of gray are the most popular. The slabs are also usually placed on the ground, very ankle-like.
Concrete is very practical and durable. Natural stone territories are chosen by people who depend not only on a long-term solution, but also extremely aesthetically pleasing due to the uniqueness of each element, interesting texture and rather uneven color.
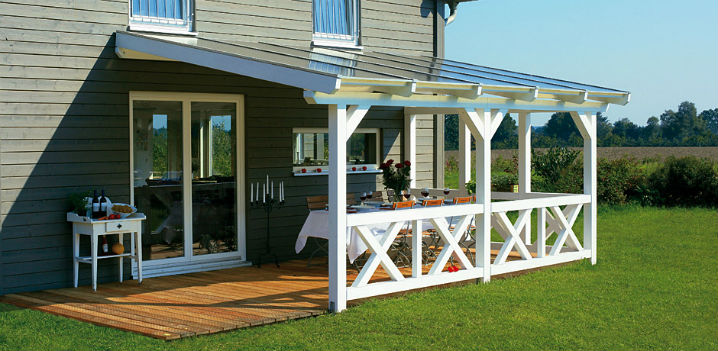
A single-pitched roof structure is perfect for a veranda. To do this, first construct a frame and sheathe it with boards, then lay a layer of waterproofing, on which they put roofing material.
If necessary, before laying the roof, the structure is insulated.
This is a standard layout and may vary slightly depending on the roof material.
Granite or basalt beads are commonly used, and syenite is the most commonly used. But remember that basalt becomes very slippery when exposed to moisture. Not only large, but also small forms of stone tiles or blocks are available, giving you the ability to create truly amazing designs. I wonder what surfaces can be.
Polished, Flakes, Ground, Scratched, Brushed. ... Right choice adhesives and joints will be essential. The surface chosen for the terrace, non-slip and abrasion resistant, is a choice. The clinker used on the terraces of the terraces is much stronger than facade bricks, therefore it is very durable, resistant to adverse weather conditions and has good anti-slip characteristics.
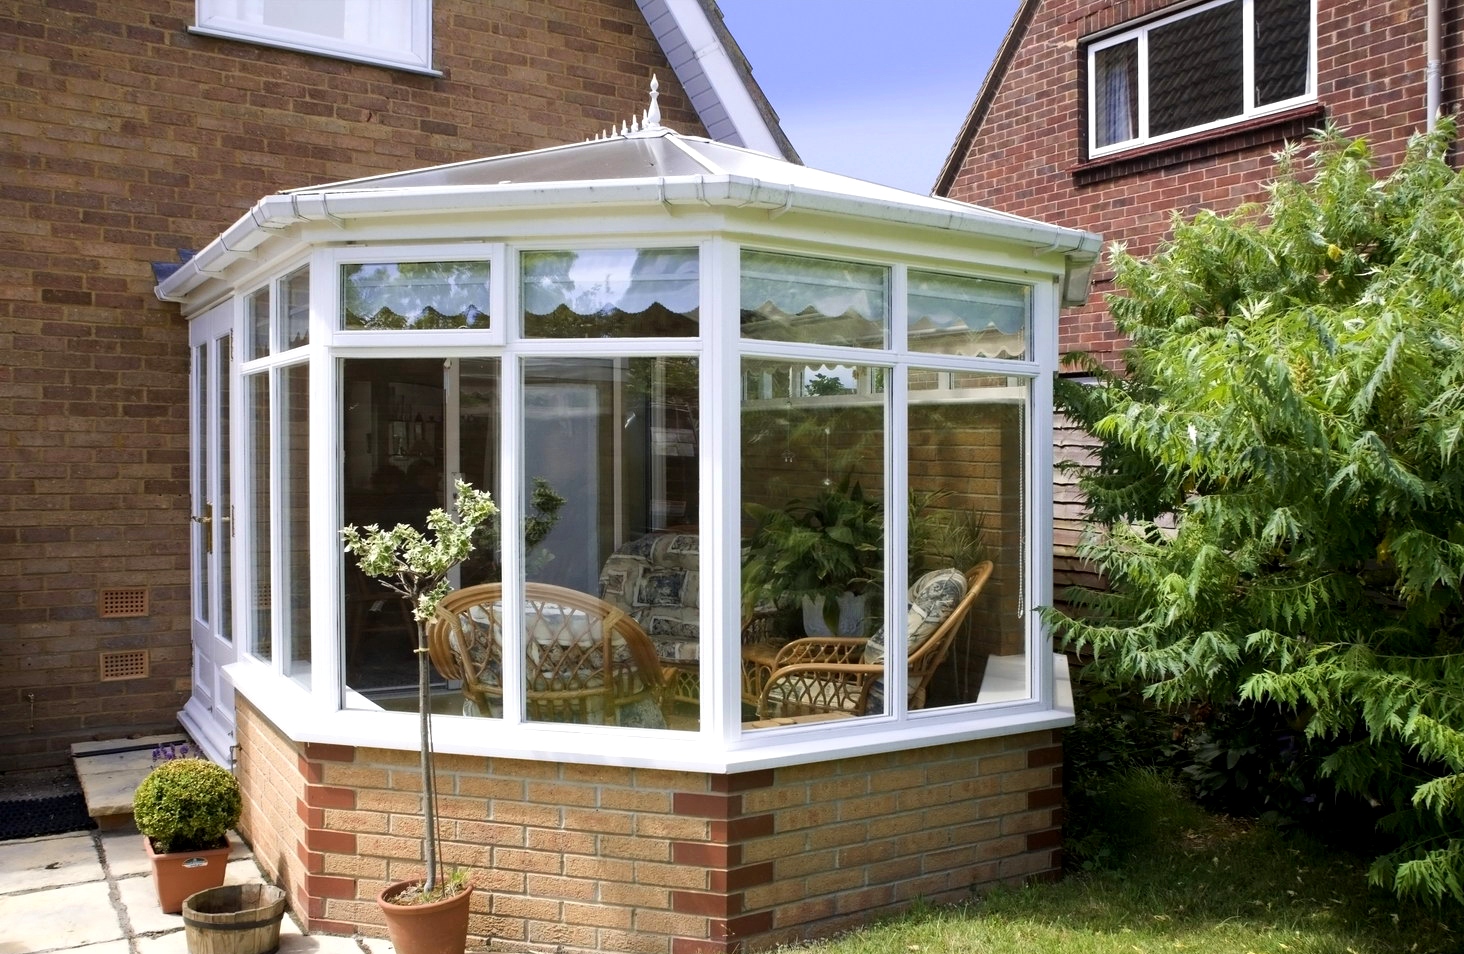
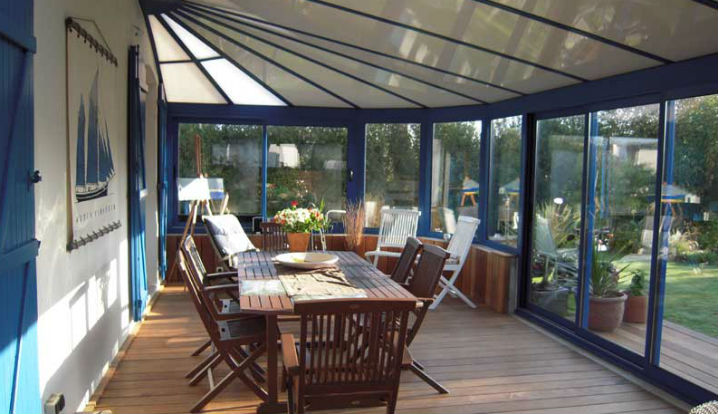
The veranda is an additional room, which is the outer part of a residential building. It is often confused with a terrace. To understand how these two structures differ from each other, you need to understand their features. A terrace is considered to be an open area attached directly to the house, which has a canopy and railings along its perimeter. A frame veranda, on the other hand, is being built as a full-fledged part of the house. In fact, it is an additional room. This room can be built from different material - brick, cinder block or wood, it all depends on the preferences of the homeowner.
It is difficult to break or scratch such tiles. There are also problems with cleaning them and the selection comes in different shapes and colors. In turn, the best gras will be in the natural version, that is, unglazed with a rough surface. One problem can only be cleaning such stains.
It should be emphasized that terraces do not change their properties and color under the influence of atmospheric factors and can be used both for terraces and for buildings, and also not. Terraced terraces are very similar to a concrete block, but can only be laid on perfectly flat concrete.
Most often, the veranda is used during the warm season. The design of the premises is not particularly difficult, so you can build it on your own, without resorting to specialists. The most optimal choice in terms of architecture would be to build a veranda in the same style as the house. Since the veranda is, in fact, an extension of the residential building itself, the contrast in the architectural styles will look disharmonious. The veranda will make it possible to expand the useful area of \u200b\u200bthe house. Since this room is often not heated, in winter it may well take over the function of a hallway. The construction of a frame veranda begins with a careful selection of a place for the construction of a structure. This room can be located both on one side and on two, forming an L-shaped. To determine on which side it is better to build a veranda, it should be borne in mind that there will always be more light and heat from the south. On the western side, in the evening, the sun will shine in the eyes, which will cause inconvenience to those living in the house. Important! An illogical solution would be to build a veranda around the house, since one or two of all sides will be used in practice. The rest of the premises are unlikely to be used.
Preparatory workBefore starting the construction of a frame veranda with your own hands, you need to well align the site chosen for its construction:
How to build a frame veranda:step by step guideAfter you have decided on the place of construction of the structure, it is necessary to develop a construction project, taking into account all the subtleties. It is also important to decide on the materials, since the process of building a veranda will depend on this. In this example, we will look at how to build an extension from a frame-type tree. Do-it-yourself frame veranda photo:
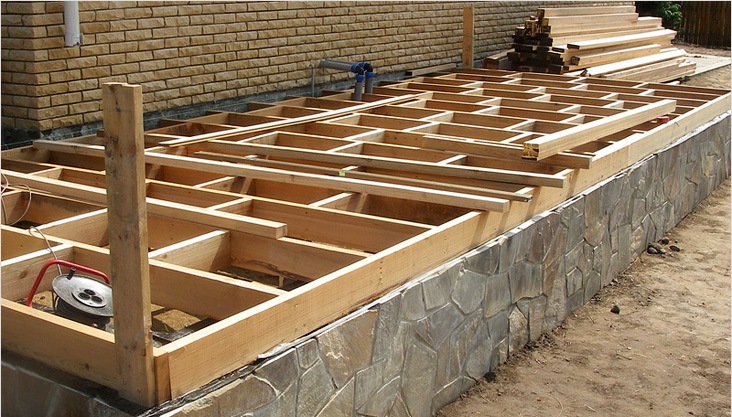
Formation of the foundationThe basis of the structure is the main stage of construction, on the quality of which the final result depends. To determine the type of foundation for your building, you need to proceed from the operational purpose of the future veranda. If the room is planned to be used as a full-fledged room, the foundation should be made the same as was done when the house was built. To do this, you must adhere to the following procedure:
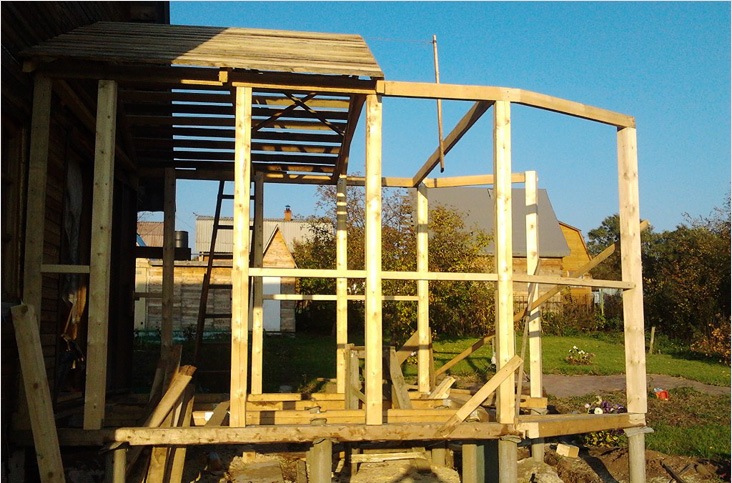
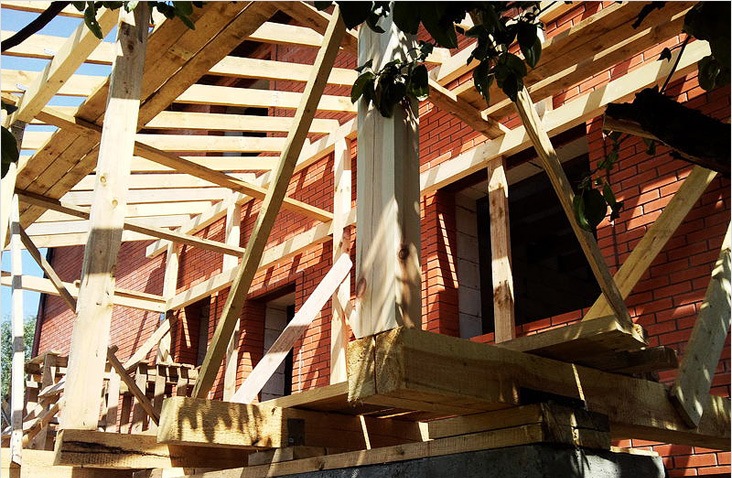
Installing the frame structureThe most troublesome process in building a frame veranda is installing supporting structure... To complete the stage with maximum accuracy, you must adhere to the following procedure:
Veranda roof constructionAt the next stage, we carry out work on the installation of the roof of the future structure. It is advisable to make the construction single-pitched. The best solution would also be to use the same material that was used in the construction of the roof of the house. To install the roof, it is necessary to perform the following manipulations:
Floor constructionThe next step in building a veranda is the construction of a floor covering. For this purpose, it is necessary to fix the boards to logs. The parameters of the boards should be: at least 30 mm thick and 75-125 mm wide. Before use, wood material must be treated with a special antiseptic compound, which will ensure its safety during operation.
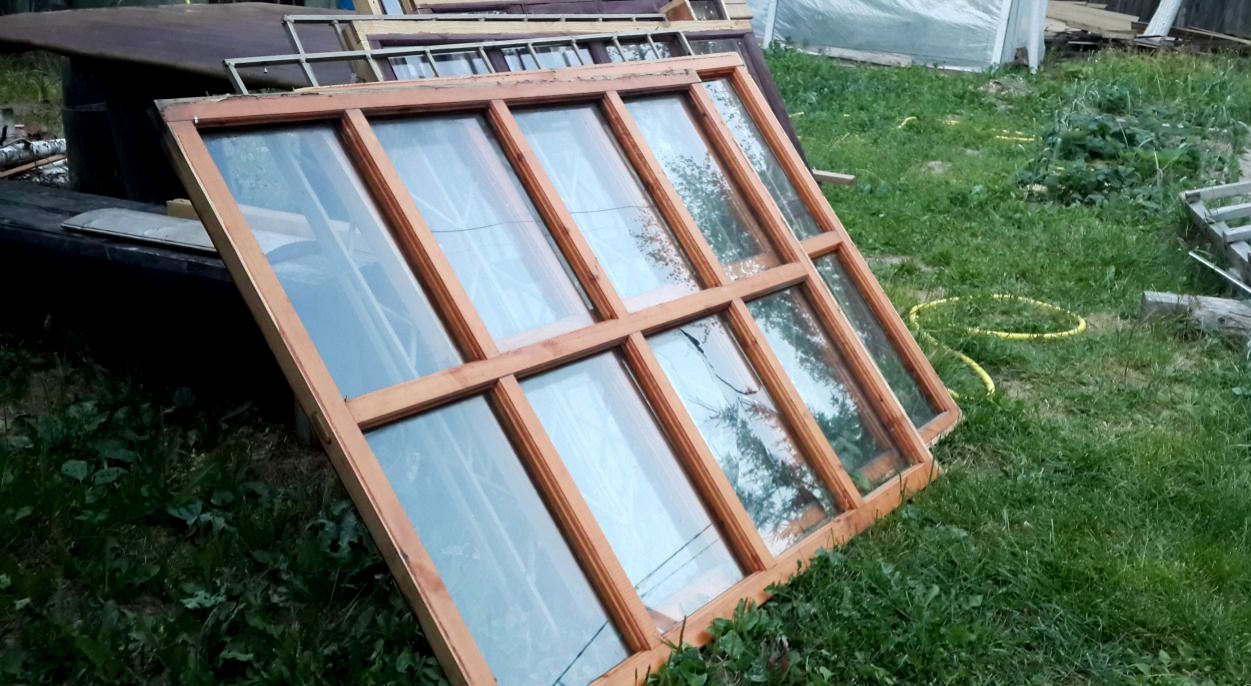
Installation of walls and windowsThe frame veranda is almost attached to the house and the next stage will be the construction of window structures. Their size will determine the appearance of the veranda so that they look harmoniously on the facade of the building. The windows should be mounted as follows:
Wall claddingAfter all the steps for the construction of a frame veranda have been successfully completed, you can start wall cladding. To do this, use wooden boards or any sheet materials. From the inside, the structure must also be thermally insulated. For these purposes, roll and plate materials can be used. Nowadays, sliding designs have become popular. For a veranda, this will be a pretty convenient solution. In the warm season, such walls will make it possible to transform the veranda into a room with an open space. If necessary, the terrace can be turned into a veranda again, using a minimum of effort and time.
The sections of such walls are connected with each other by metal hinges. Each section is divided into two parts. The top is usually glazed, while the bottom is a wood panel. The principle of operation of this design is that when you open it, the wall folds into an accordion. The sections are kept closed by brackets or horizontal metal hooks. Interior of a frame verandaAt the end of construction work, you should take care of the design of the veranda. The main criterion in this matter is the taste preferences of the homeowner. However, there are also several important points to consider:
Frame sauna with a veranda:
Video instructions for building a frame veranda are presented in the fragments below:
|